Adding pages to project Menu Configuration

The Menu Configuration form (in Power Operation Studio, click Visualization > Menu Configuration) edits Pagemenu.dbf in your project. This controls the Power Operation Runtime tabs and menus on the screen. You can also use menu configuration to specify actions that will be taken when an option is selected.

TIP: Copy and paste the menu settings from the PLS_Example project settings and use them as a template for your new project’s menu configuration file.

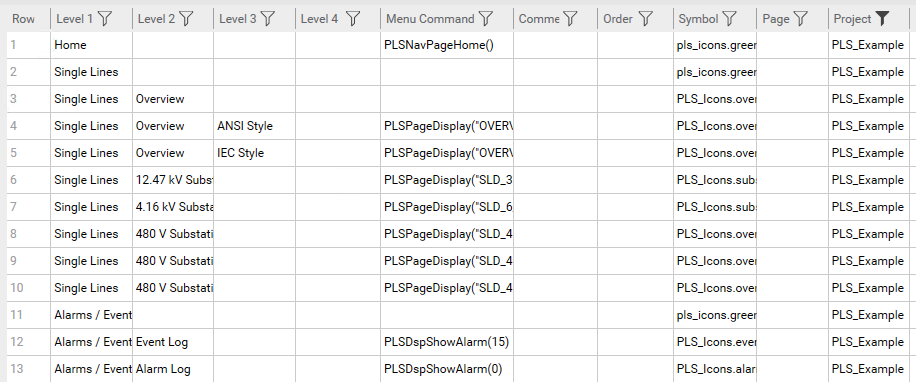
The following image illustrates a blank Menu page for the PLS_Example project (see the table below for descriptions of the columns):
Menu Item

Description

Levels 1 through 4

These items establish the menu levels that will display. For example, you might use "One-Lines" for level 1, followed by the substation for level 2, and the graphic name for level 3. (Each line: 256 characters maximum)

Menu Command

The Cicode expression that you want to execute. Typically, you will use the "page display" command followed by the actual page you want to see. For example:

PLSPageDisplay("CB_IEC_1")

which displays the page CB_IEC_1.

Order

The relative position within the final graphics page. If you leave this field blank, the default value 0 is used. (64 characters maximum)

Symbol

Displays a defined image along with the description for that level.

Images must already be defined in the project/include project. They are specified in the format <library name>,<symbol name>. For example, in PLS_Example, the symbol used for the level 2 of one-lines is Substation3, entered as PLS_Icons.Substation3.

Different menu levels are designed to be used with different symbol sizes for optimal display. For Level 1 items (tab), the recommended symbol size is 16 x 16 pixels. For Level 2 items, (buttons), the recommended symbol size is 32 x 32 pixels. Symbols are not displayed for menu items of Level 3 or beyond.

Page

The page on which this entry will display. If this is left blank, the entry will display on every page.

Comment

You can use up to 128 characters to add a comment (will not display on screen).