Write and Confirm
Use the Write and Confirm component to perform breaker operations, On/Off digital outputs, and set CT and PT ratios. Write and Confirm verifies and then confirms that the write operation is either successful or unsuccessful.
To use Write and Confirm:
-
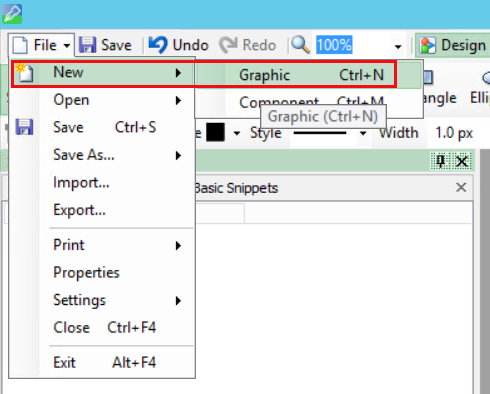
In the Graphics Editor, create a new graphics file:
-
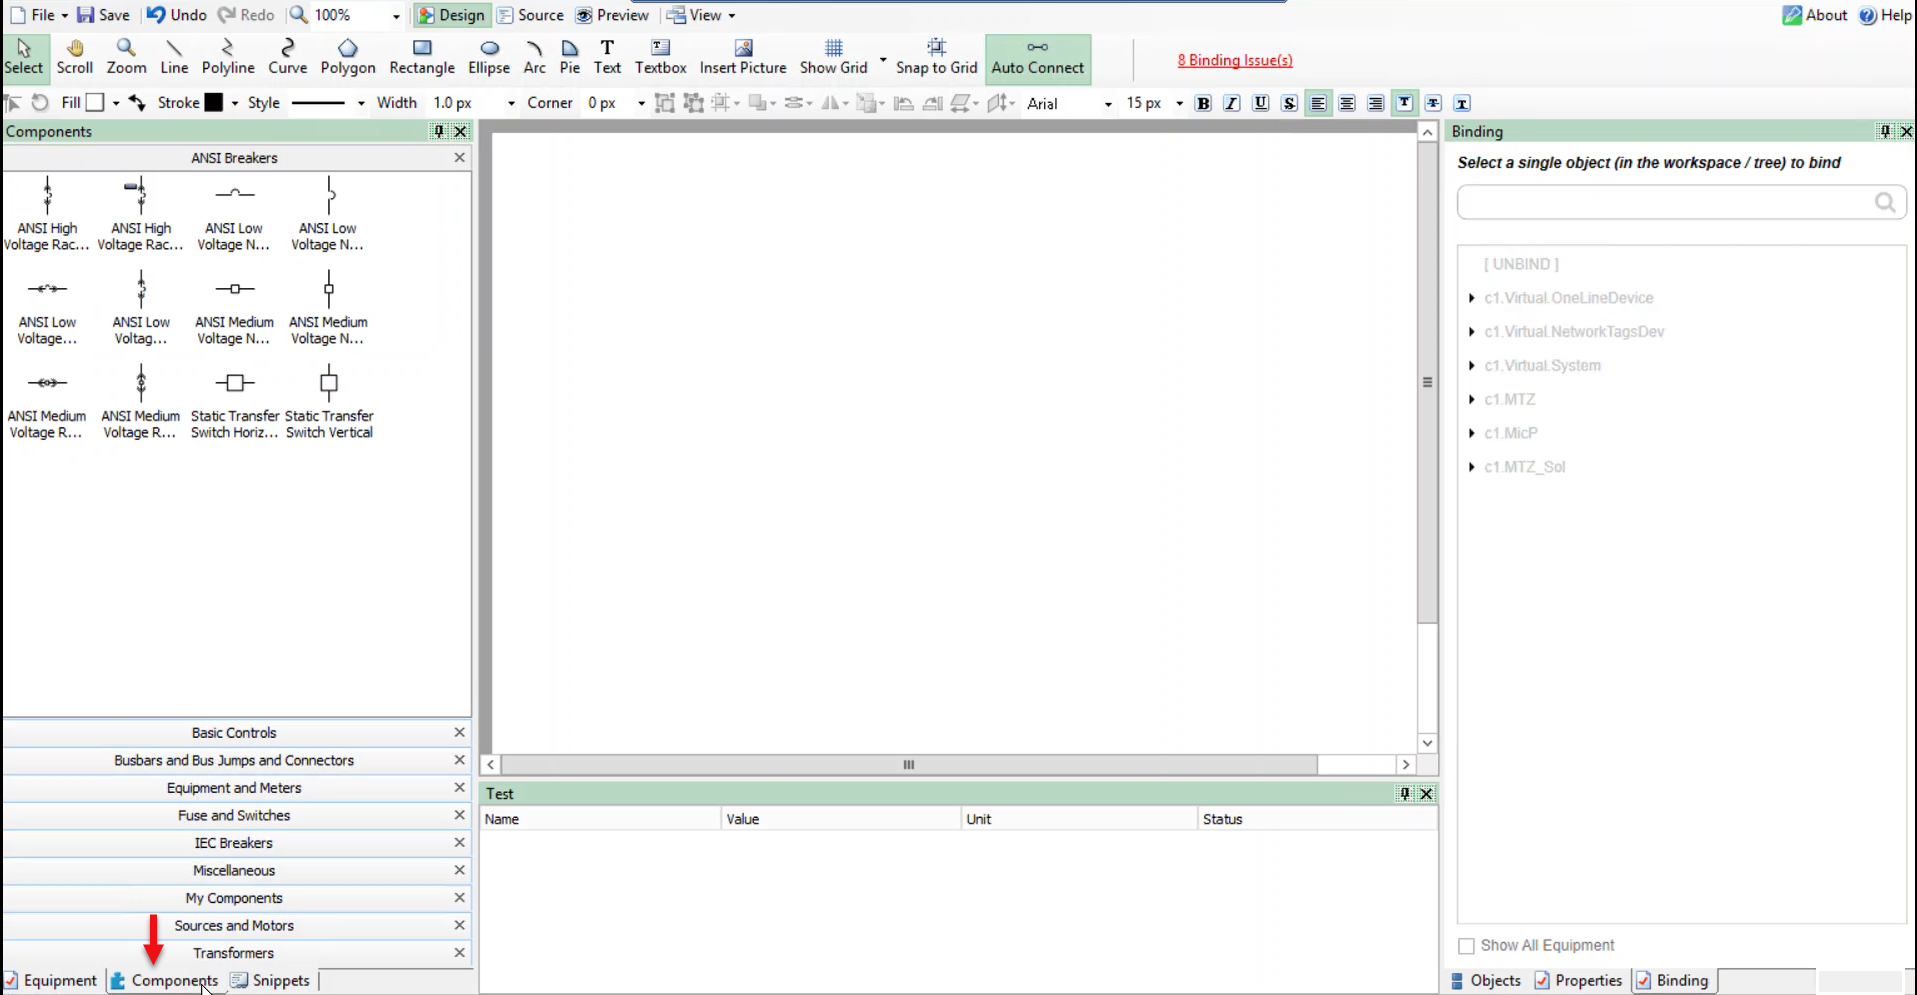
In the bottom left corner, click Components:
-
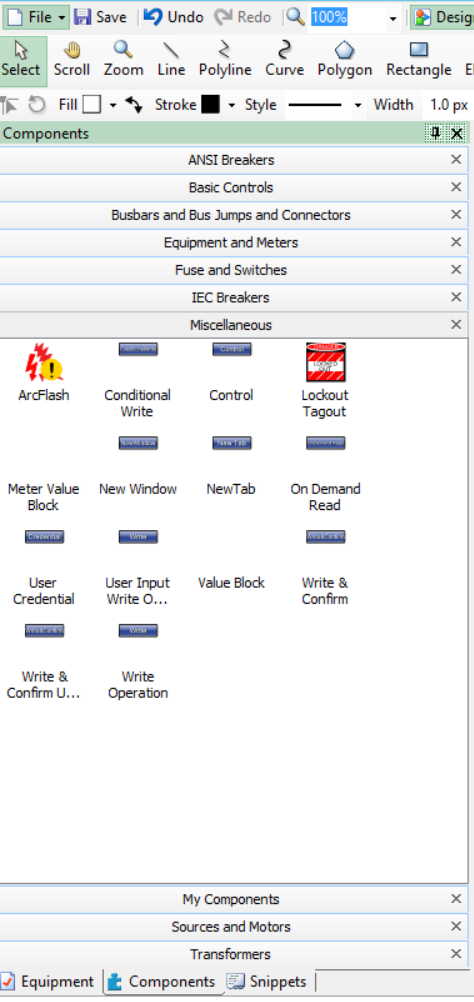
Click Miscellaneous:
-
Drag and drop the Write and Confirm component to the workspace:
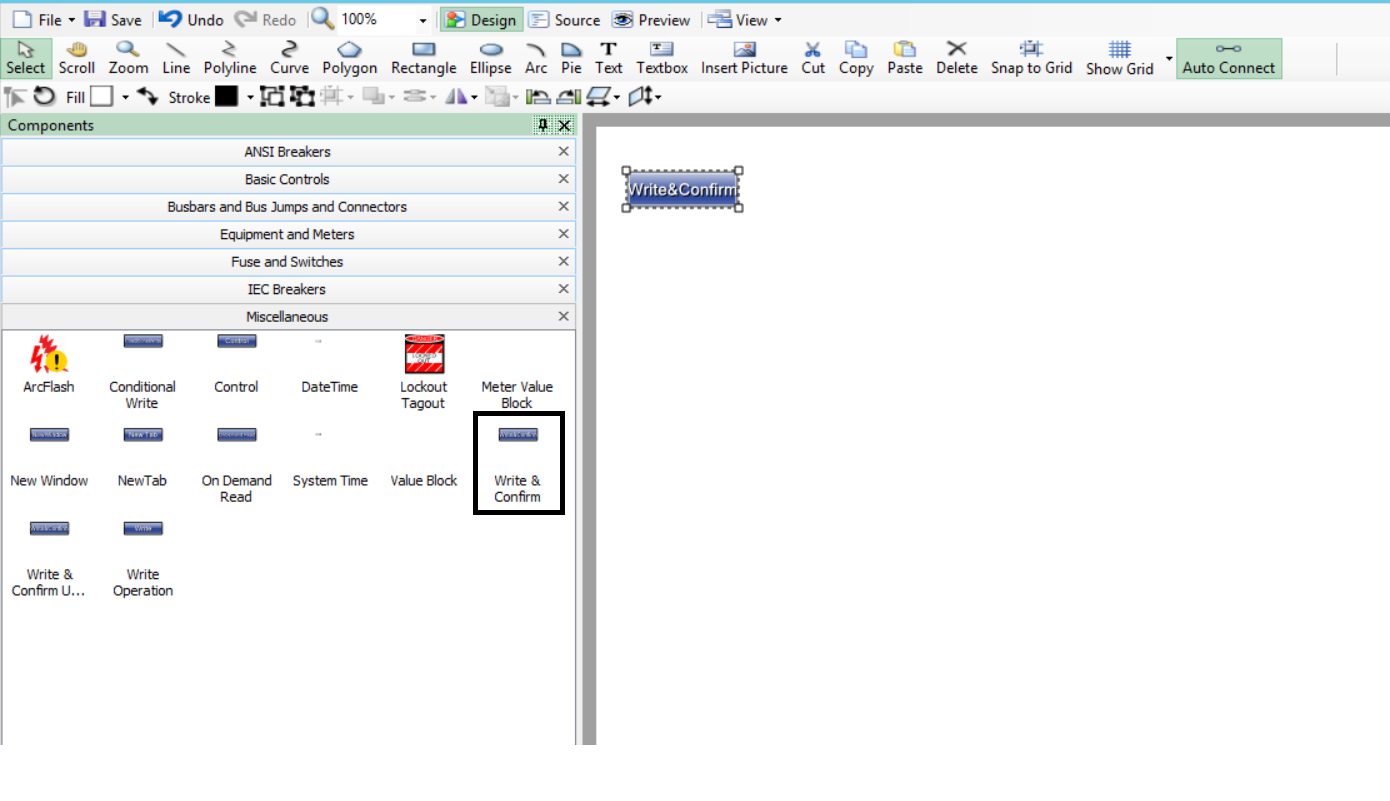
-
In the bottom right corner, click Object, and then click on the Component which is binded under the TGML:
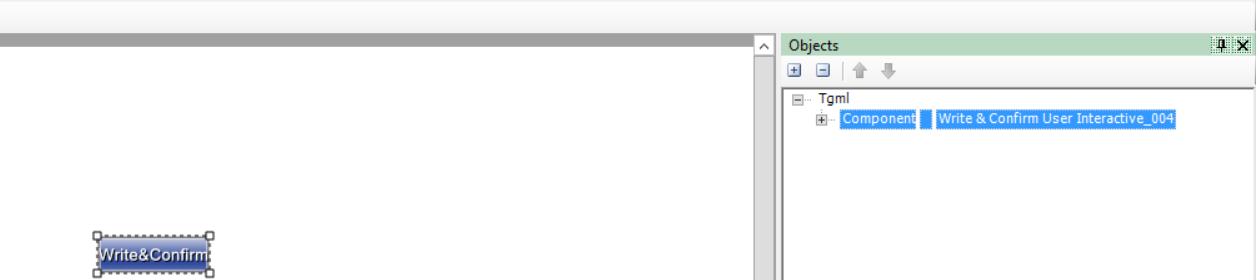
-
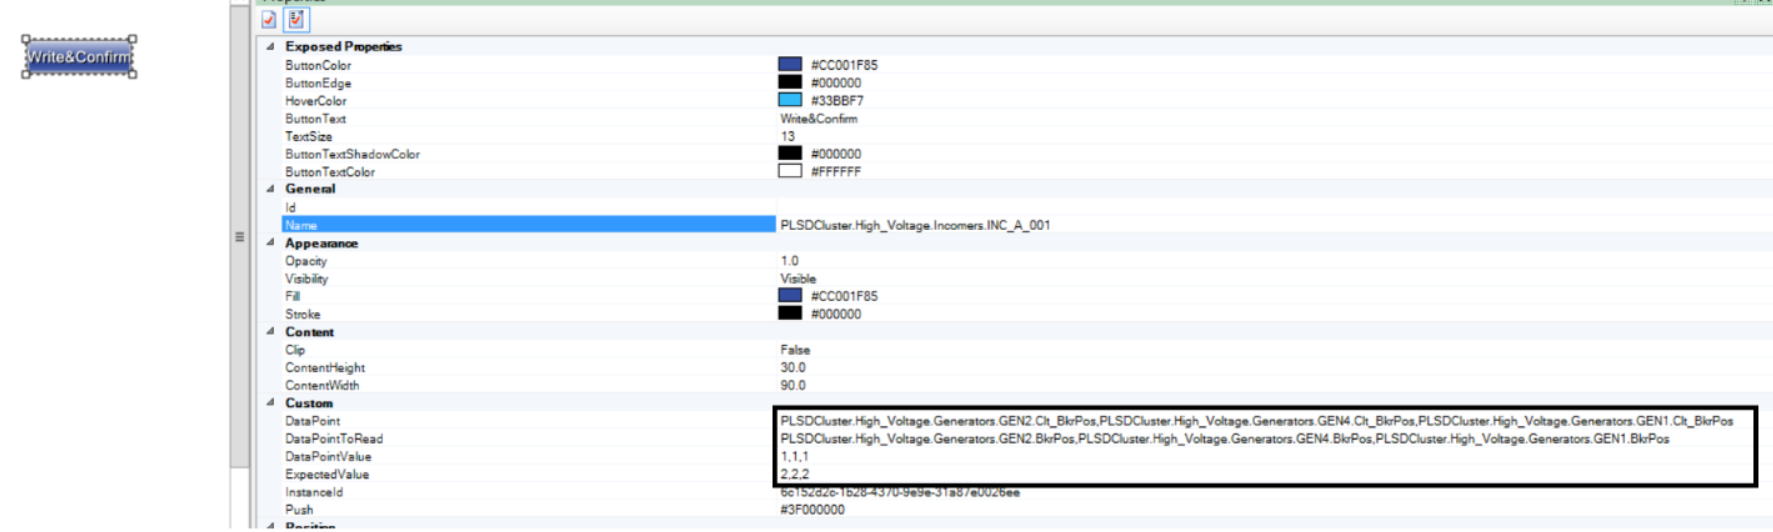
Go to Properties pane just beside the Object pane of the component and enter the following properties based on your requirements:
- DataPoint: Specify the fully qualified item names to do the write operation. Commas can be used as a delimiter to do the write operation. If only one DataPoint then no comma is required.
- DataPointToRead: Specify the fully qualified item names to read and verify that the item names are written correctly.
- DatapointValue:Specify the value to write which was specified in DataPoint field.
- Expected Value: Specify the expected value to verify the final value.
- Go to the Object pane, and then click on Tgml:

- Go to Properties pane again, and from the UseGlobalScripts attribute drop-down select
True: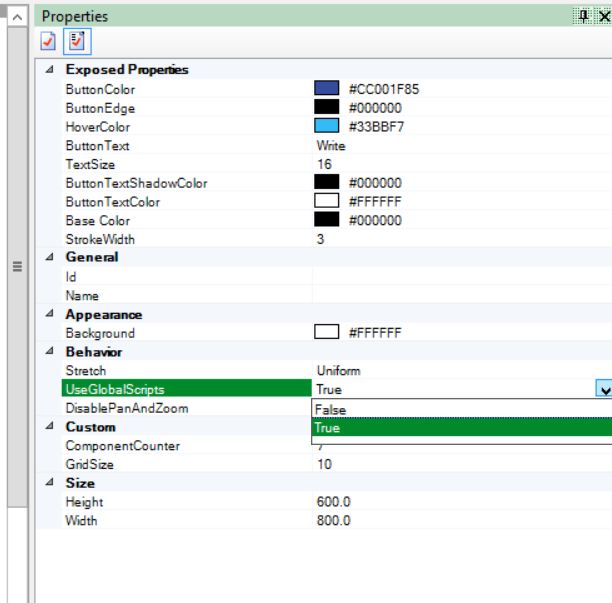
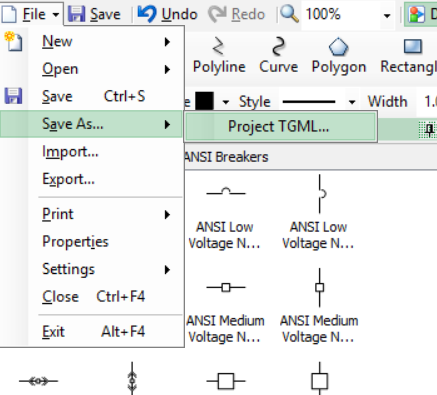
- Go to File > Save As > Project TGML.
Test the changes:
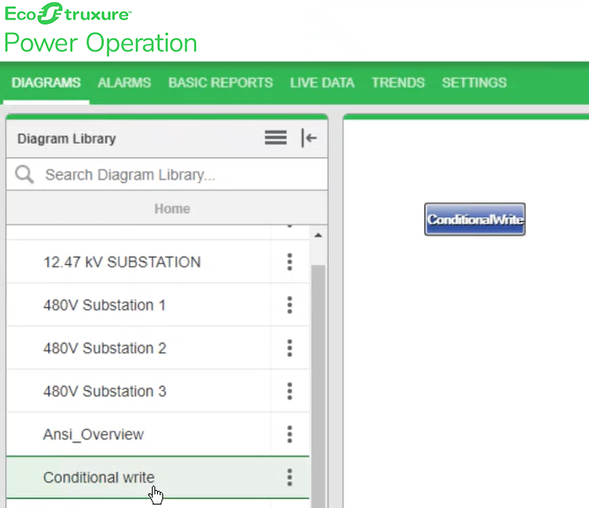
- Log in to PO Web Applications (https://localhost/webhmi or https://ipaddress/webhmi).
-
Click on the Write and Confirm component created from the Diagram Library:
-
Click on the Write and Confirm component. You are prompted to enter your user credentials:
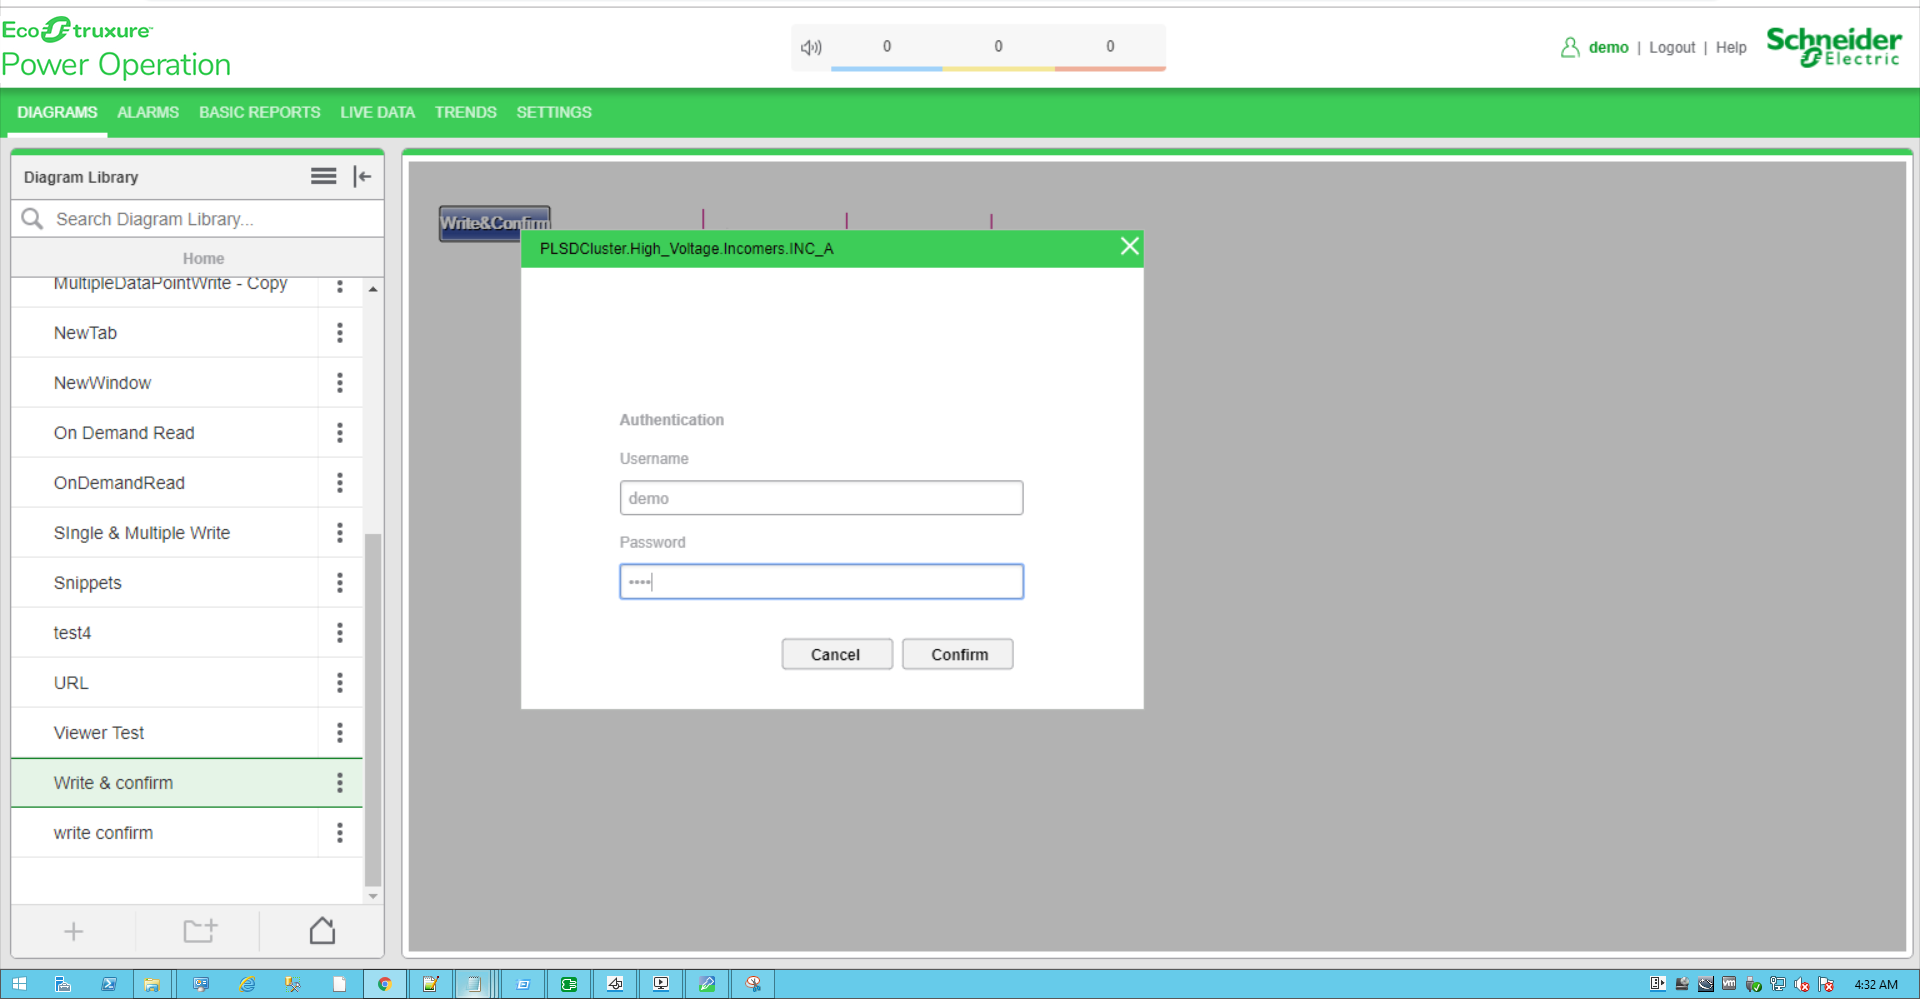
- Enter your username and password, and then click Confirm. To control which components require authentication, see Turning off credential requirements for control components.
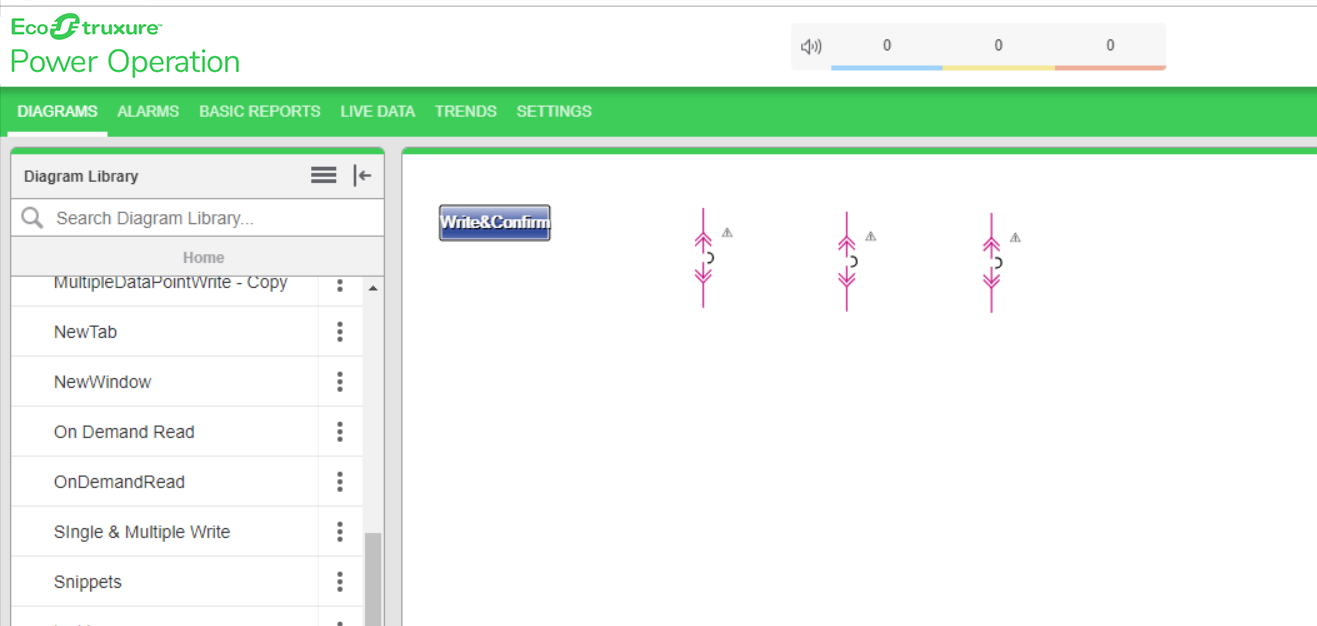
For example, verify if the breakers operation is working properly in this feature.
If the write operation is successful, the DataPoint Written Correctly message appears:

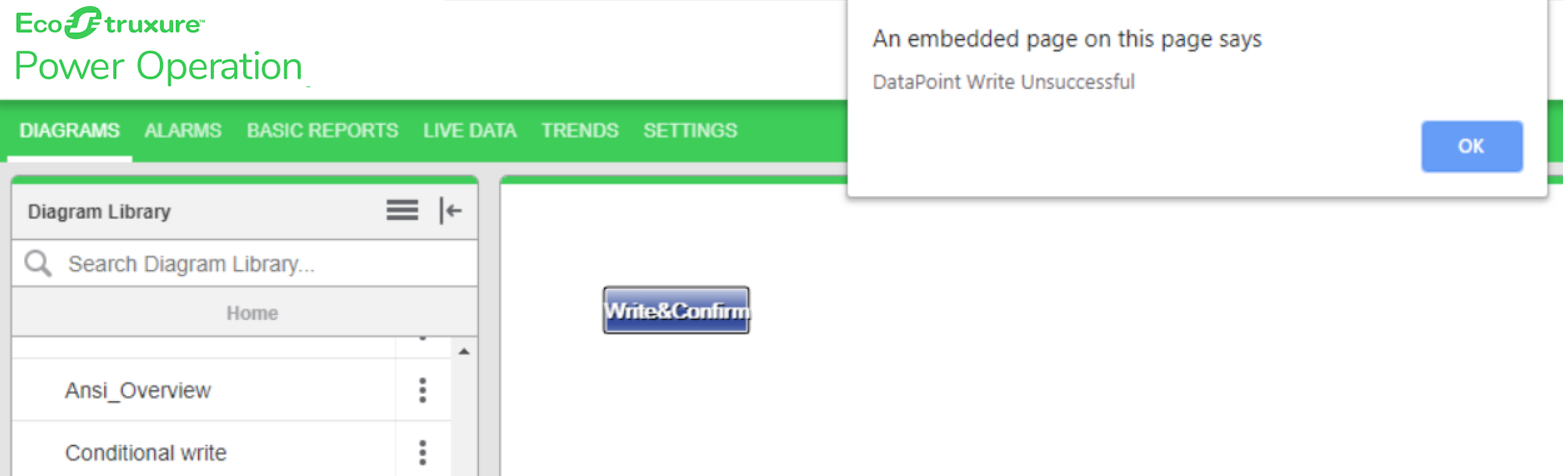
If the operation is not successful, the DataPoint Wrtiten Unsuccessful message appears: