Servers and Web Client
Use Servers and Web Client to define the server information for your primary server, and for the Advanced Reports and Dashboards server.
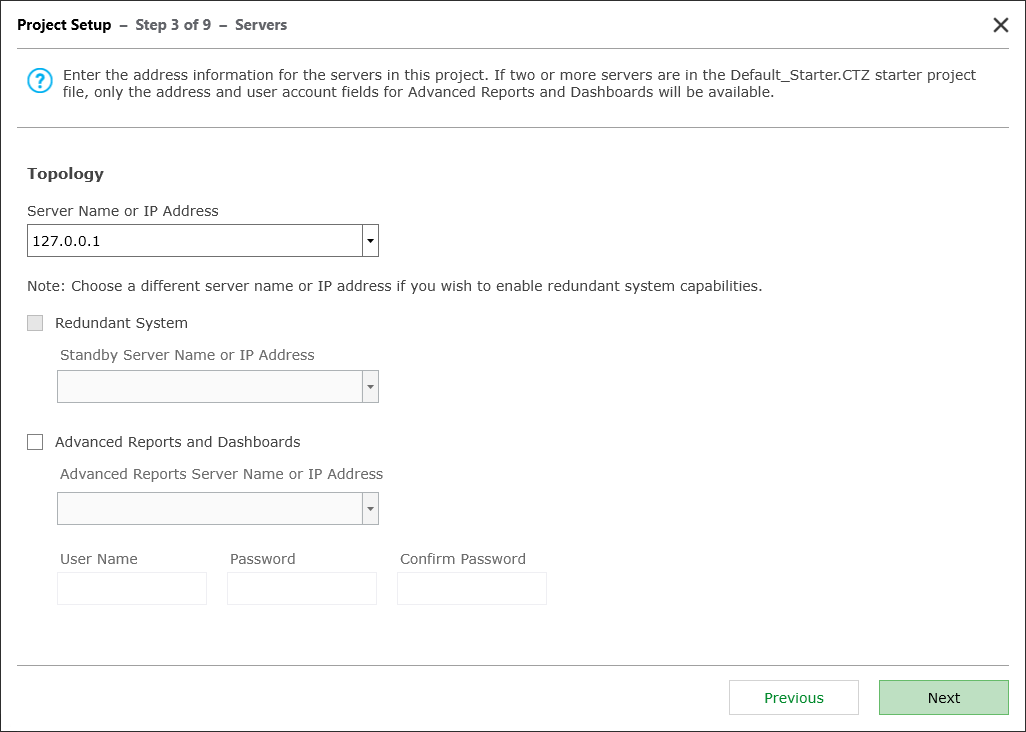
Project Setup detects the number of servers that are in your starter project. If you only have one server—for example, using the loopback IP address—you see all the fields in the following image. If you are using a project that has two or more servers identified, you only see the bottom section, Advanced Reports and Dashboards.
To define the server information:
- Enter the Server Name or IP Address for the project's primary server, or select it from the list.
- (Optional) If this is a redundant system:
- Click Redundant System.
- Enter the server name or IP address of the standby server, or select it from the drop-down list.
- (Optional) If you installed the Advanced Reports and Dashboards module:
- Click Advanced Reports and Dashboards.
- Enter the Advanced Reports Server Name or IP Address, or select it from the list.
- In the User Name/Password fields, enter the user name and password used for the Advanced Reports and Dashboards Server. Re-enter the password in the Confirm Password field.
NOTE: WebReach is also assumed to be on this server.
- Click Next.
For more information on Power Operation with Advanced Reporting and Dashboards server configuration, see Servers.