Creating advanced alarm filters
You can use Notifications Settings to create advanced alarm filters.
NOTE: When using advanced criteria, the multiple criteria are logically AND'd together, meaning that all criteria have to be satisfied for an alarm to ultimately be selected into the rule.
An advanced alarm filter consists of custom criteria you define to customize the alarm filter definition. You can filter alarms using the same objects that are available in basic filters. However, you can also define alarm filters using the search terms contains, equals, and starts with to further fine tune the alarm filter definition.
NOTE: Before creating advanced alarm filters, you should have a good understand of alarm filter rules, lists, and exclusions. See About Alarm Filters for details. Also note the following:
– If an alarm filter contains an exclusion that is met, the notification will not be sent. Therefore, use exclusions with care.
– Thoroughly test your alarm notifications before deploying them on a live system.
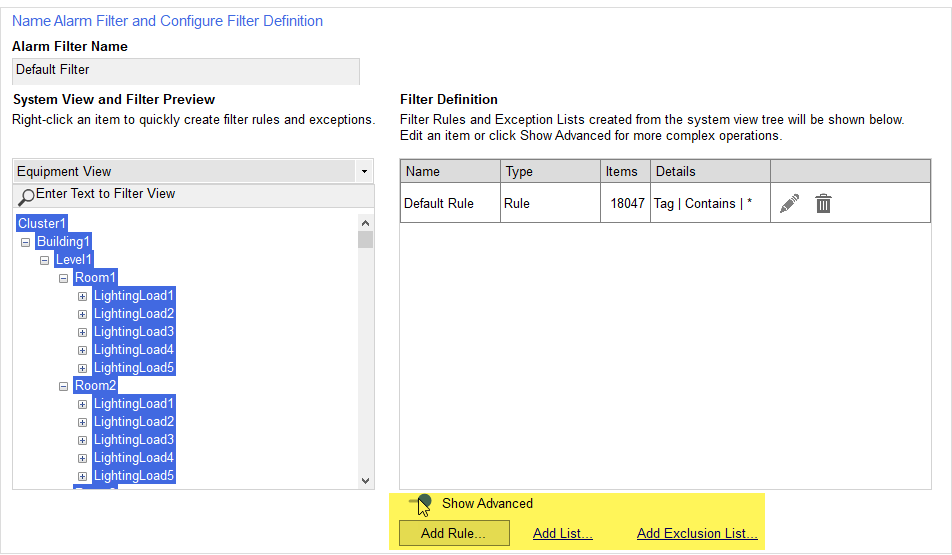
Viewing the advanced alarm filter settings
To view the advanced alarm filter settings:
- Open the New Filter window using one of the following methods:
- In the Alarms Filters section of the Notifications Settings pane, click Add New.
- In the Notification Components pane, click Alarm Filters and then click Add New.
- At the bottom of the Filter Definition pane, click Show Advanced.
The Add Rule, Add List, and Add Exclusion List items appear.
Adding a custom rule
- Click Add Rule.
- Enter an alarm filter rule name.
- From the first drop down, select an object type. For example, Name.
- From the second drop down, select a search condition. For example: StartsWith.
- Enter the text you want to include. For example: over
- (Optional) Click Add Custom Criteria to add another rule. You can add up to 10 criteria per rule.
- When you are finished adding custom criteria, click Save.
The Add Alarm Filter Rule window appears.
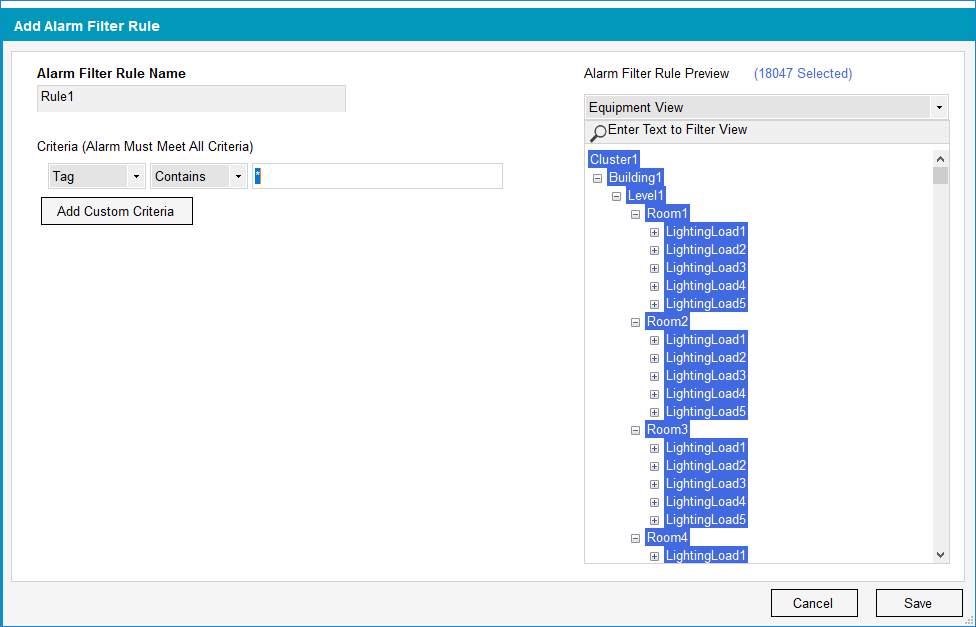
NOTE: You can only also use * (wildcard) alone; it cannot be used with other text.
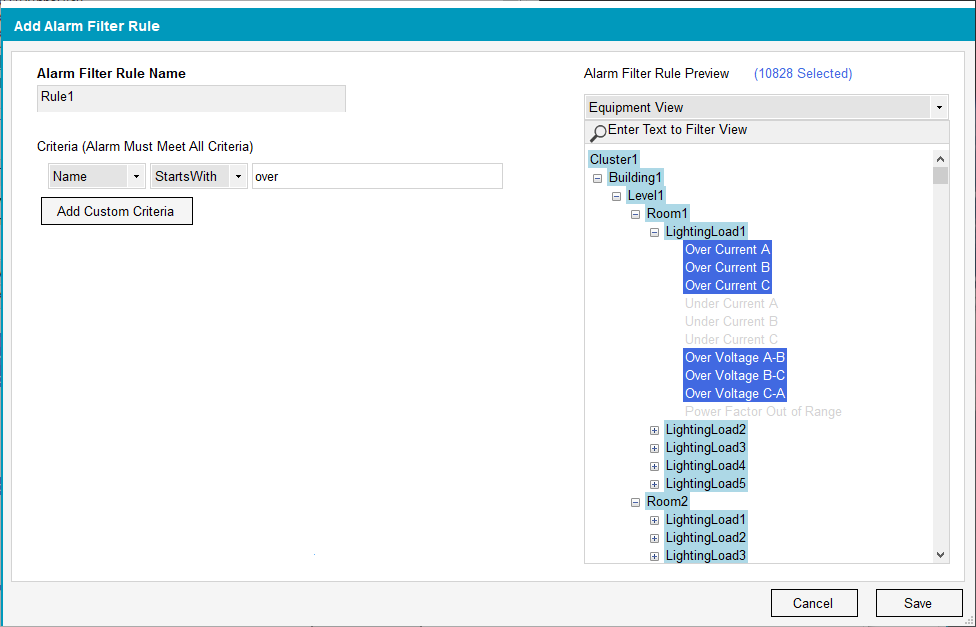
All the tag names that begin with 'over' are included in the custom filter:
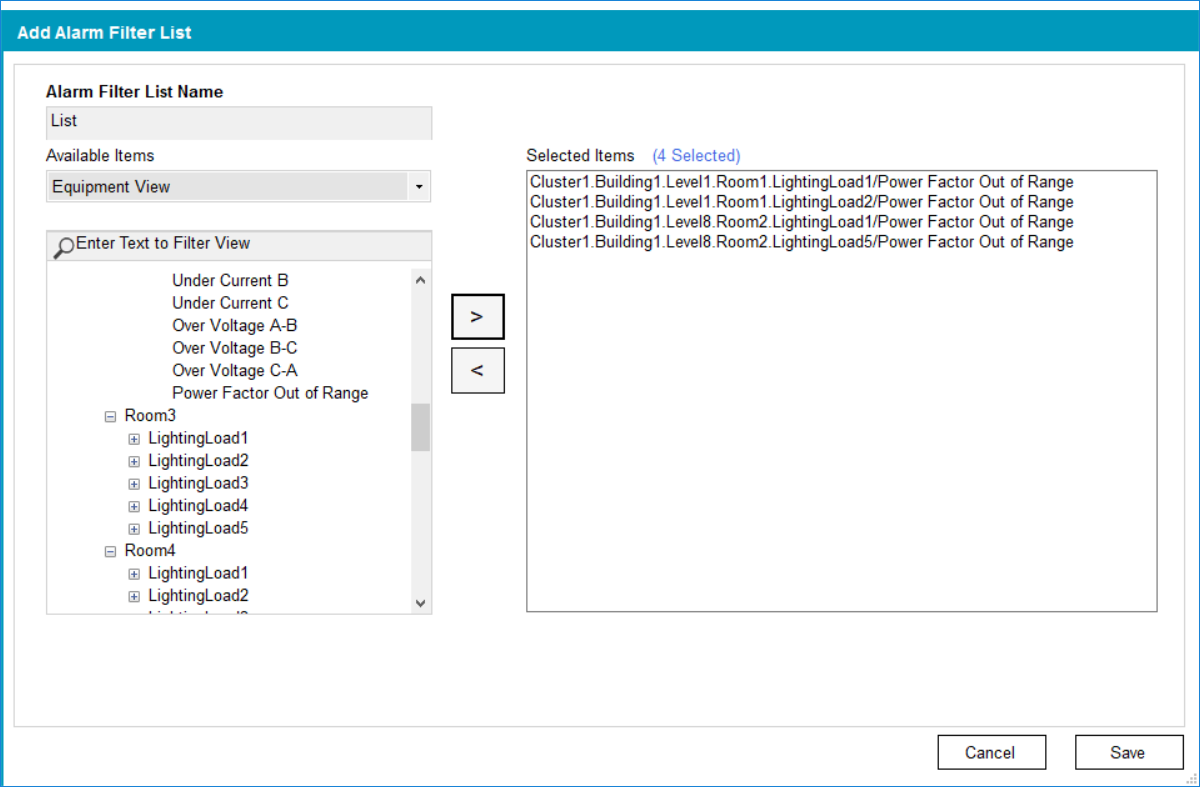
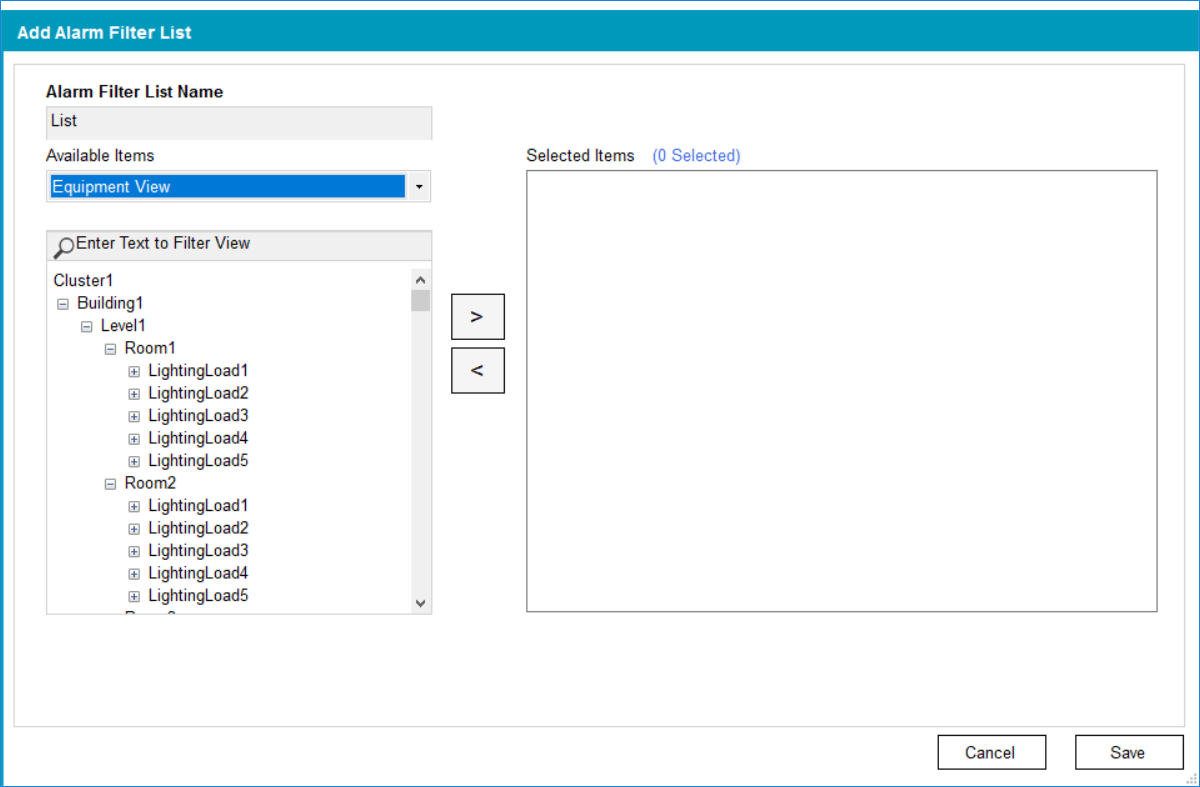
Adding a custom list or exclusion list
NOTE: The procedure for adding lists and exclusion lists is the same. This following procedure adds an alarm filter list.
To add a custom list or exclusion list:
- Click Add List.
- Enter an alarm filter list name.
- From the Available Items drop down, select the view you want to use.
- Navigate to and then select the tag you want to add to the list, and then click the add arrow
 .
. - (Optional) Remove tags form the list by clicking the remove arrow
 .
. - Repeat step 4 to add additional tags.
- When you are finished adding tags, click Save.
The Add Alarm Filter List window appears.
NOTE: You can only add tags to lists and exclusion lists.