Configuring pop-ups
You can configure pop-ups to display real-time device readings.
To configure a pop-up:
- Open the Graphics Editor.
- In the Components pane, select a component and drag and drop it on the workspace.
- In the Binding pane, select a component or device to bind to the selected component.
- From the Snippets pane, drag and drop the PopUp snippet onto the component in the workspace. Two additional properties appear: Link and Script.
- Link: Enter the page to be opened.
- Script: Enter the display type: Link, New Tab, New Window, PopUp, or URL. Different snippets are available for these types.
NOTE: All the TGML templates, including the generic pop-up, are in:
C:\Program Files (x86)\Schneider Electric\Power Operation\v2024\Applications\Services\Platform Server\PLS_Include\TGML\Templates
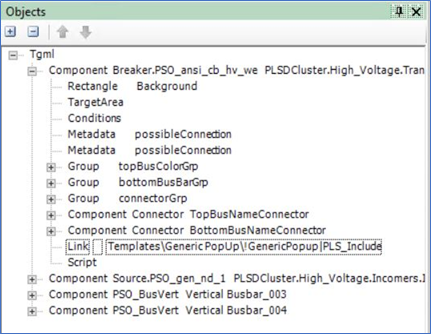
• The generic pop-up file is in:Templates\Generic PopUp\!GenericPopup|PLS_Include
• For Diagrams to render a pop-up based on your configuration, copy the required TGML templates to:
C:\ProgramData\Schneider Electric\Power Operation\v2024\User\Include\TGML\Templates
• Create the TGML\Templates folder if it is not available in the location previous.
• It is recommended that you keep the source and destination hierarchy similar to the default folder structure for seamless pop-up or link navigation. Any change in folder structure or file rename will require you to reconfigure the link property in the TGML graphic.
- Navigate to the following path to save the file:
File > Save As > Project TGML
- Type the file name in the File name field.
- Select Save.
- Open the Connection Debugger by clicking Connection Debugger.
- In the Connection Debugger, click Create Configuration File. After the Configuration file has been successfully generated, close the Connection Debugger.
- Open a web browser.
- Type https://localhost/webhmi in the address bar.
NOTE: If Power Operation 2024 R2 is installed on the remote server, type a valid URL in the address bar.
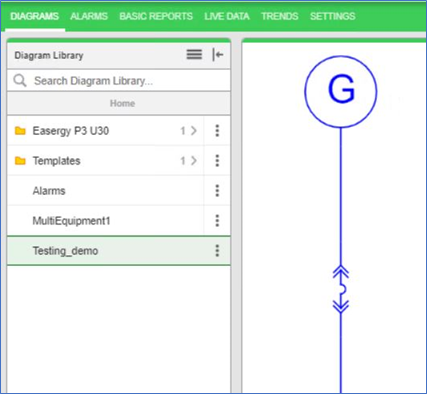
- Select Enter. The Power Operation Web Applications Home page appears.
- Select the new TGML file.
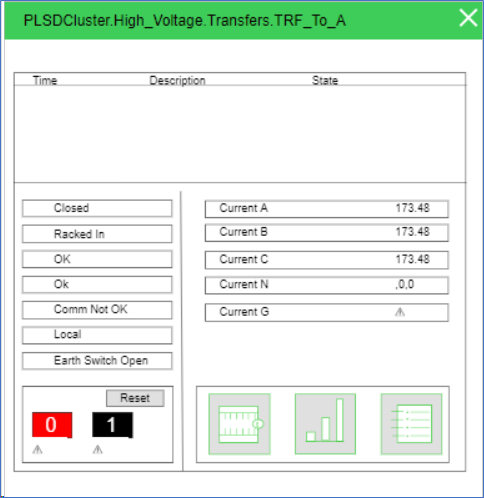
- Select the graphic to open a pop-up displaying real time readings from the component.