Configuring breakers
To configure a breaker:
- Open the Graphics Editor: Click Start > Power Monitoring Expert > Graphics Editor.
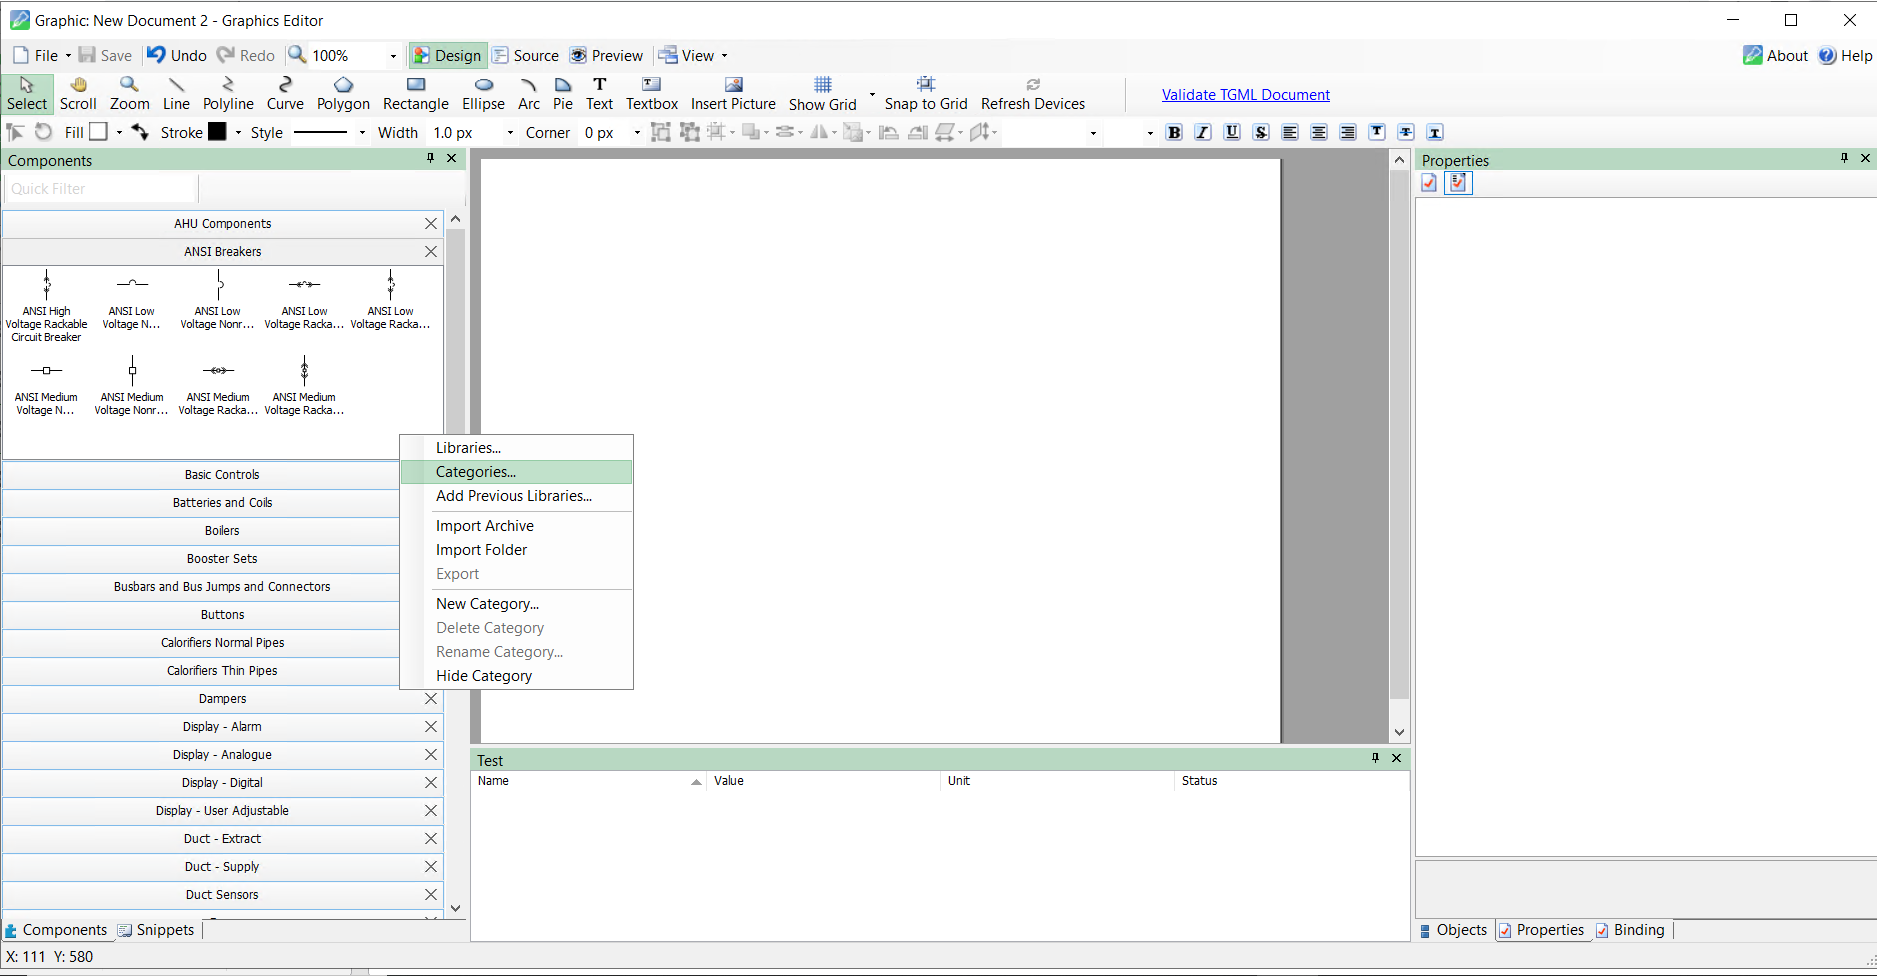
- Right-click the Components pane, and then click Categories.
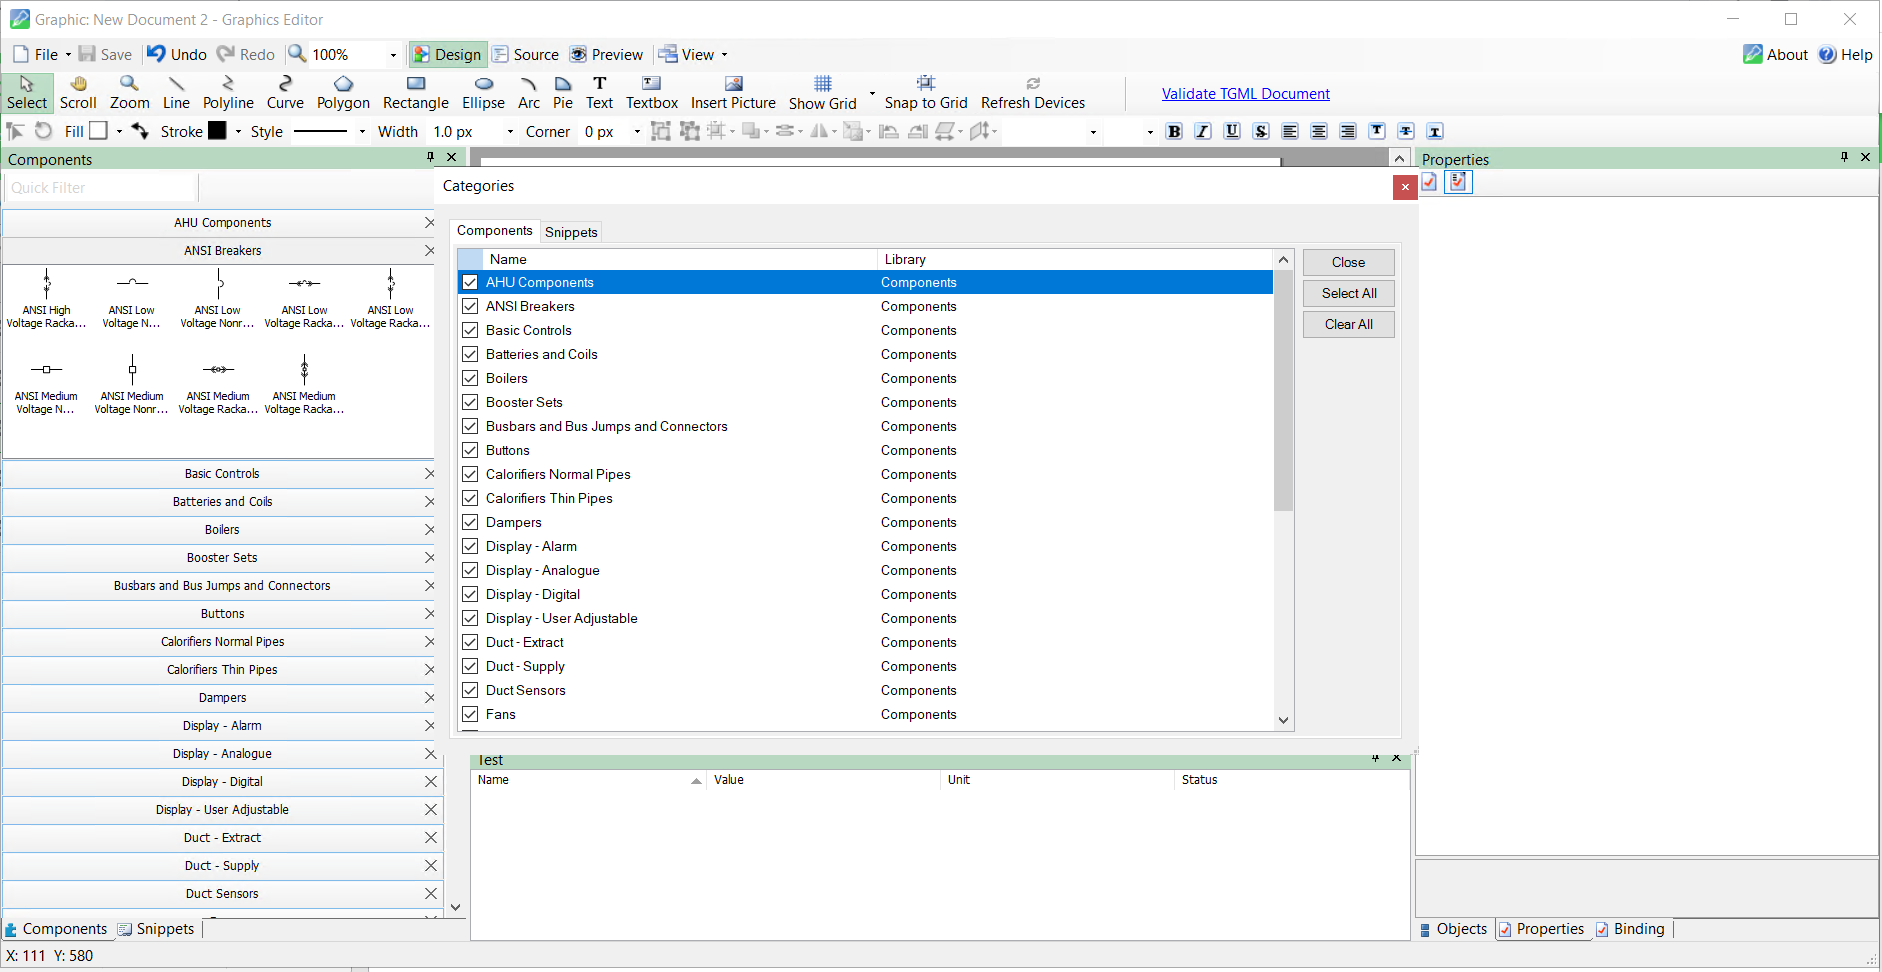
- In the Components tab, click Select All, and then click Close.
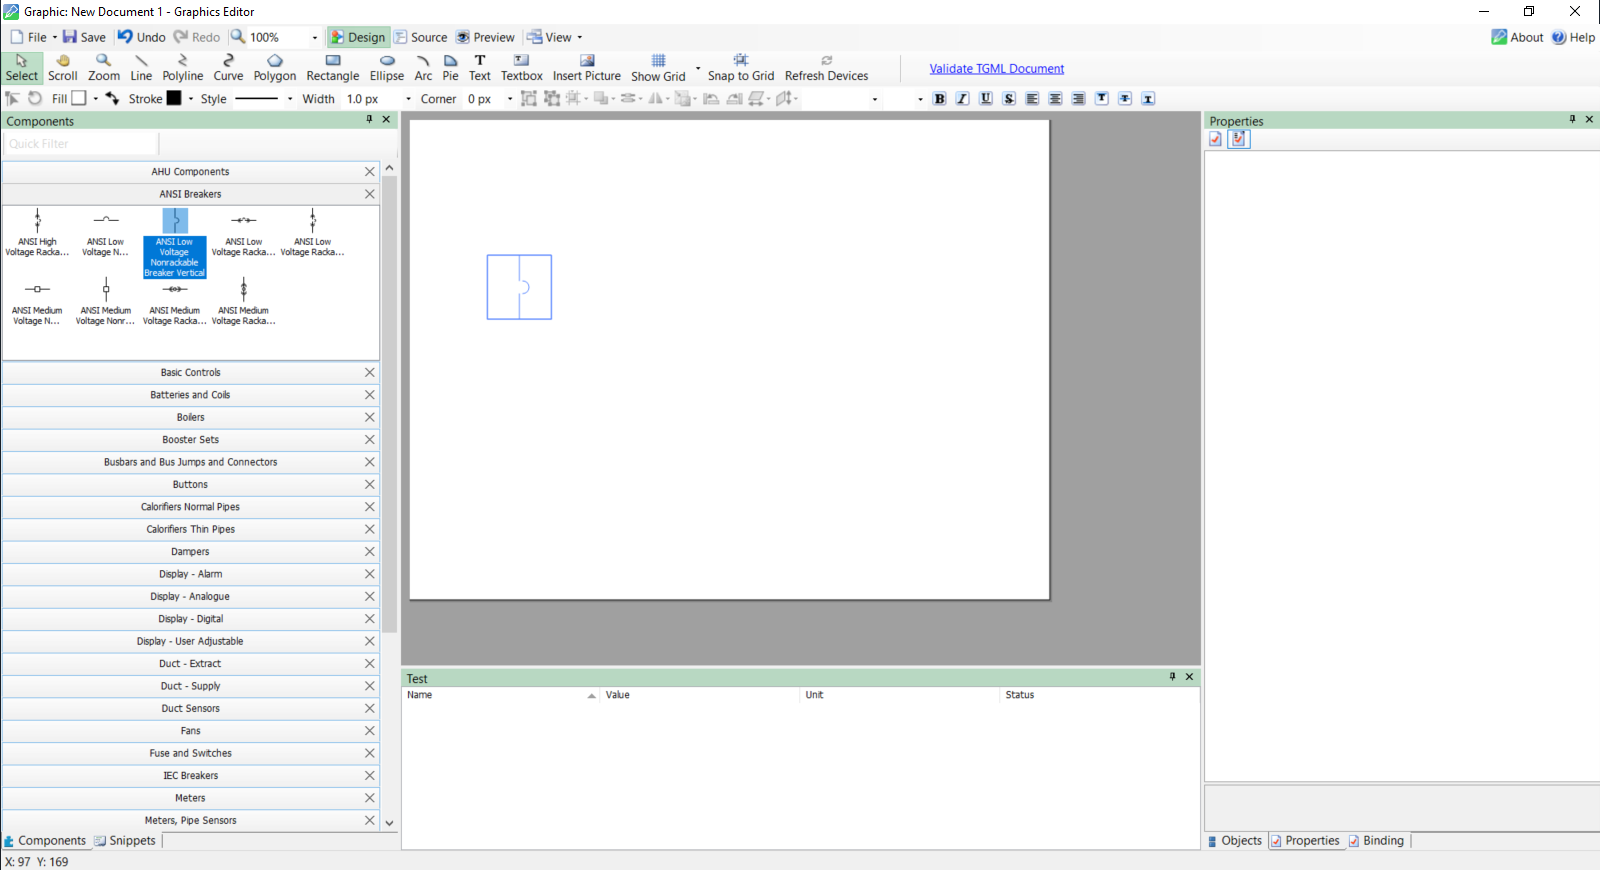
- Select a component, and then drag and drop the component to workspace area.
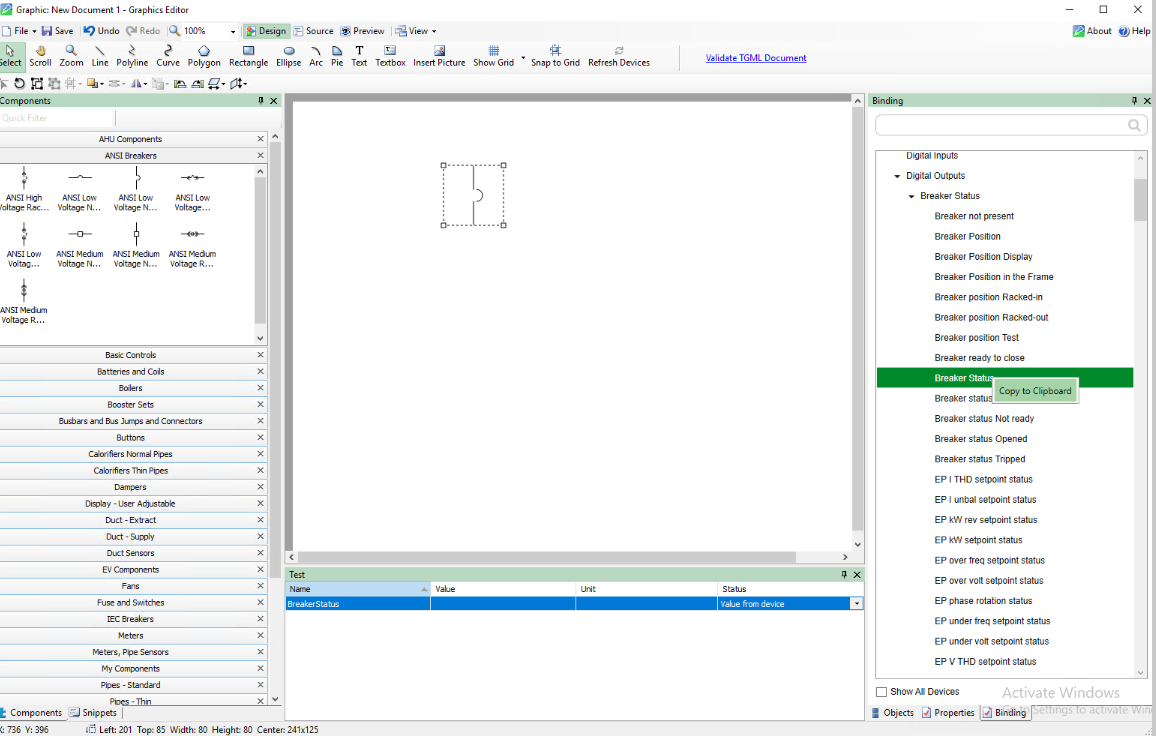
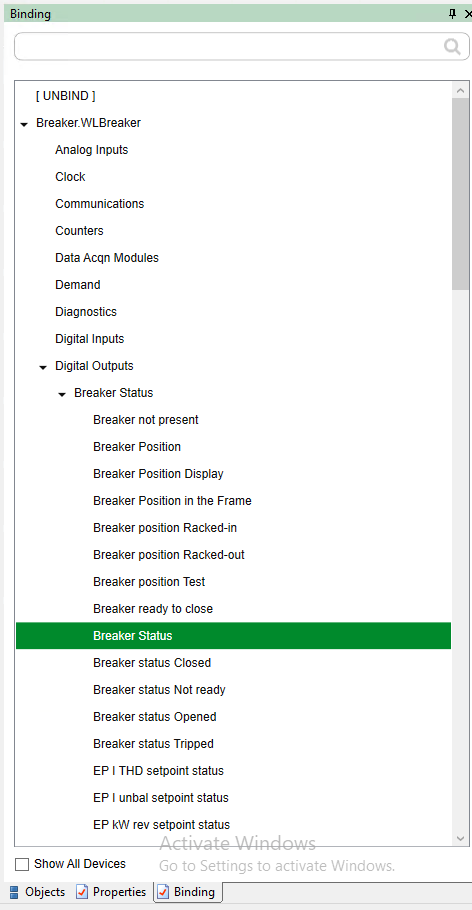
- On the Binding pane: Double-click on the Breaker Device to display the feature managers.
- Double-click on the Breaker Status feature manager that lists the modules. Double-click on the module to list the Output registers.
- Right-click on the Breaker Status output register, and then select Copy to Clipboard.
- Go to Binding, select a bind name for the rack-out position, and then right-click and select Copy to Clipboard.
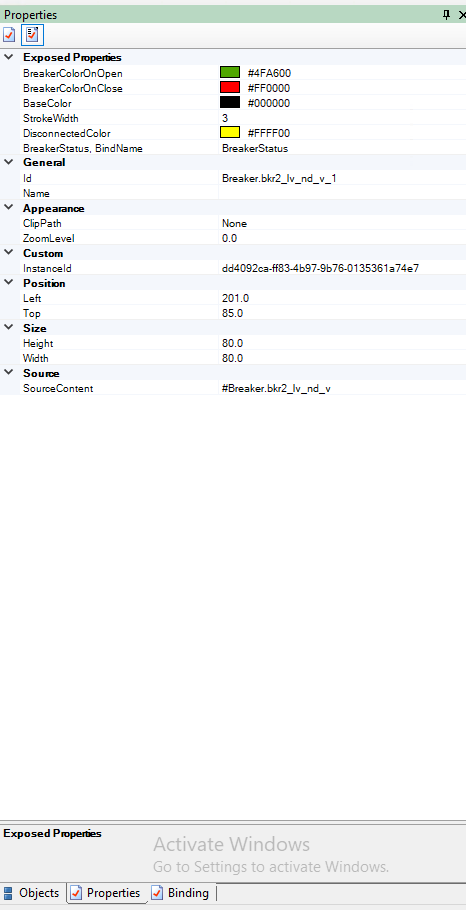
- Go to Properties, and then paste the copied value in RackPosition, BindName.
- Click Save.