Creating a hierarchy
The following example uses the default hierarchy template (with Site, Buildings, and Areas nodes) to illustrate the basic functionality of Hierarchy Manager.
In this scenario, we are the facility manager for Faber College. The college includes three buildings, two of which have already been added to Hierarchy Manager. Building Three has just been completed, and we must add this building to our hierarchy using Hierarchy Manager. This involves creating a new building and areas entries, and adding devices to the areas, all beginning on a specific date.
At the same time, renovations to Building Two have just been completed which include the replacement of a meter. We need to swap the old device with the new one in our hierarchy by setting the end date for the existing device and the start date for the new device. The new device must be associated with the correct area.
Open Hierarchy Manager
NOTE: Access to this application or function is controlled by user privileges.
- Open Hierarchy Manager in one of the following ways:
- From Web Applications Settings > System > Hierarchies
- From Management Console Tools > Web Tools > Hierarchy Manager.
- Type a user name and password in the Log In dialog, if required, and click OK to open Hierarchy Manager.
NOTE: In the following steps, devices have already been added to the system, and the hierarchy has been populated with site, building, and area information.

Site, Buildings, and Areas tabs represent each Node type.
Add a building to the hierarchy
- Click the Buildings tab.

The Buildings grid includes Building One and Two, the site they are associated with, and the areas defined for each building.
-
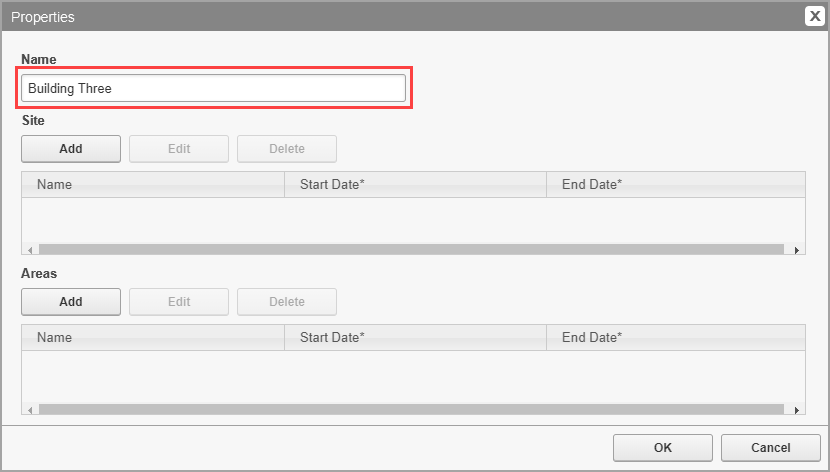
To add Building Three, click Add above the Buildings grid to open the Properties dialog for the Buildings node, then enter the building name in the Name field.
-
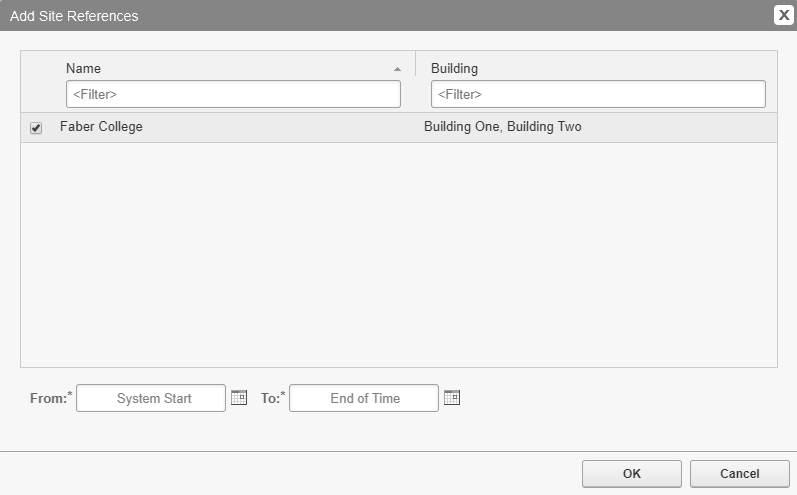
Click Add above the Site grid, in the properties dialog, to open the Add Site References dialog and select the Faber College site name in the grid. Then click the From date field or click the calendar icon beside it at the bottom of the dialog. Select a start date in the calendar.
-
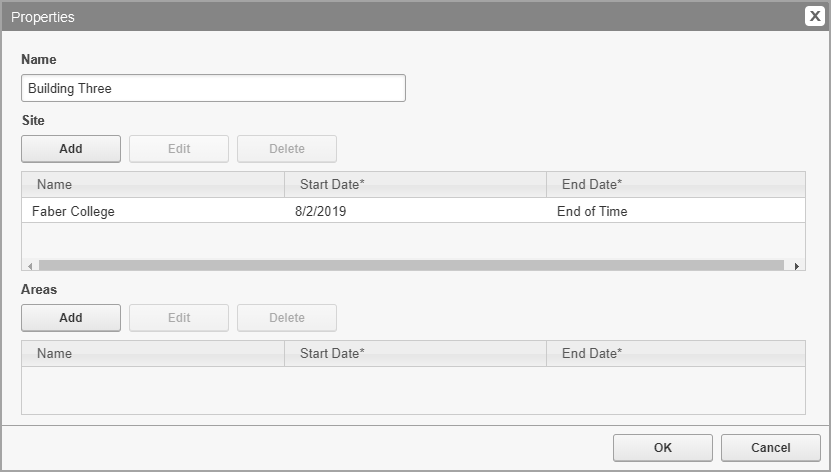
Confirm that the date has changed in the Start Date column under Sites, then click OK.
Associate areas and devices to Building Three
-
Click the Areas tab.
A new area needs to be created, Area 3. Associate this area with the new building, assign a device to the area, and set the start date.
-
Click Add above the Areas grid to open the Properties dialog for the Areas node, then type Area 3 in the Name field.
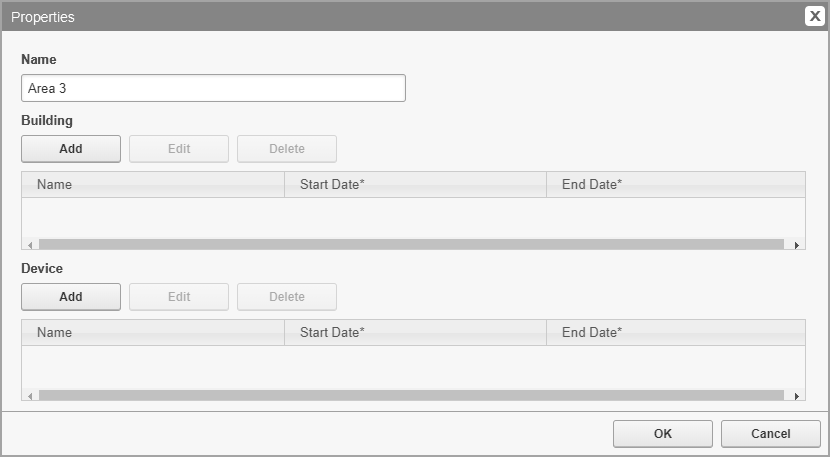
- Click Add above the Building grid to open the Add Building References dialog.
- Select Building Three in the grid.
- Click the From field or click the calendar icon and select a start date.
- Confirm that the date has changed in the From field under Building, then click OK.
- Click Add above the Device grid to open the Add Device References dialog.
- Select a device.
- Click the From field or click the calendar icon and select a start date.
- Confirm that the date has changed in the Start Date column under Device, then click OK.
The following image shows the complete set of entries on the Areas tab.

View the hierarchy in a tree configuration
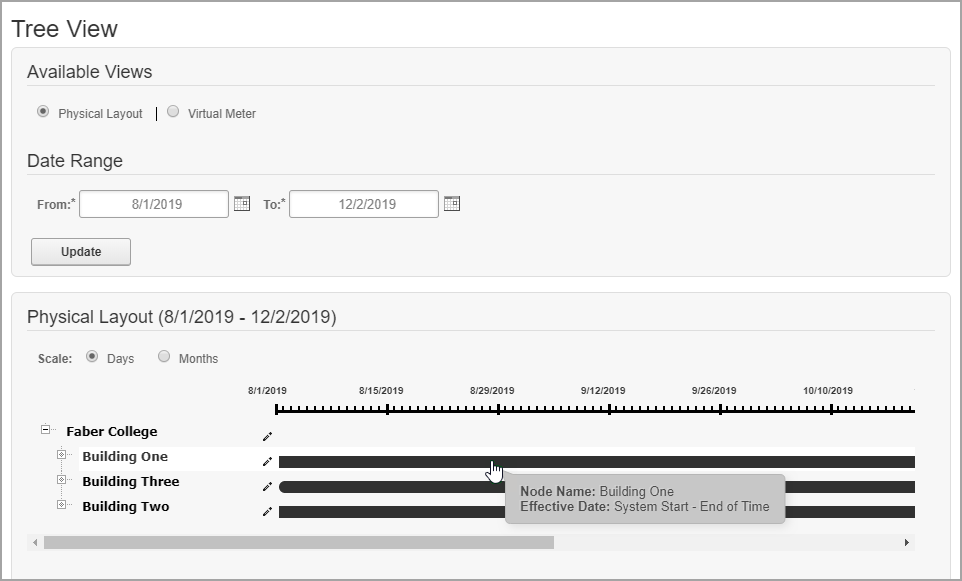
To see the hierarchy in a tree organization, switch to the Tree View by clicking Show Views, in the top right corner of the Hierarchy Manager window. You can use this window to select the type of view you want to see (if multiple views are available), and the date range for the view. Click Update to refresh the view after you make your selections.
Click:
- The plus sign in the view to expand that entry.
- The minus sign beside an entry to collapse that part of the hierarchy.
- The pencil (edit) icon to open and edit the properties for the related item.
-
The bar for each entry to see the Node name and the effective date range for that entry.
- Click Show Types to return to the initial Hierarchy Manager page.
Adding and removing devices
This part of the example involves replacing a device in Building Two after a renovation. Set the end date for the device you are replacing to the date they are removed. Then assign a new device to the area with the start date set to the day the device is installed.
The device that you are replacing is associated with Area 2 in Building Two.
When this task is complete:
- The entry for the old device is dimmed and italicized in the hierarchy if the End Date is the current date or earlier.
- Any reports that include the area only include data collected by the device up to this new end date.
NOTE: Date ranges extend from start of day to start of day. This means that the end date does not include data collected for that day.
- Open Hierarchy Manager and click the Areas tab.
- Double-click Area 2 in the grid or select it and click Edit to open the properties dialog.
- Double-click Campus.Library device in the Device grid, or select it and click Edit to open the Edit Device References dialog.
- Click the To field, or click the calendar icon beside it, and select the end date.
- Confirm that the date has changed in the End Date column under Device, then click OK.
- Click Add above the Device grid to open the Add Device References dialog.
- Select the new device, Campus.Library_NEW.
- Click the From field or click the calendar icon beside it. Select the start date.
- Confirm that the date has changed in the Start Date column under Device, then click OK.

When you complete these tasks, any reports that include this area with a date range that extends beyond the device start date includes data collected by the new device as of their start date. The reports do not include any data for the removed device as of their end date.