Creating basic alarm filters
An alarm filter is a set of criteria that filters the alarms to include or exclude in a notification. An alarm filter is comprised of one or more alarm rules, lists, and exclusions.
NOTE: Before creating alarm filters, you should have a good understand of alarm filter rules, lists, and exclusions. See About Alarm Filters for details. Also note the following:
– If an alarm filter contains an exclusion that is met, the notification will not be sent. Therefore, use exclusions with care.
– Thoroughly test your alarm notifications before deploying them on a live system.
To create a basic alarm filter:
- Open the New Filter window using one of the following methods:
- In the Alarms Filters section of the Notifications Settings pane, click Add New.
- In the Notification Components pane, click Alarm Filters and then click Add New.
- In Alarm Filter Name, enter a unique alarm filter name.
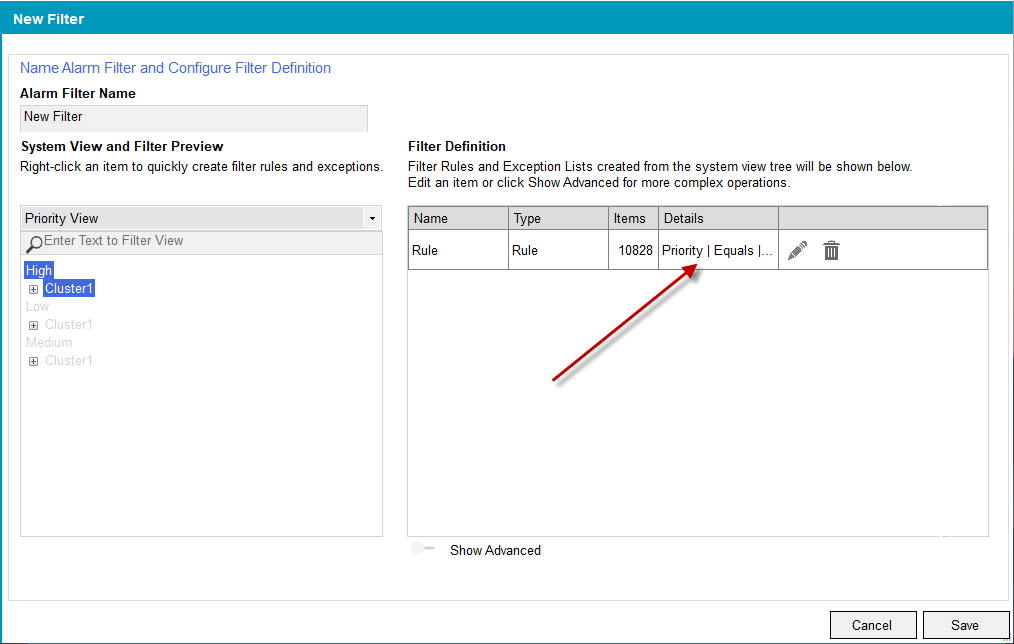
- Under System View and Filter Preview:
- Select the system view that sorts the alarms for your needs.
- Navigate to the level of alarm you want to use by expanding or collapsing the alarm nodes.
- Right-click the node you want to filter on and then click Add Rule.
For example, if you want to include and exclude equipment, use the Equipment View. If you want to create an alarm filter for high priority alarms only, select Priority View. For more information on system views, see Alarm Filter System Views.
The alarm rule is added to the alarm filter. The Alarm Filter section displays the rule name, type, items and details. For example:
NOTE: The steps for adding a list and exclusion is the same as that for rules. However, you can only add a list or an exclusion to tags.
- (Optional) Repeat step 3 to add more alarm rules to the alarm filter definition.
- When you are finished adding alarm rules, click Save.
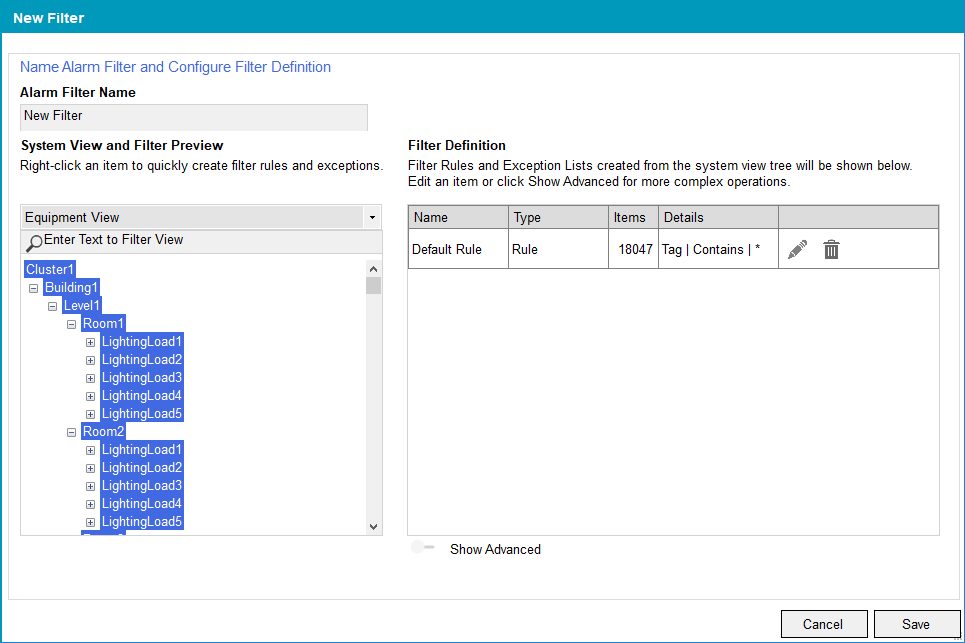
By default, the new alarm filter has a default rule that includes all alarm tags. You can build the filter definition by editing the Default Rule or deleting it and then adding new filters.