PopUp snippet example
When you click a TGML graphic that has a configured PopUp snippet, another TGML graphic opens.
This topic uses an example to illustrate how to configure a PopUp snippet.
Prerequisites:
This example uses a graphic file that already has a binded component or equipment in the workspace. For more information on how to prepare the TGML graphic snippet examples, see TGML snippet example prerequisites.
To create a PopUp snippet:
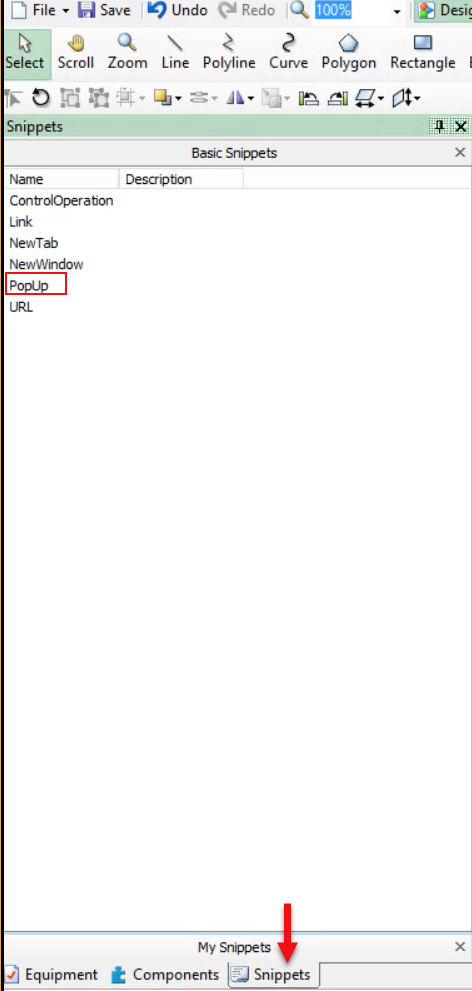
- In the Snippets pane, click PopUp.
- Drag and drop the PopUp snippet over the selected component in the workspace.
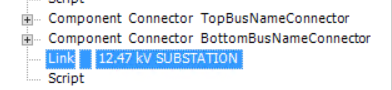
- In the bottom right corner, in the Objects pane, expand TGML > Component node.
2 additional properties appear:
- Link: Enter the page to be opened.
- Script: Enter the display type.
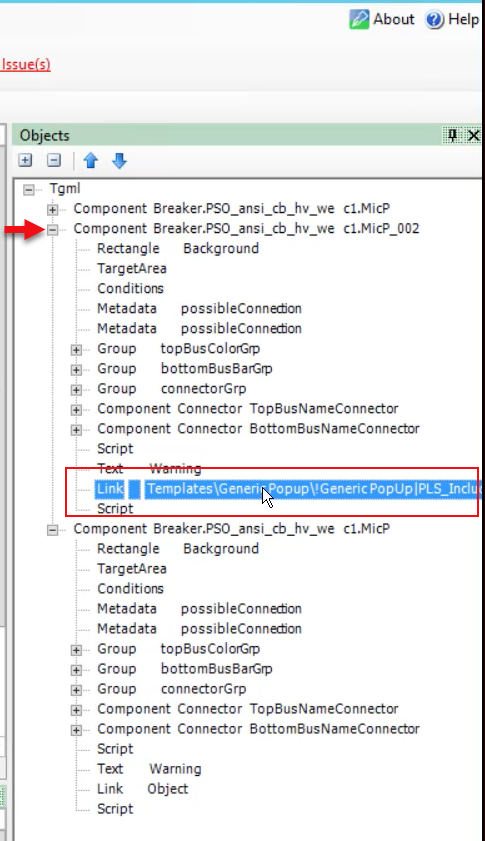
NOTE: You can add any pop-up TGML file name in the link. By default, we are using the generic pop-up TGML file as an example.
- In the bottom right corner, click Binding, and then select the component and the device you want to bind together.
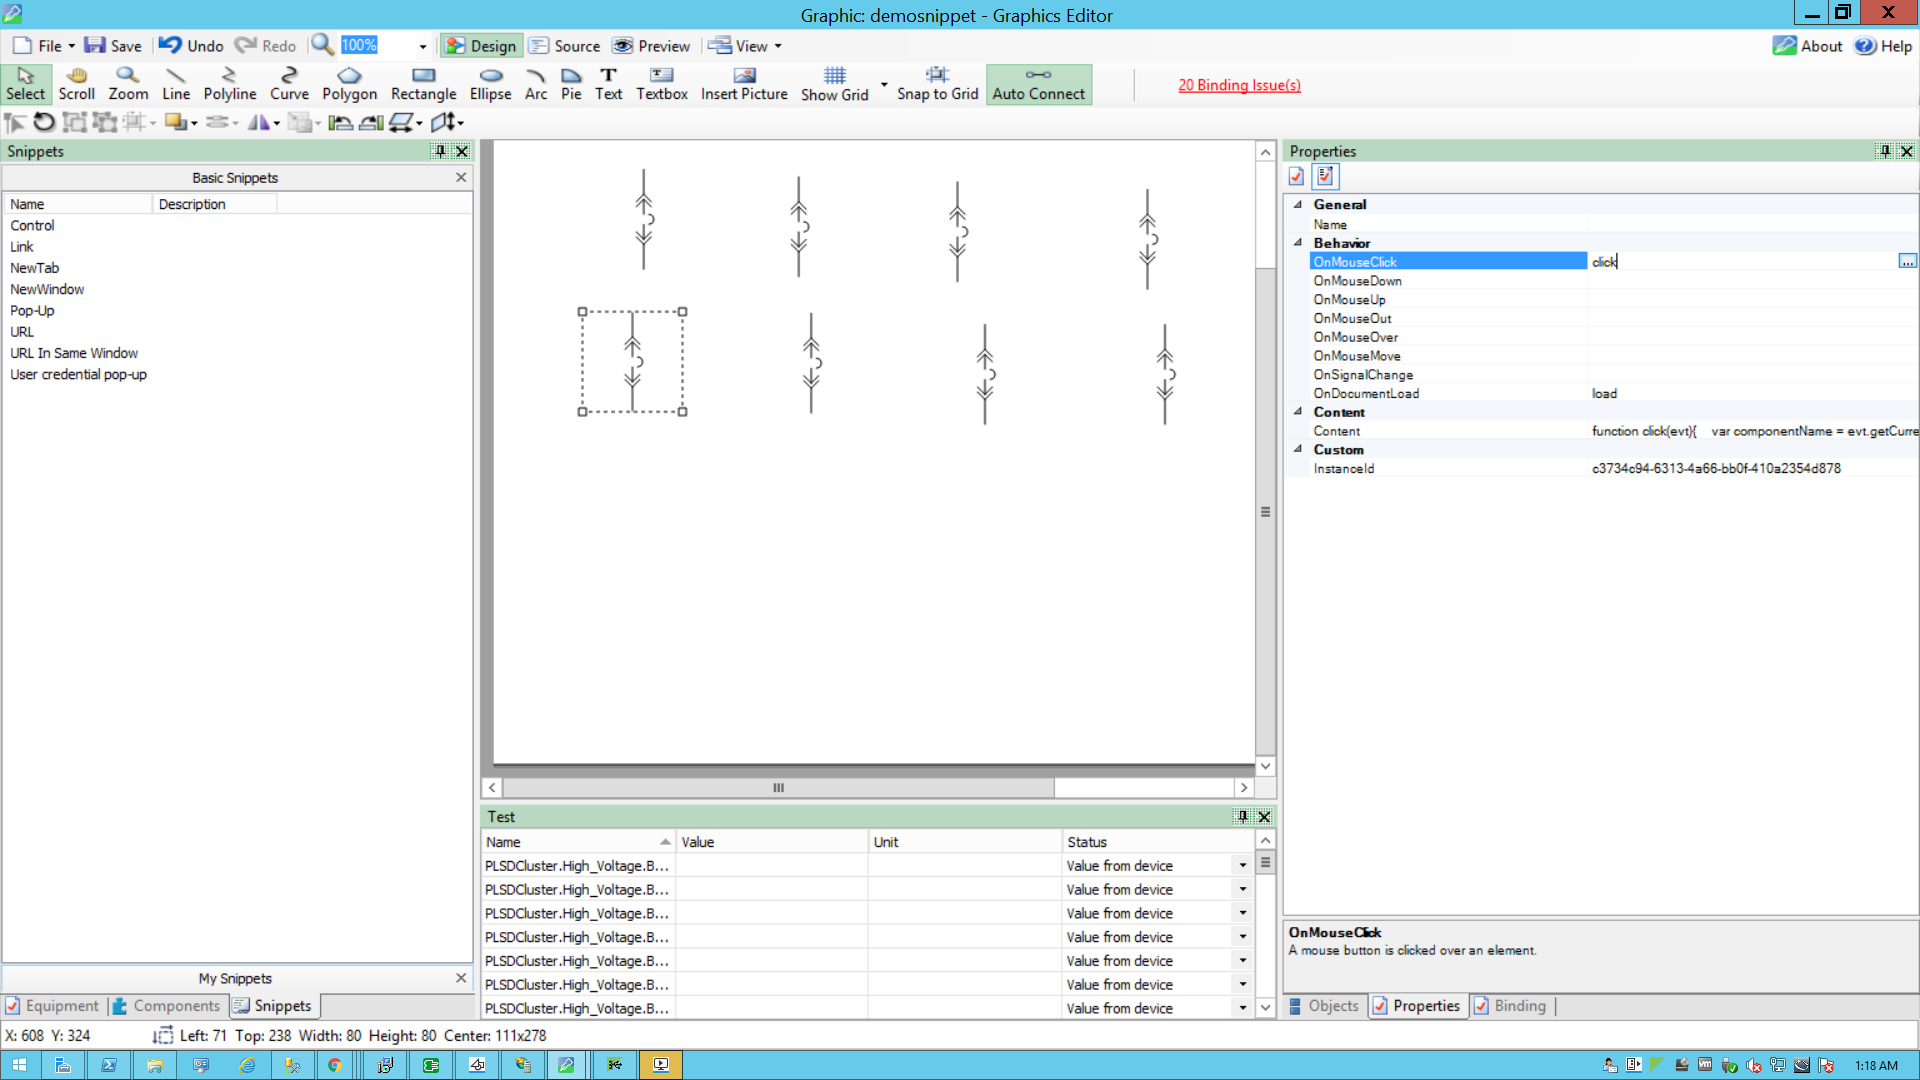
- In the bottom right corner, click Properties, and then expand Behavior.
- Click the ellipsis next to OnMouseClick.
- Use the following script to configure the PopUp:
- In the Object pane, click the Link to edit.
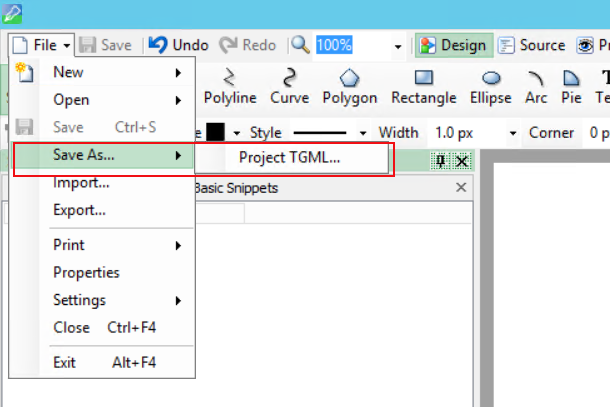
- Go to File > Save As > Project TGML.
- Enter a file name, and then click Save.

The following screen is displayed:
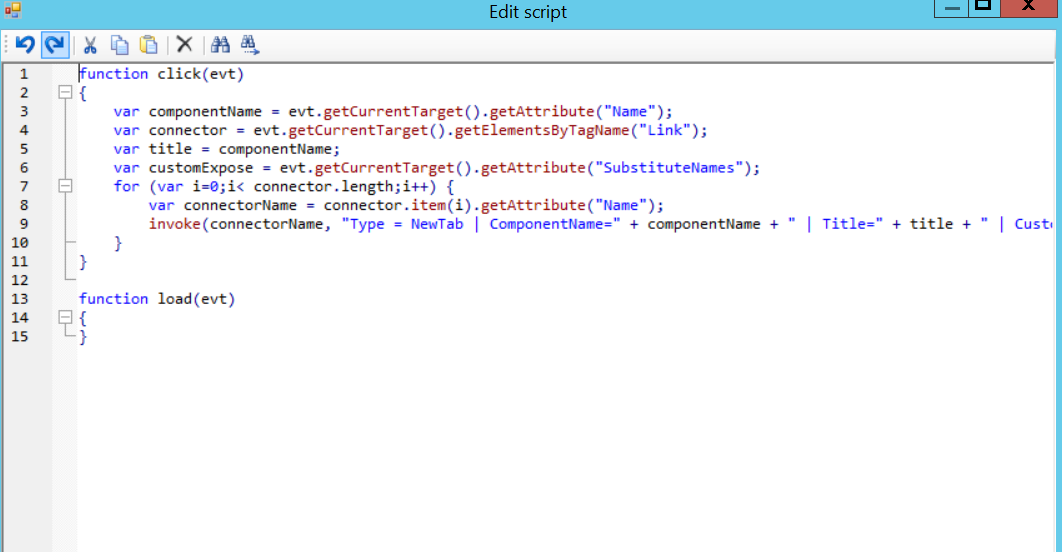
function click(evt)
{
    //componentName is name of the component based on the component
    // selection we will fetch the component name
    var componentName = evt.getCurrentTarget().getAttribute("Name");

    //Collecting the links from the Component
    var Link = evt.getCurrentTarget().getElementsByTagName("Link");

    //InstanceId-It is auto generating id each component pop up selection
    // it will create new instance id
    var instanceId = evt.getCurrentTarget().getAttribute("InstanceId");

    //title is component name used for showing the title
    var title = componentName;

    //customExpose-If two breakers are internally connected (means multi equipment)
    var customExpose = evt.getCurrentTarget().getAttribute("SubstituteNames");

    //Height & width can be configurable by the user
    var width = 370;
    var height = 370;

    //showTitleBar: Displays the Title Bar in the target pane when set to Yes
    var showTitleBar = "Yes";

    for (var i=0;i< Link.length;i++){

        //LinkFileName : Extracting the file name from the Link
        var LinkFileName = Link.item(i).getAttribute("Name");

        //With invoke function you can configure the graphic component in Graphics Editor
        //to open a linked target object in a target location when you perform an
        //action(Pop-Up) on the component
        invoke(LinkFileName, "Type = PopUp | ComponentName=" + componentName + " | InstanceID=" + instanceId + "  | Title=" + title + " | Width=" + width + " | Height=" + height + " | ShowTitleBar =" + showTitleBar + " | CustomExpose=" + customExpose);
    }
}

function load(evt)
{

}If the TGML file is present in same project, enter the same TGML file name.
If the TGML file is present in another project, enter the TGML file with project name.

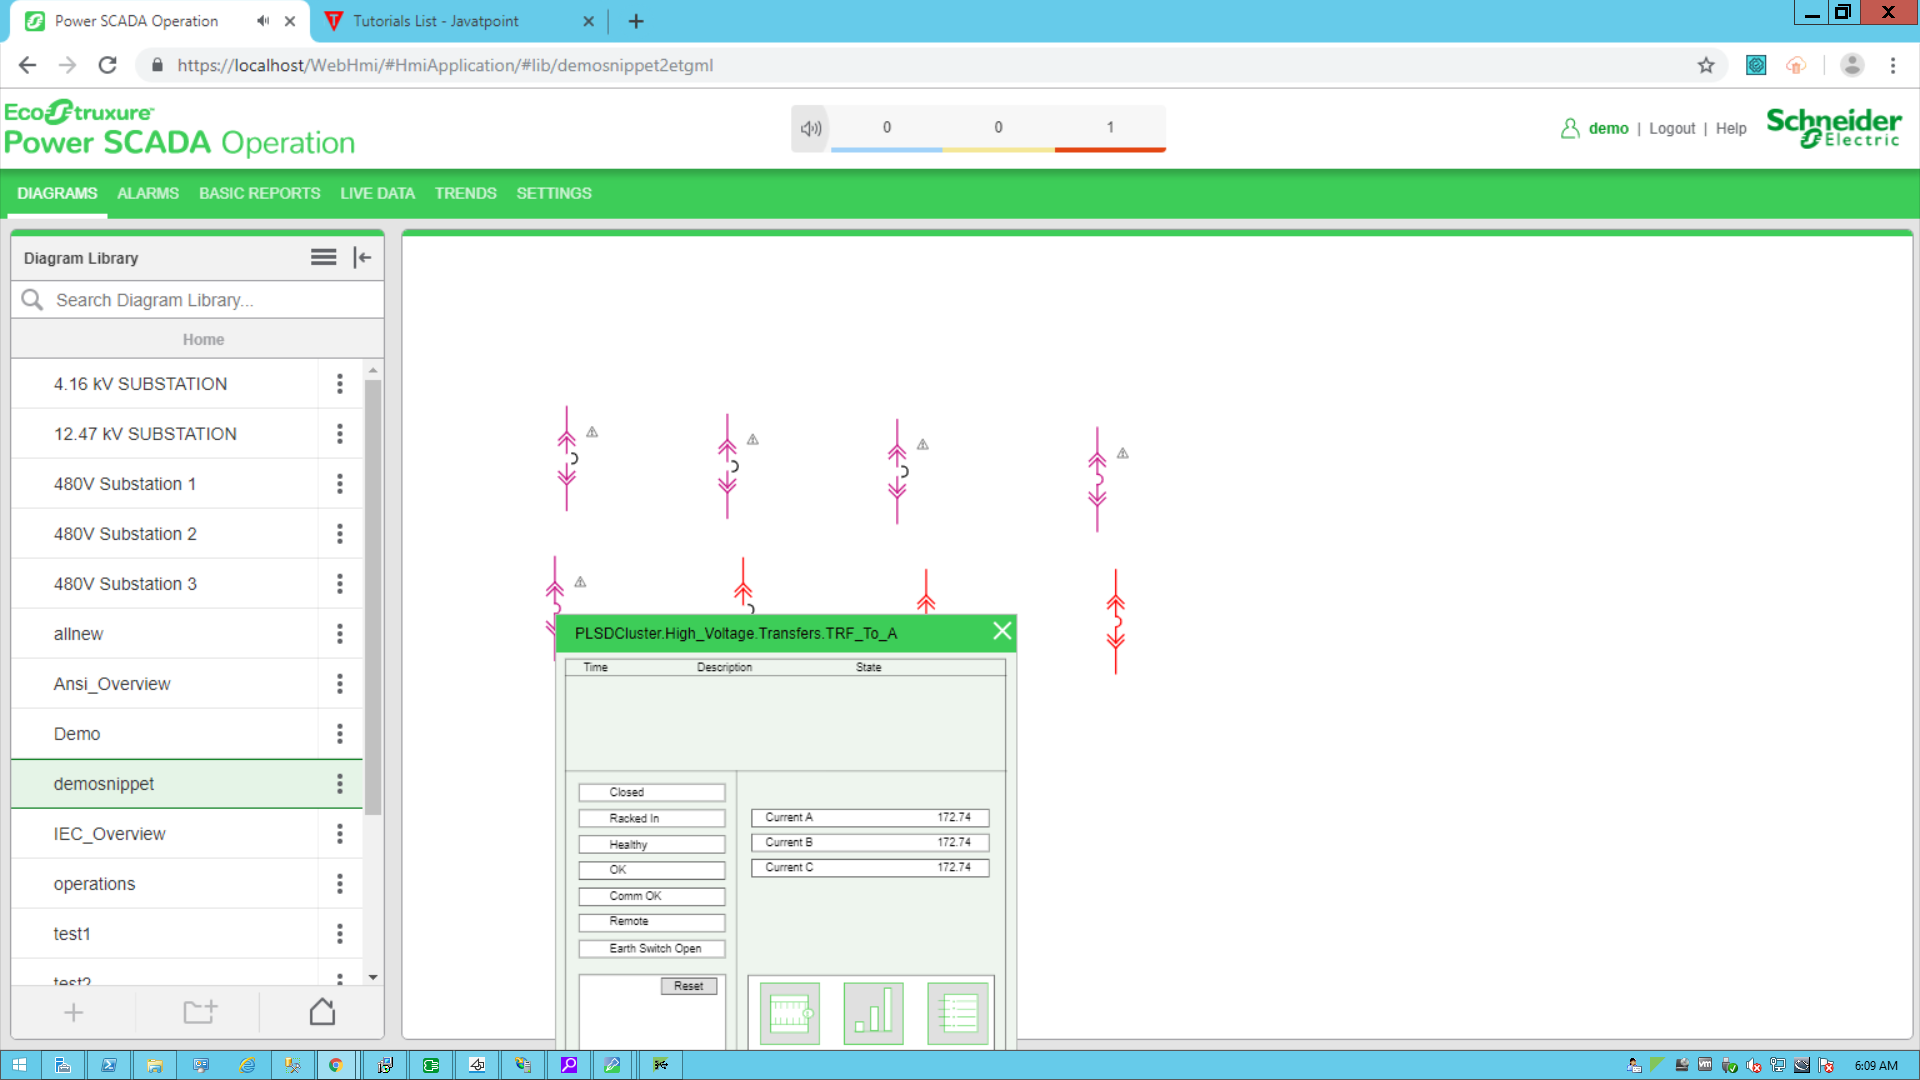
To view the snippet behavior:
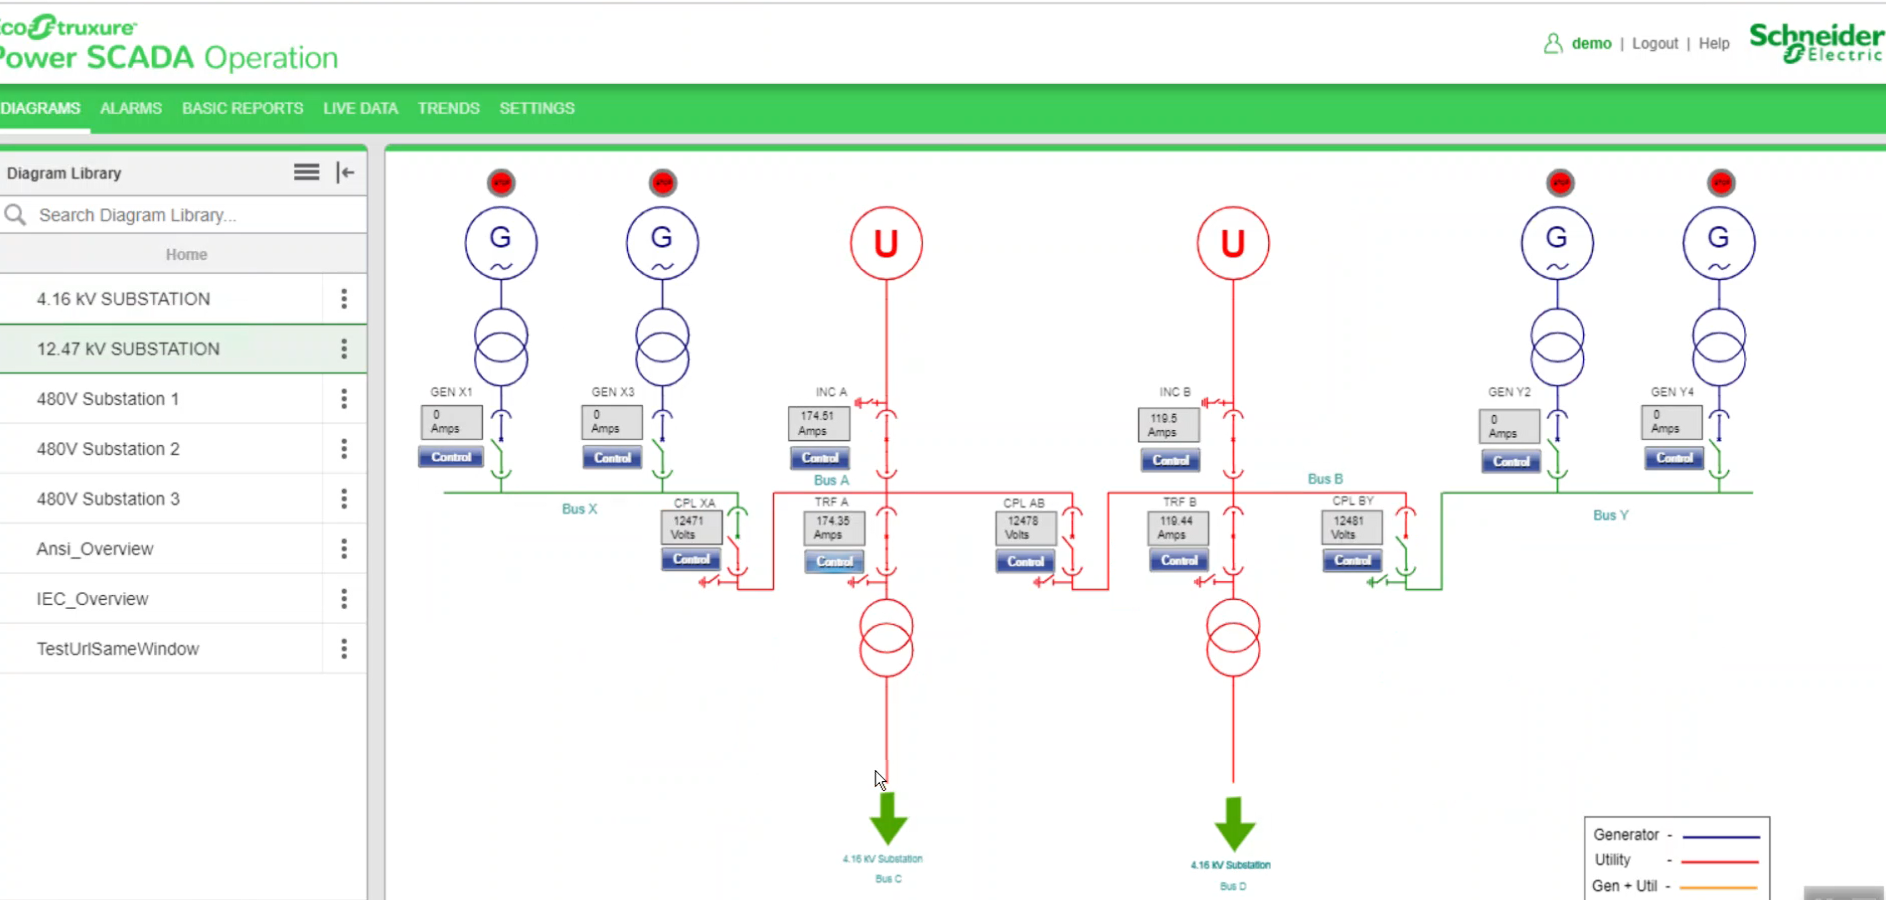
- Log into PO Web Applications (https://localhost/webhmi or https://ipaddress/webhmi).
- Select the new TGML file from the Diagram Library.
- Click the breaker to open a pop-up displaying real time readings from the component.
The Power Operation Web Applications Home page appears.