Control Operation
You can use the Control Operation snippet to control equipment, circuit breakers, and to change device states. Only authorized users can perform this control operation.
![]() warning
warning
inaccurate data results
| ● | Do not incorrectly configure the software or the devices. |
| ● | Do not base your maintenance or service actions solely on messages and information displayed by the software. |
| ● | Do not rely solely on software messages and reports to determine if the system is functioning correctly or meeting all applicable standards and requirements. |
| ● | Consider the implications of unanticipated transmission delays or failures of communications links. |
Failure to follow these instructions can result in death, serious injury, equipment damage, or permanent loss of data.
![]() warning
warning
unintended equipment operation
| ● | Do not use the software or devices for critical control or protection applications where human or equipment safety relies on the operation of the control action. |
| ● | Do not use the software to control time-critical functions. |
| ● | Do not use the software to control remote equipment without proper access control and status feedback. |
Failure to follow these instructions can result in death or serious injury, or equipment damage.
To configure and operate controls:
- Open the Graphics Editor.
- Select the Components pane.
-
To configure the default Control component:
- In the Components pane, select Miscellaneous.
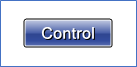
- Select the Control component and drag and drop it on the workspace.
-
Select the Properties pane and enter the DataPoint value.
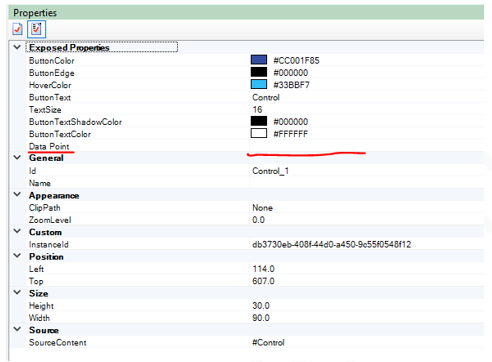
NOTE: The Control component contains the DataPoint attribute by default.
- To build a custom Control component:
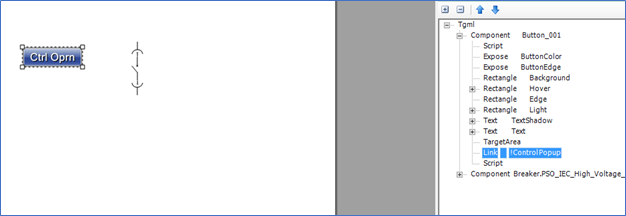
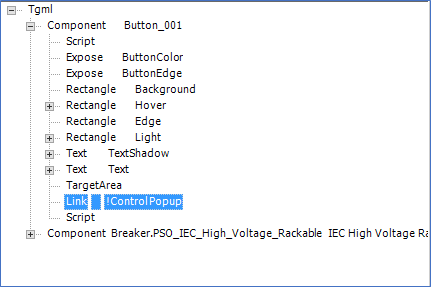
- Select the required component.
The Link default name is Control Popup.
The Script creates the following syntax:
Copyinvoke(connectorName, "Type = PopUp | ComponentName=" + componentName + " | DataPoint = "+ dataPoint +" | Title=" + title + " | Width=" + width + " | Height=" + height + " | ShowTitleBar =" + showTitleBar + " | ShowUnamePwd =" + showUnamePwd +" | UserCredBottom = "+usercredbottom +" | UserCredLeft = "+ usercredleft+" | UserCredWidth = "+ usercredwidth +" | UserCredHeight = "+usercredheight +" | UserCredBackColor = "+usercredbackcolor+" | UnamePwdWidth = "+unamepwdwidth+" | UnamePwdColor = "+unamepwdcolor);You can modify the following default parameters to configure the pop-up window:
Parameter Default value width 40 height
60 showTitleBar "Yes" showUnamePwd
"Yes" usercredbottom
36 usercredleft
10 usercredbackcolor
"white" usercredwidth
80 usercredheight
25 unamepwdwidth
50 unamepwdcolor
"#9FA0A4" Enter this Value into the DataPoint Attribute exposed on the Use object. In the following example, the Value is c1.Test2...
- Click OK.
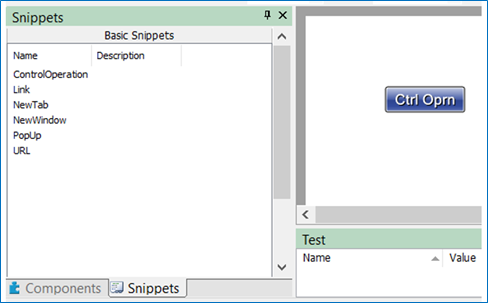
NOTE: The Control Operation snippet adds two additional properties: Link and Script.

-
Navigate to the following path to save the file:
File > Save As > Project TGML
- Type the file name in the File name field.
- Click Save.
- Open a web browser.
-
Type https://localhost/webhmi in the address bar.
NOTE: If Power Operation 2024 is installed on the remote server, type a valid URL in the address bar.
- Click Enter. The Power Operation Web Applications Home page appears.
- Select the new TGML file.
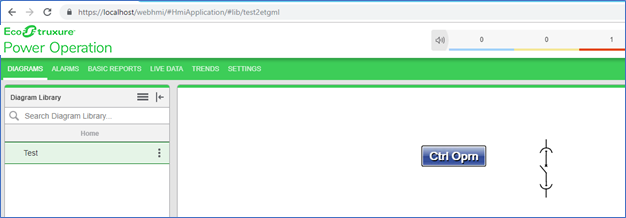
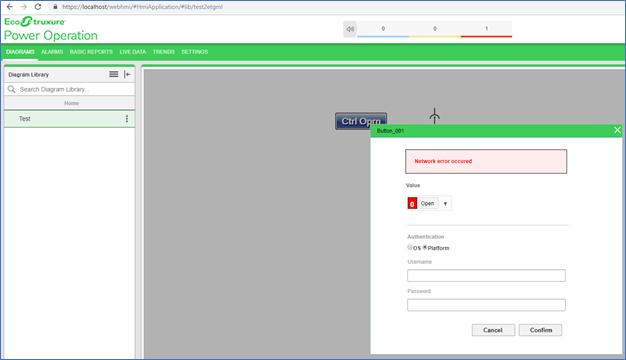
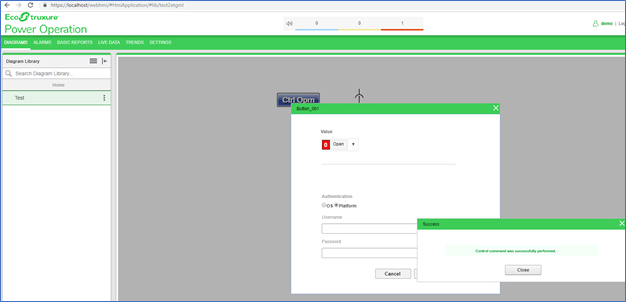
- Click the Control component to open the control operation pop-up
- Select a value (Open or Close) to perform the operation.
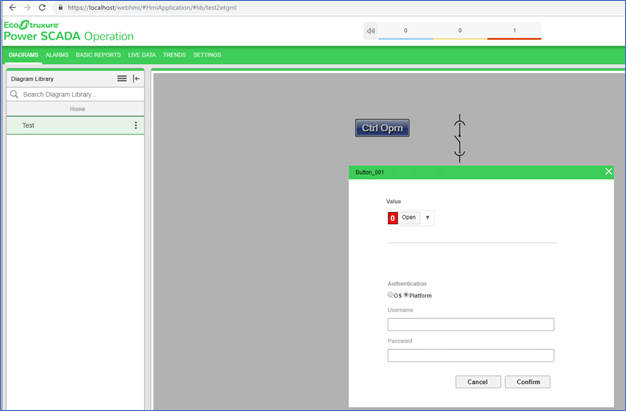
- Enter Username and Password.
- Click Submit, and one of the following messages will appear:
-
Success: Appears when the selected value (Open/Close) is updated on the device.
-
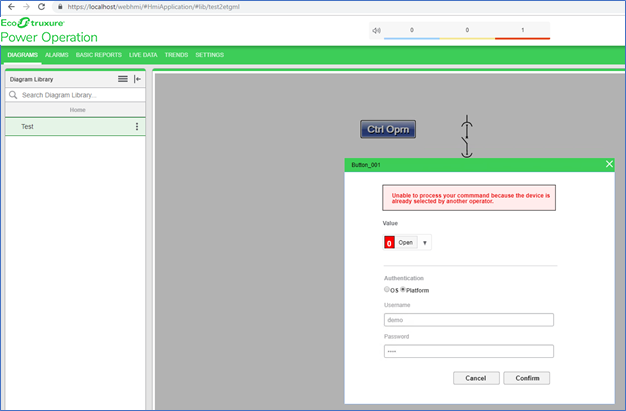
Unsuccessful: Appears if the operation fails for one of several reasons, including:
- The datapoint does not exist
- There was a network error present
- There was an authentication error
- Device problem or issue
- The datapoint does not exist
-
Authentication failed: Appears if the provided credentials are not valid:
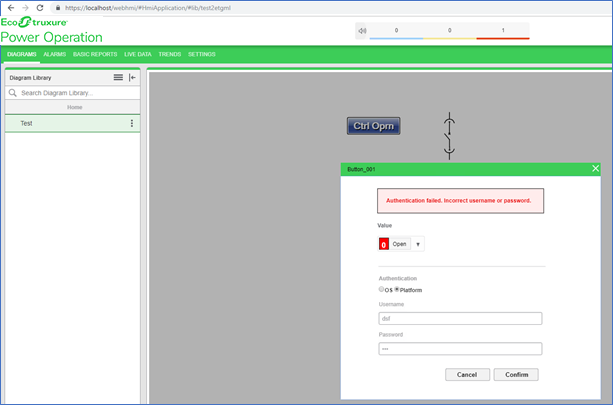
-
Data point does not exist: Appears if the provided tag names are not correct:
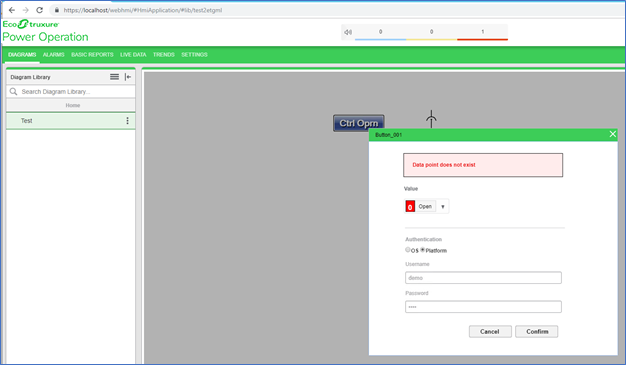
-
Network error: Appears if any network related issue occurs: