OPC Server Configuration of EcoStruxure Machine Expert Controllers with the OPC Configuration Tool
|
Step |
Action |
|---|---|
|
1 |
Right-click the Server node, and execute the Append PLC command from the contextual menu: 
|
|
2 |
Select the entry GATEWAY3 from the Interface list. 
For further information on the available interfaces, refer to the chapter Configuration Options According to the Interface. For a general description of the available parameters for controller configuration, refer to the section Configuration Parameters for the Controller. |
|
3 |
Select the PLC1 node to rename it (MyPLCexample in this example). 
|
|
4 |
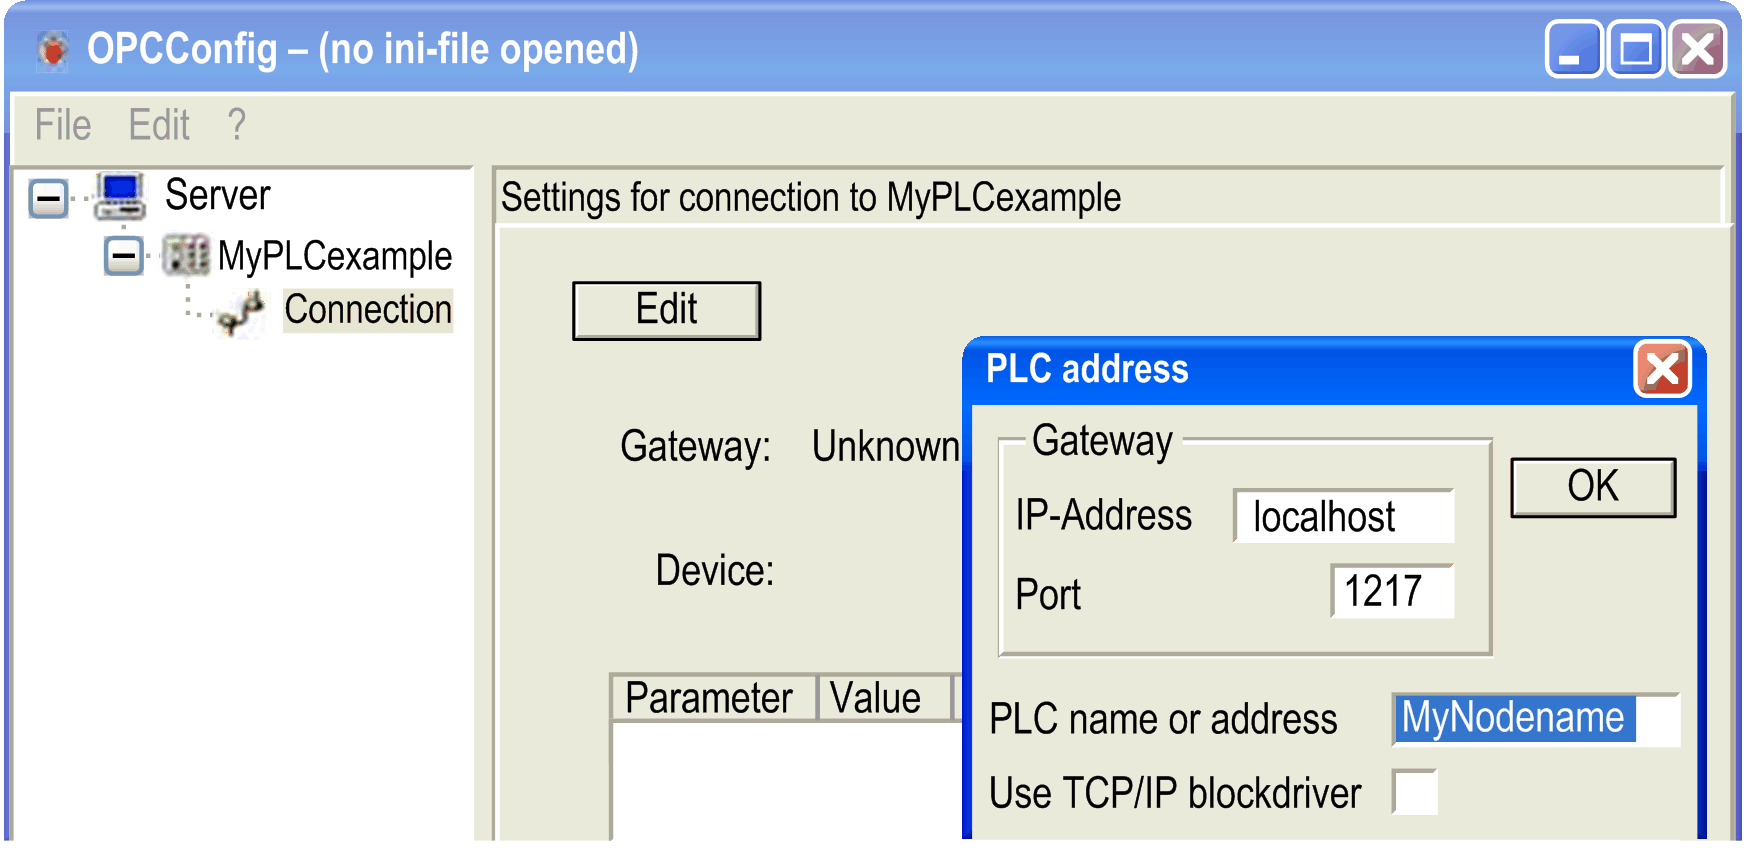
Select the Connection node, and click the Edit button. Result: The PLC address dialog box is displayed: 
|
|
5 |
Enter the node name or address of the controller (for example: MyPLCexample) to be able to access your variable from your OPC client. Alternatively, you can activate the option Use TCP/IP blockdriver and enter the IP address of PLC and the IP port of PLC in the boxes that become editable with this option enabled. This function is not available for all supported controllers. Consult the Programming Guide specific to your controller for further information. |
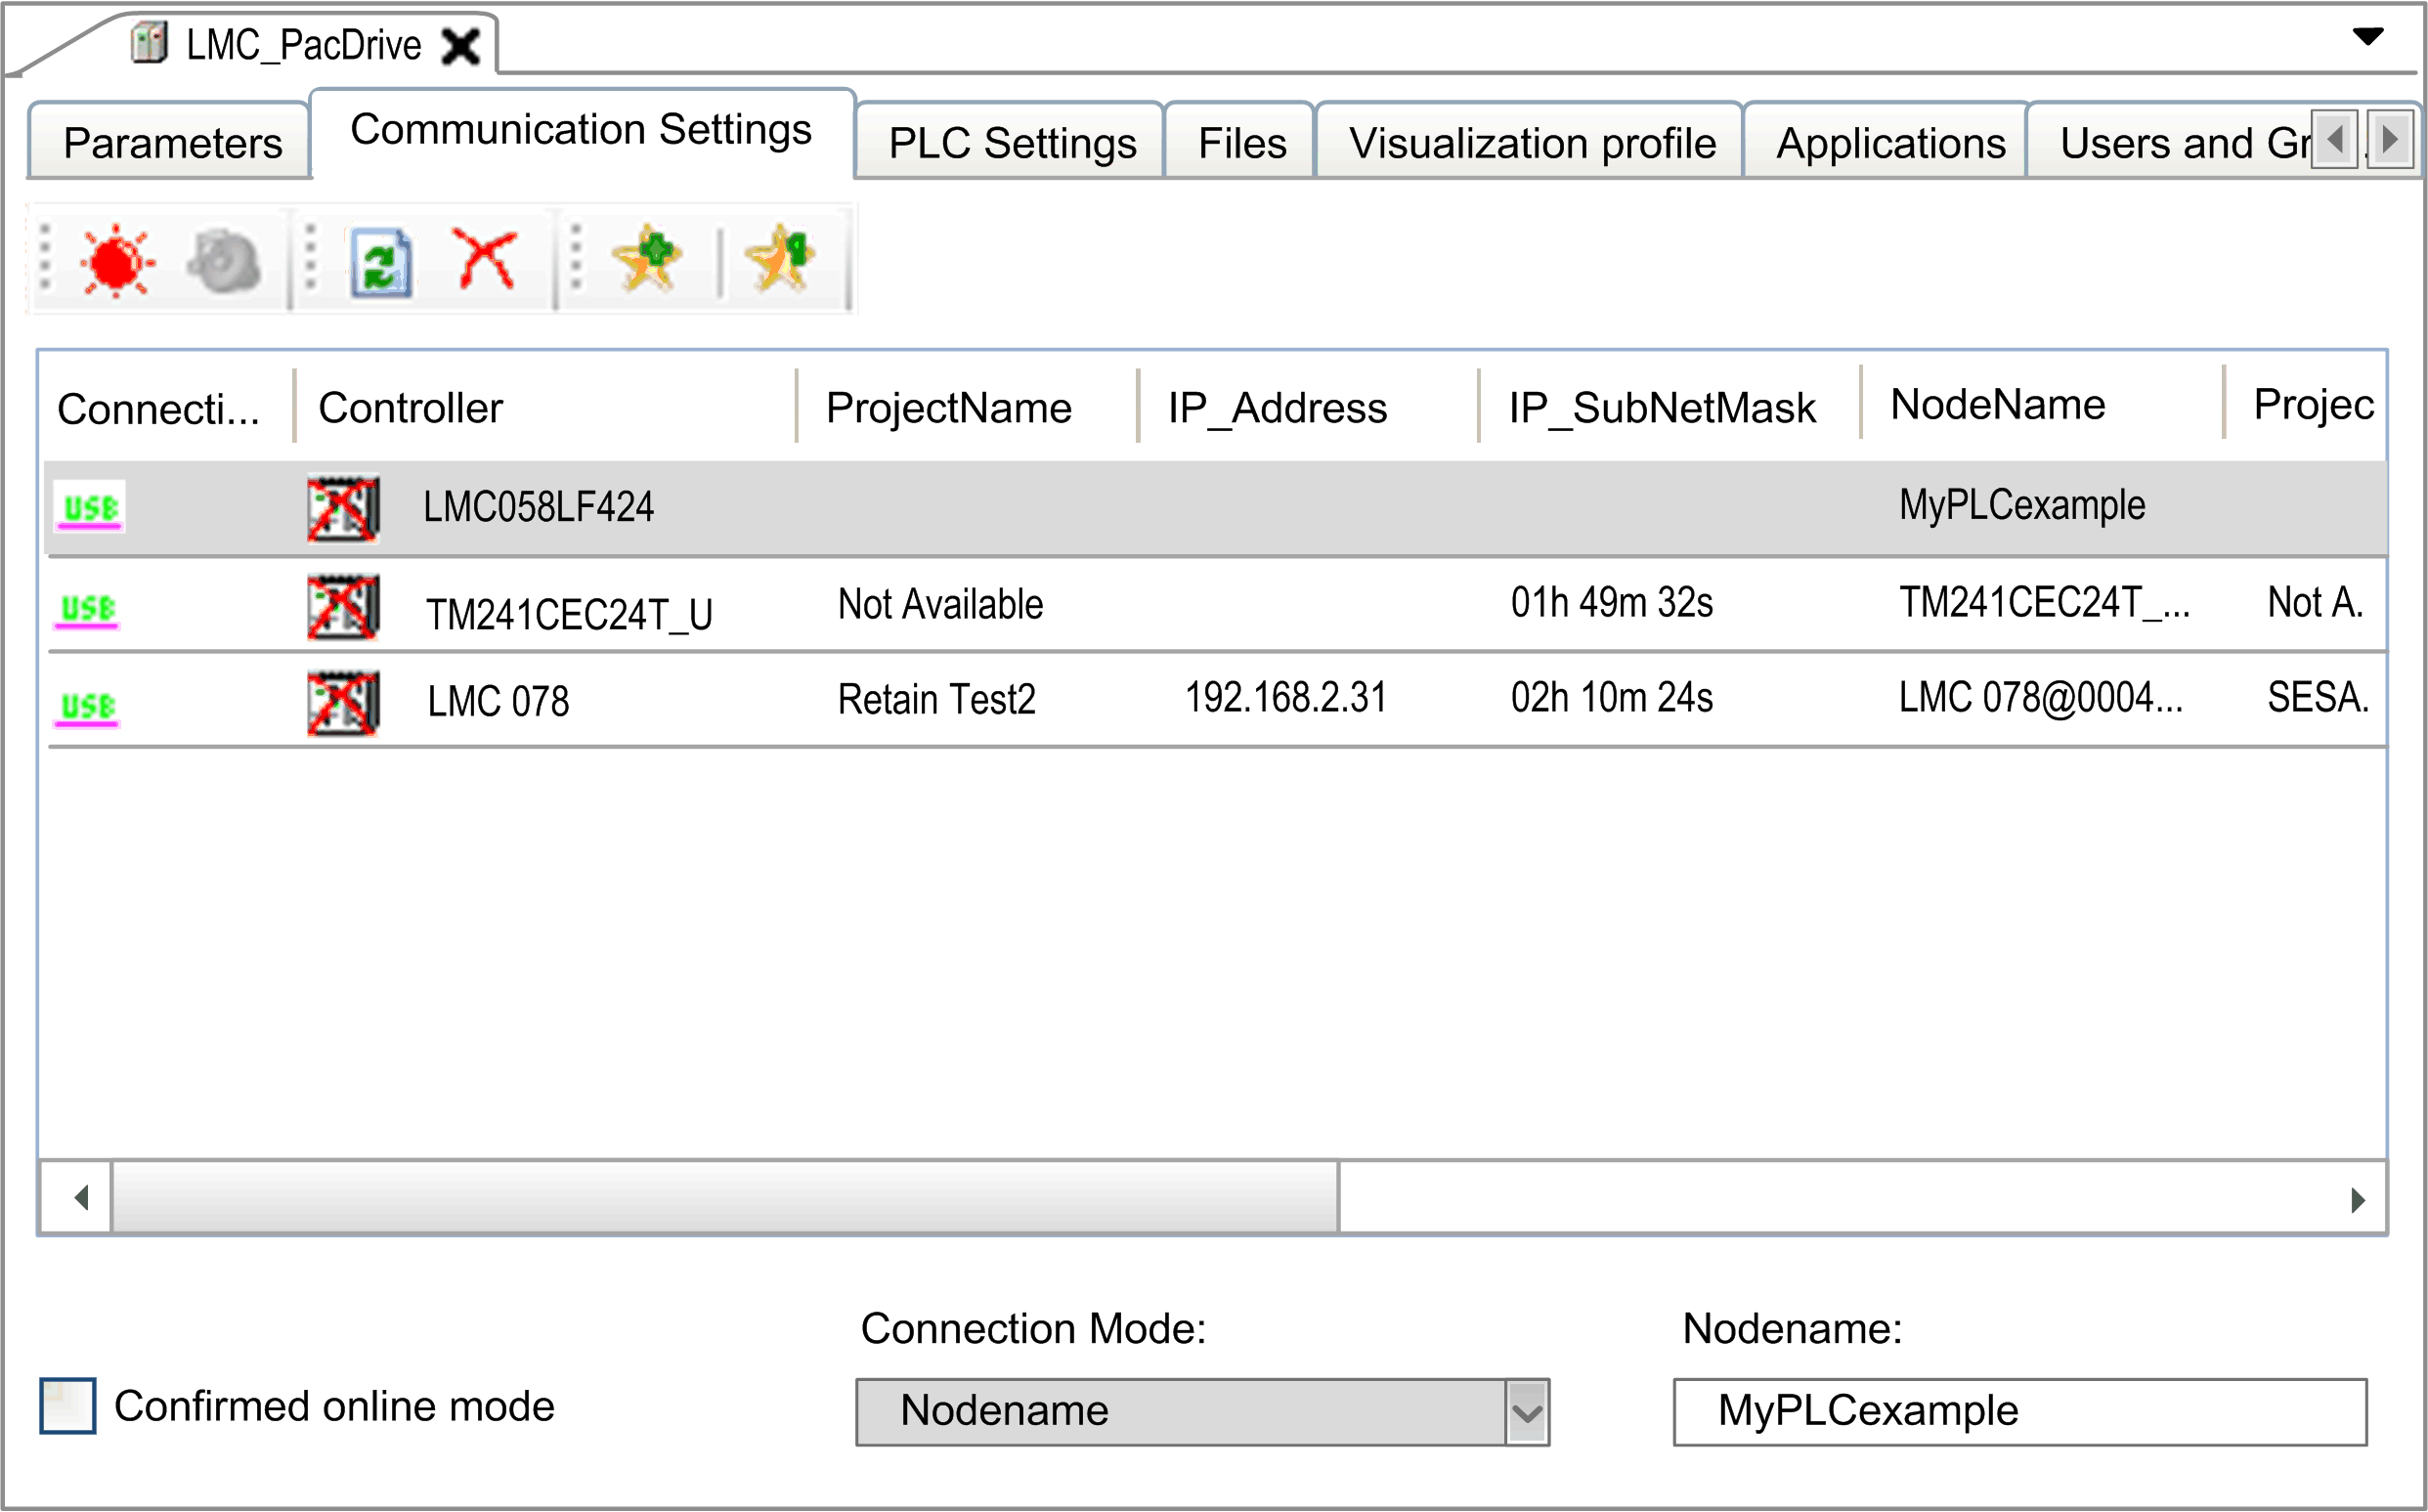
The address is provided in the EcoStruxure Machine Expert Communication Settings dialog box of your project. The address can be physical or logical. To avoid address value reconfiguration when there are many devices in your project, it is a good practice to use logical addresses.
Modifying / Retrieving the Name of the Controller
In the example provided, the controller name MyPLCexample is used. To modify the name of the controller in the Communication Settings tab of the device editor, refer to the section Specifying Unique Device Names (NodeNames) in the Programming Guide.
NOTE: You can also use this process to retrieve the present controller name for pasting it into the PLC name or address box of the PLC address dialog box.
In the Communication Settings tab in controller selection mode, you can copy the nodename of the controller selected in the list of controllers from the Nodename box:

|
Step |
Action |
|---|---|
|
1 |
Paste the nodename as new value in the PLC name or address box of the PLC address dialog box: 
|
|
2 |
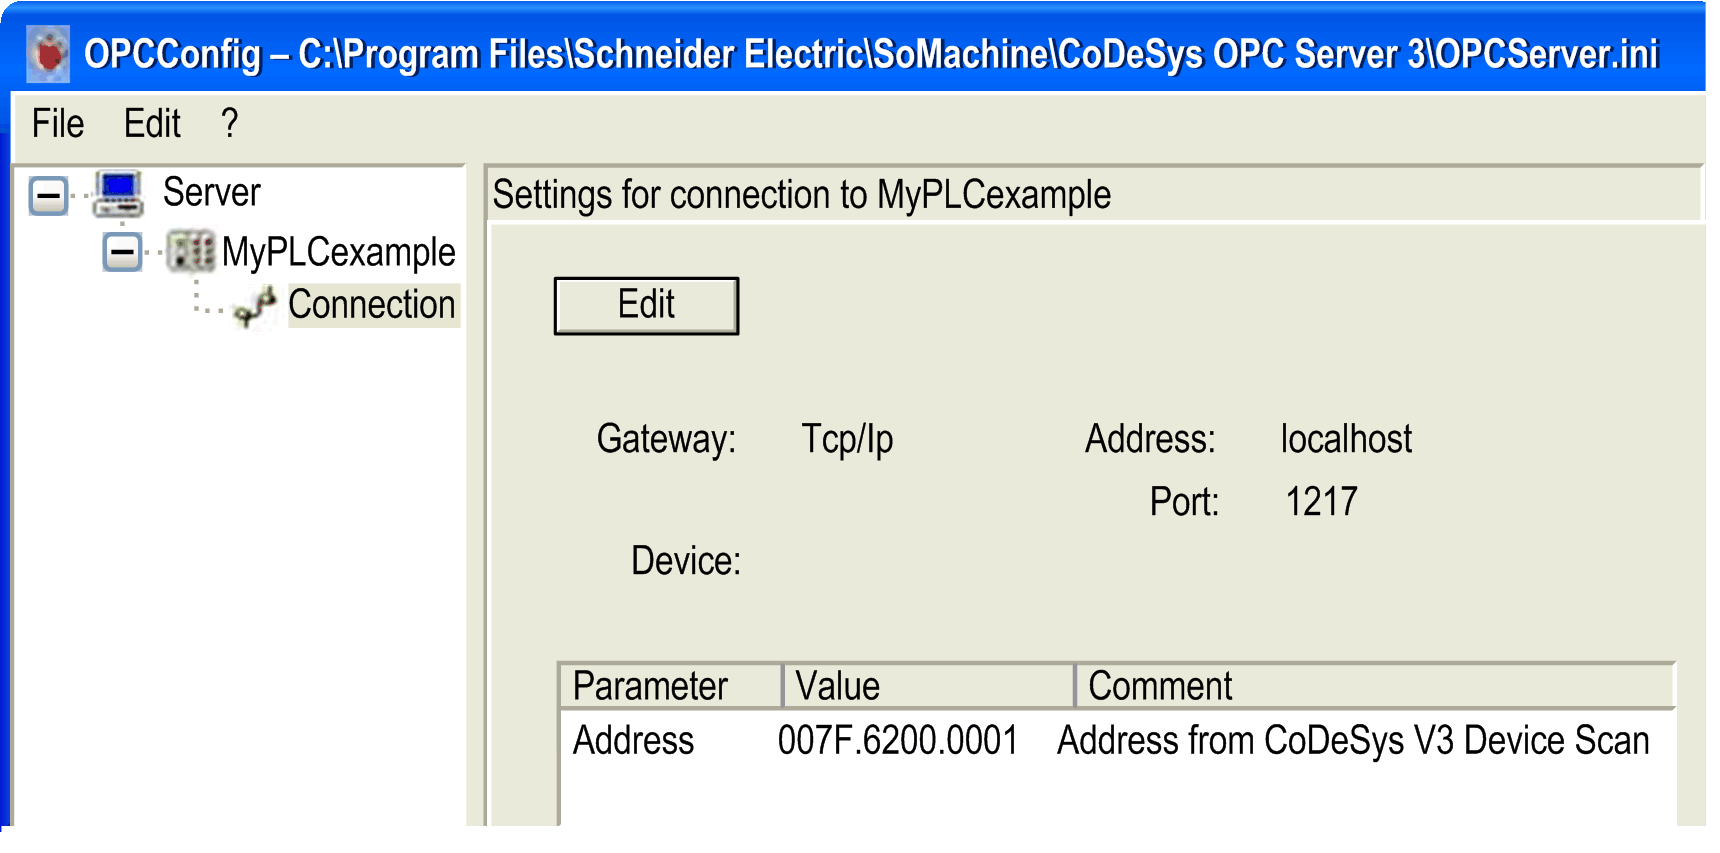
Click the OK button. Result: The following dialog box is displayed: 
|
|
3 |
From the File menu, execute the command Save As. Result: The following dialog box is displayed: 
|
|
4 |
Enter or select, if available, the file name OPCServer.ini, and click the Save button. NOTE: The name of the file must be OPCServer.ini. Do not use another file name. For further information, refer to the OPCServer.ini File chapter in the Appendix. |