Replacing a Redundant Power Supply
The power supply modules are hot swappable. Hot swapping a power supply is the process of inserting and extracting a power supply from an operating power system.
AC power supply is connected separately to each module. Up to two power supplies may be on a single AC power source:
oExtraction: The AC power is disconnected from the power supply first and then the power supply is extracted from the subsystem. This could occur in standby mode or powered on mode.
oInsertion: The module is inserted into the cage and then AC power is connected to the power supply module.
|
Step |
Action |
|---|---|
|
1 |
Use the power switch to turn off the inoperative power supply module. |
|
2 |
When the LEDs are no longer lit, unplug their power cord. |
|
3 |
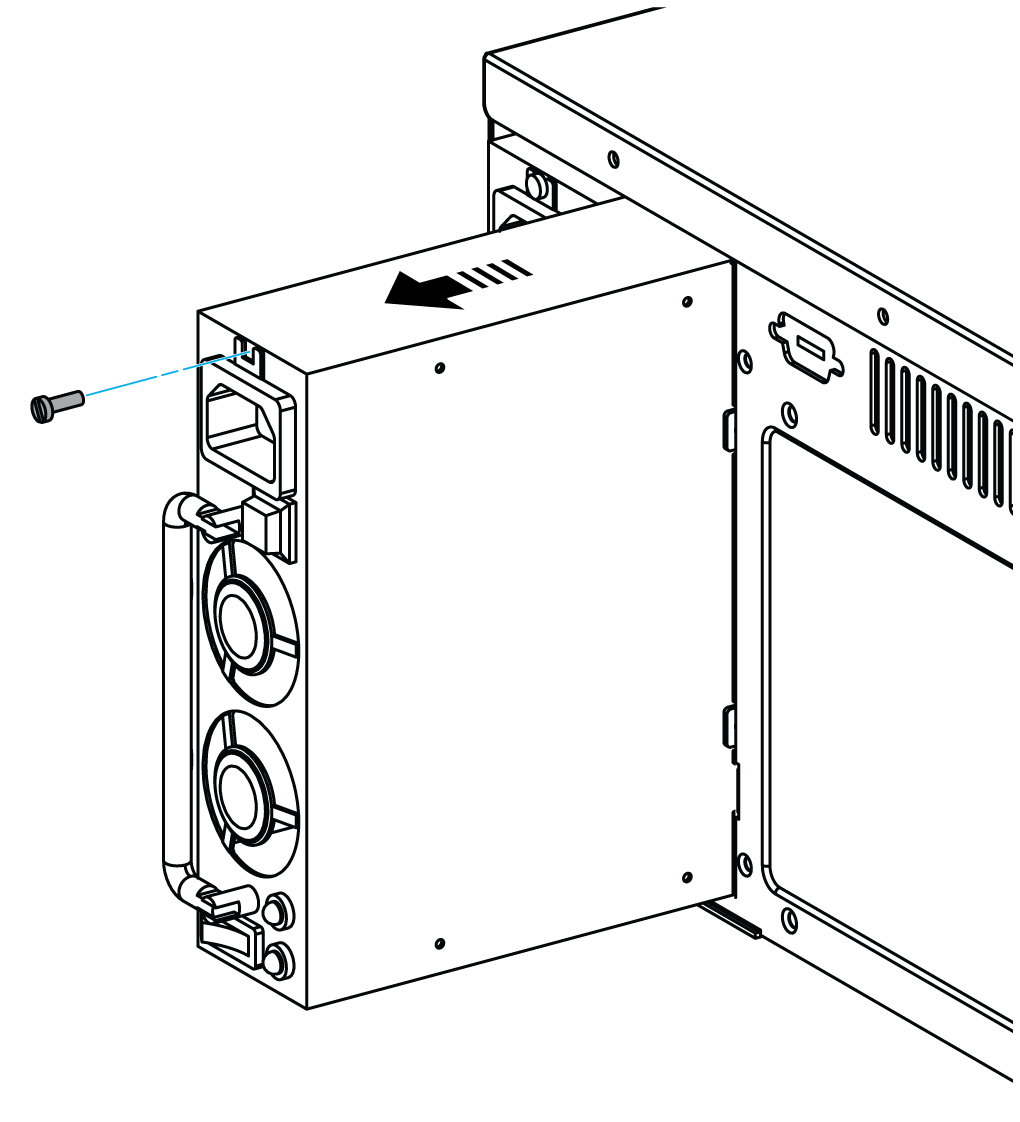
Remove the screw above the module. |
|
4 |
Use the handle to slide out the module: 
|
|
5 |
Verify that the new power supply module has the same rating as the power supply module that was removed. |
|
6 |
Slide the new power supply inward until it locks into position. |
|
7 |
Fold the handle against the module. |
|
8 |
Replace the screw. |
|
9 |
Plug in the power cord. |
|
10 |
Turn on the new power supply module. |
There are two LEDs to indicate the power supply status. When AC is applied to the power supply module and standby voltages are available the green LED turn-on to indicate that all the power outputs are available. The amber LED turns-on to indicate that the power supply has declined.
|
Event |
Green led |
Amber led |
|---|---|---|
|
No AC power plug-in |
OFF |
Flashing |
|
AC OK and power turn-off |
Flashing |
OFF |
|
AC OK and power turn-off and no failure |
ON |
OFF |
|
AC OK and power turn-off and failure event |
OFF |
Flashing |
|
AC OK and power turn-off and warning event |
Flashing |
Flashing |
This is an alarm to report the one of the single modules is declined or without the internal signal in redundant mode. It is to sound the alarm until the internal signal returns or push the RESET button.