Front Storage Drive Trays, Description, and Installation
|
|
|
HAZARD OF ELECTRIC SHOCK, EXPLOSION OR ARC FLASH |
|
oRemove all power from the device before removing any covers or elements of the system, and prior to installing or removing any accessories, hardware, or cables. oUnplug the power cable from both the Magelis Industrial PC and the power supply. oAlways use a properly rated voltage sensing device to confirm power is off. oReplace and secure all covers or elements of the system before applying power to the unit. oUse only the specified voltage when operating the Magelis Industrial PC. The AC unit is designed to use 100...240 Vac input. |
|
Failure to follow these instructions will result in death or serious injury. |
|
NOTICE |
|
ELECTROSTATIC DISCHARGE |
|
Take the necessary protective measures against electrostatic discharge before attempting to remove the Magelis Industrial PC cover. |
|
Failure to follow these instructions can result in equipment damage. |
NOTE: Remove all power before attempting this procedure.
|
Step |
Action |
|---|---|
|
1 |
Disconnect the power cord to the Rack iPC. |
|
2 |
Touch the housing or ground connection (not the power supply) to discharge any electrostatic charge from your body. |
|
3 |
Open the front door. |
|
4 |
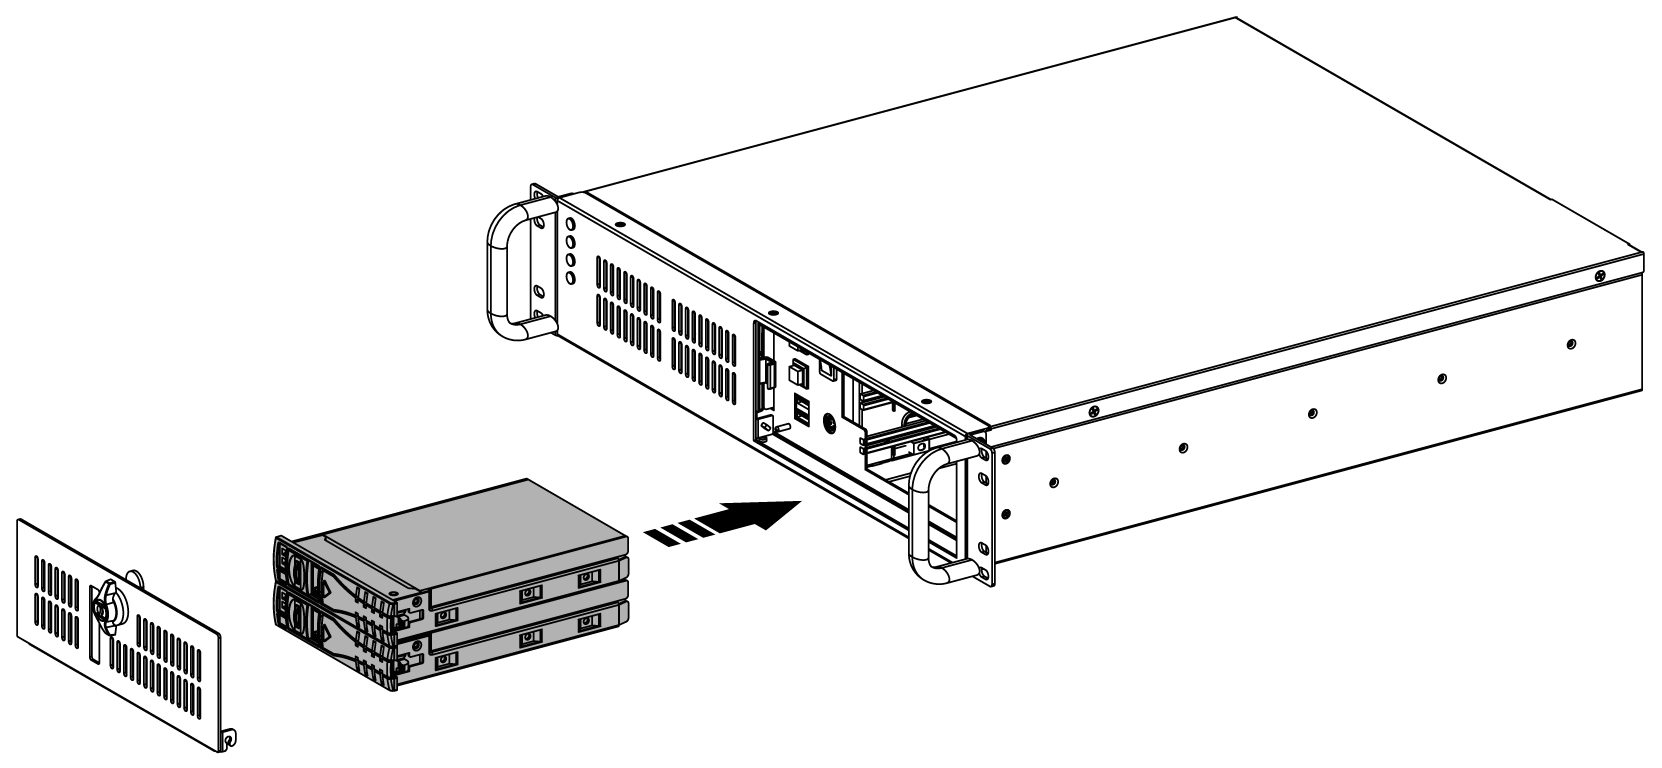
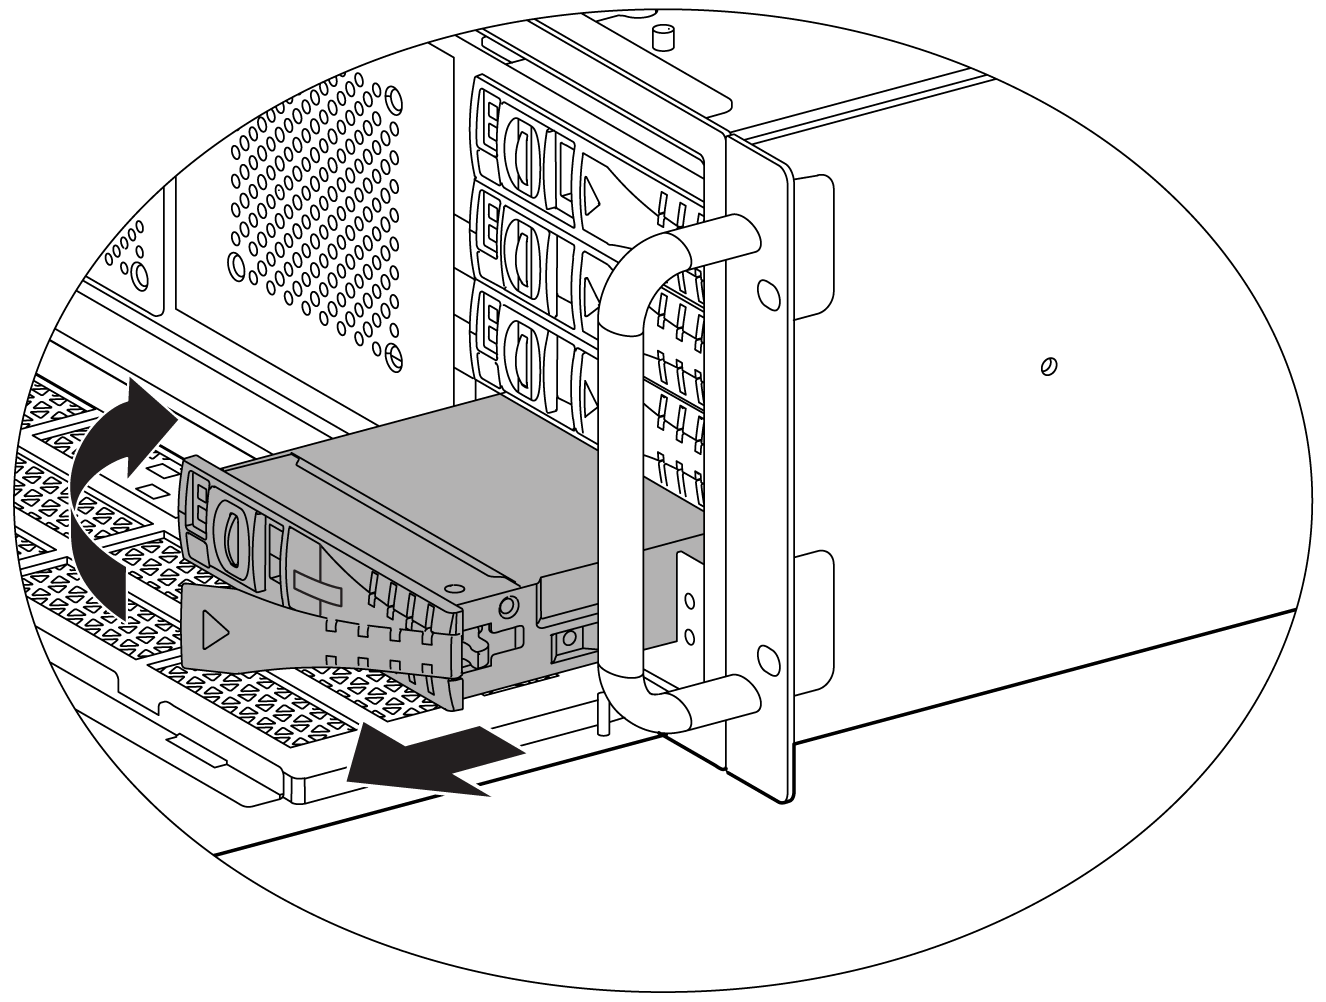
If you want to install a SATA HDD into the lower mobile tray, remove the front door first for the Rack iPC Optimized. The small door is attached to the rack with hinges without screws. Left-shift the key latch of one HDD tray to unlock the tray. Hold the handle of the tray and draw it out from the chassis: 
Pushing up the latch and removing the mobile tray for the Rack iPC: 
|
|
5 |
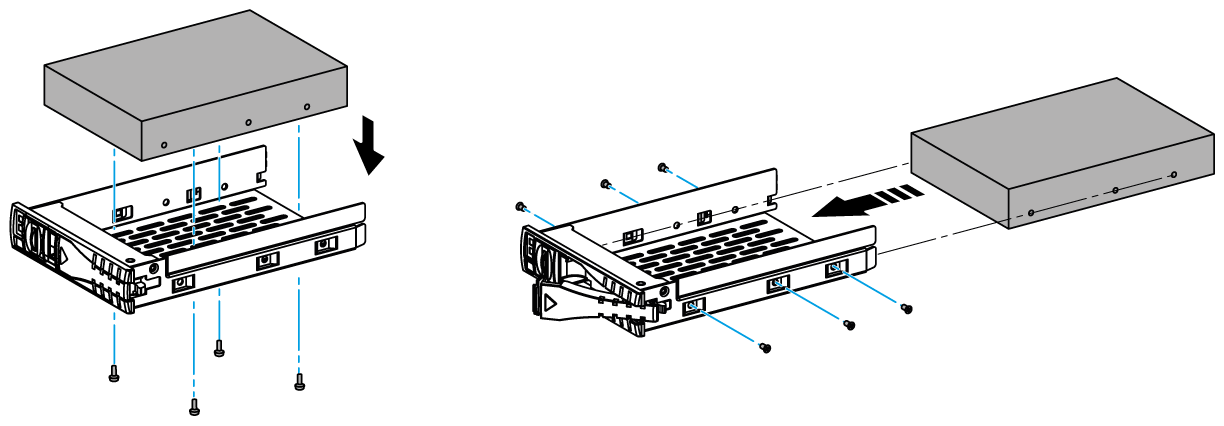
Slide one SATA disk drive into the proper location in the tray and fix it with 4...6 screws. Installing a 2.5” or 3.5” SAS/SATA HDD: 
|
|
6 |
Return and push the HDD tray to the chassis until the handle of tray is moving back. Right-shift the key latch of the HDD tray to lock the tray. |
|
7 |
Repeat steps 3 to 6 if there is a second SATA HDD to install. |
|
|
|
OVERTORQUE AND LOOSE HARDWARE |
|
oDo not exert more than 0.5 Nm (4.5 lb-in) of torque when tightening the installation fastener, enclosure, accessory, or terminal block screws. Tightening the screws with excessive force can damage the installation fastener. oWhen fastening or removing screws, ensure they do not fall inside the Magelis Industrial PC chassis. |
|
Failure to follow these instructions can result in injury or equipment damage. |