An SVN repository usually saves information as a file system tree, a hierarchy of files, and directories. Any number of clients connects to the SVN repository and reads or writes changes to the files in revisions.
Notice
Consult with your IT specialists for more information, for example how to create an SVN repository. For production purposes, we recommend a strictly dedicated administrative SVN server.
We recommend that you create the suggested default directory structure in the SVN repository.
See also
Creating an SVN repository for testing purposes
Notice
Use the file:// access method for testing purposes only.
Note
You can reach SVN repositories that were created in format 1.8 or 1.9 via the file:// protocol.
For testing purposes, you can create a local SVN repository without installing your own server. The SVN repository is accessed via file:// and provides the same functionality as a server.
Creating a test repository with TortoiseSVN
Requirement: The SVN client TortoiseSVN 1.9 is installed on the development system.
Create a new, empty folder on your local file system. The test repository will be created there.
⇒ Example: D:\\SVN repository
Click TortoiseSVN ‣ Create repository here .
⇒ The dialog Create repository opens.
Click Create directory tree.
⇒ The SVN repository is created.
See also
Documentation TortoiseSVN Documentation TortoiseSVN
|
file:/// |
Direct access to an SVN repository (on local hard drive) |
|
http:// |
Access via WebDAV protocol to Apache server that is supported by SVN |
|
https:// |
As http://, but with SSL encryption |
|
svn:// |
Access via own protocol to an svnserve server |
|
svn+ssh:// |
As svn://, but tunneled via SSH |
Import the project into the SVN repository.
Open the CODESYS project that you want to save in the SVN repository.
⇒ Example: A.project is open.
Click Project ‣ SVN ‣ Import project to SVN .
⇒ The Browse SVN repository dialog opens.
Select the directory file:///D:/SVN repository/trunk in the directory tree.
Select the ![]() command.
command.
⇒ The Create remote directory dialog opens.
Specify the URL for the new directory.
Note: Because the new directory should contain the CODESYS project, specify the project name with extension here.
⇒ file:///D:/SVN%20repository/trunk/A.project
Click OK to close the dialog.
Select the new project and click OK to exit the Browse SVN repository dialog.
⇒ The Import Project to SVN dialog opens. The directory file:///D:/SVN repository/trunk/A.project is specified in URL of SVN repository.
Specify an import message, for example Project for Customer A and click OK.
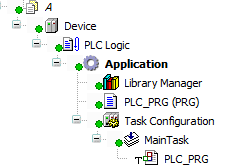
⇒ The project is saved in SVN. Overlaid icons show the SVN status in the object path of CODESYS.

See also