The installation gasket and screw fasteners are required when installing the panel.
Mount the panel in an enclosure that provides a clean, dry, robust, and controlled environment (IP65 enclosure).
NOTE: The protection level of the product may vary from that which is shown on the label, as the value on the label takes into account product aging.
An old gasket can lose its dust and drip resistance. Changing the gasket once a year or when scratches or dirt becomes visible is recommended.
The gasket helps maintain the protection ratings (IP65, IP20) of the panel, and provides additional protection from vibration.
|
Stage |
Description |
|---|---|
|
1 |
Before installing the panel into a cabinet, check that the installation gasket is securely attached to the panel. |
|
2 |
A gasket which has been used for a long period may have scratches or dirt on its surface, and could have lost much of its dust and drip resistance. Change the gasket once a year or when scratches or dirt become visible. |
|
3 |
Make sure that the gasket is inserted into the panel bottom face. |
|
Stage |
Description |
|---|---|
|
1 |
Check that the installation panel or the surface of the cabinet is flat, in good condition and has no jagged edges. Metal reinforcing strips may be attached to the inside of the panel wall, near the panel-cut, to increase the rigidity of the panel. |
|
2 |
Decide on the installation the thickness of the panel based on the level of panel strength required: 1.5 mm (0.06 in) to 10 mm (0.4 in). |
|
3 |
Be sure that the ambient operation temperature and the ambient humidity are within their designated ranges. (When installing the panel in a cabinet or enclosure, the ambient operation temperature is the internal temperature of the cabinet or enclosure.) |
|
4 |
Be sure that heat from surrounding equipment does not cause the panel to exceed its standard operating temperature. |
|
5 |
When installing the panel in a slanted position, the panel face should not incline more than 30°. 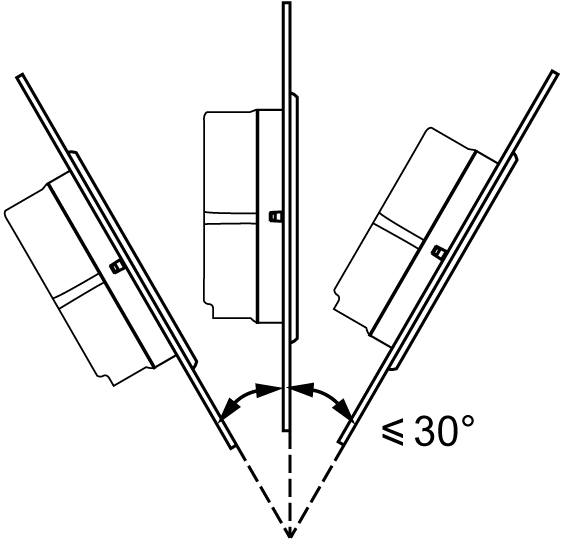
When installing the panel in a slanted position, and the panel face inclines more than 30°, the ambient temperature must not exceed 40 °C (104 °F). You may need to use forced air cooling (fan, A/C) to ensure that the ambient operating temperature is 40°C or below. |
|
6 |
For easier maintenance, operation and improved ventilation, install the panel at least 100 mm (3.94 in) away from adjacent structures and other equipment as shown in the following illustration.: 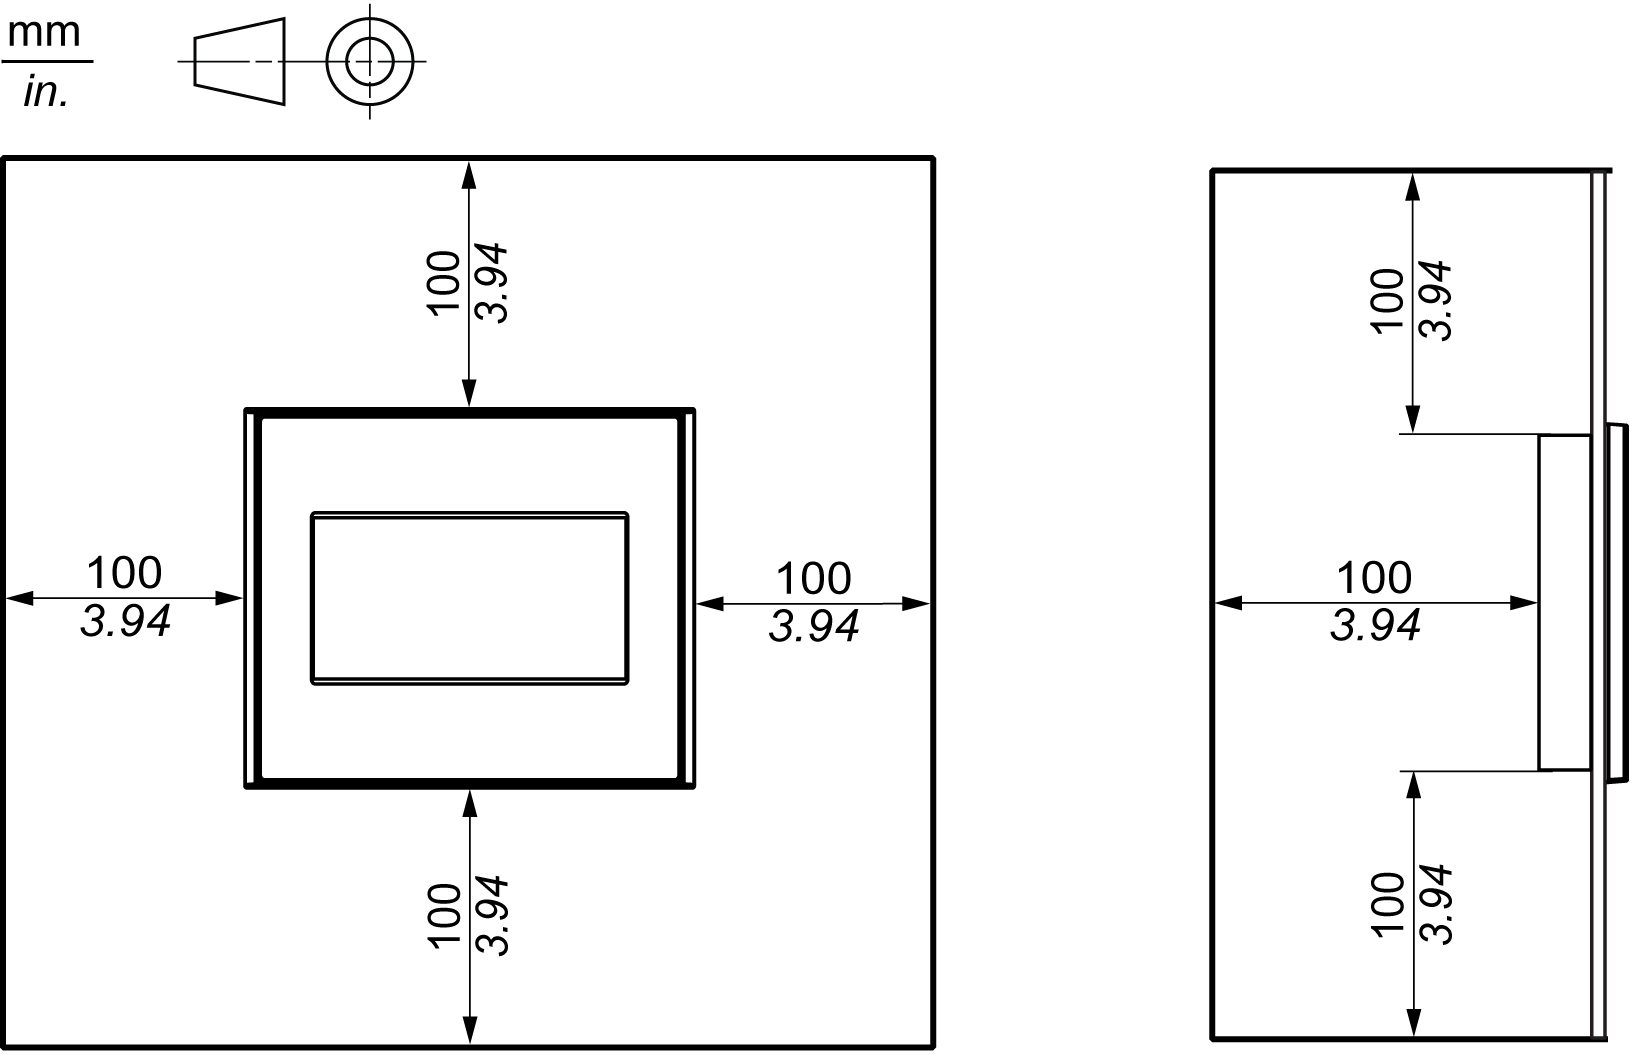
|
|
NOTICE |
|
PANEL UNSTEADY WHEN UNSECURED |
|
Keep panel stabilized in the panel-cut while you are installing or removing the screw fasteners. |
|
Failure to follow these instructions can result in equipment damage. |
|
Step |
Action |
|---|---|
|
1 |
Place the panel on a clean and level surface with the display face pointing downward. |
|
2 |
Check that the installation gasket of the panel is seated securely which runs around the perimeter of the frame. |
|
3 |
Create the correct sized opening required to install the panel, using the installation dimensions. |
|
4 |
Insert the panel into the panel-cut. |
|
5 |
Insert the installation fasteners into the panel‘s insertion slots on the top and bottom side (and left and right sides for the HMIGXO5502). Slide the fasteners flat against the panel. If the fasteners are not correctly attached, the panel may shift or fall out.l: 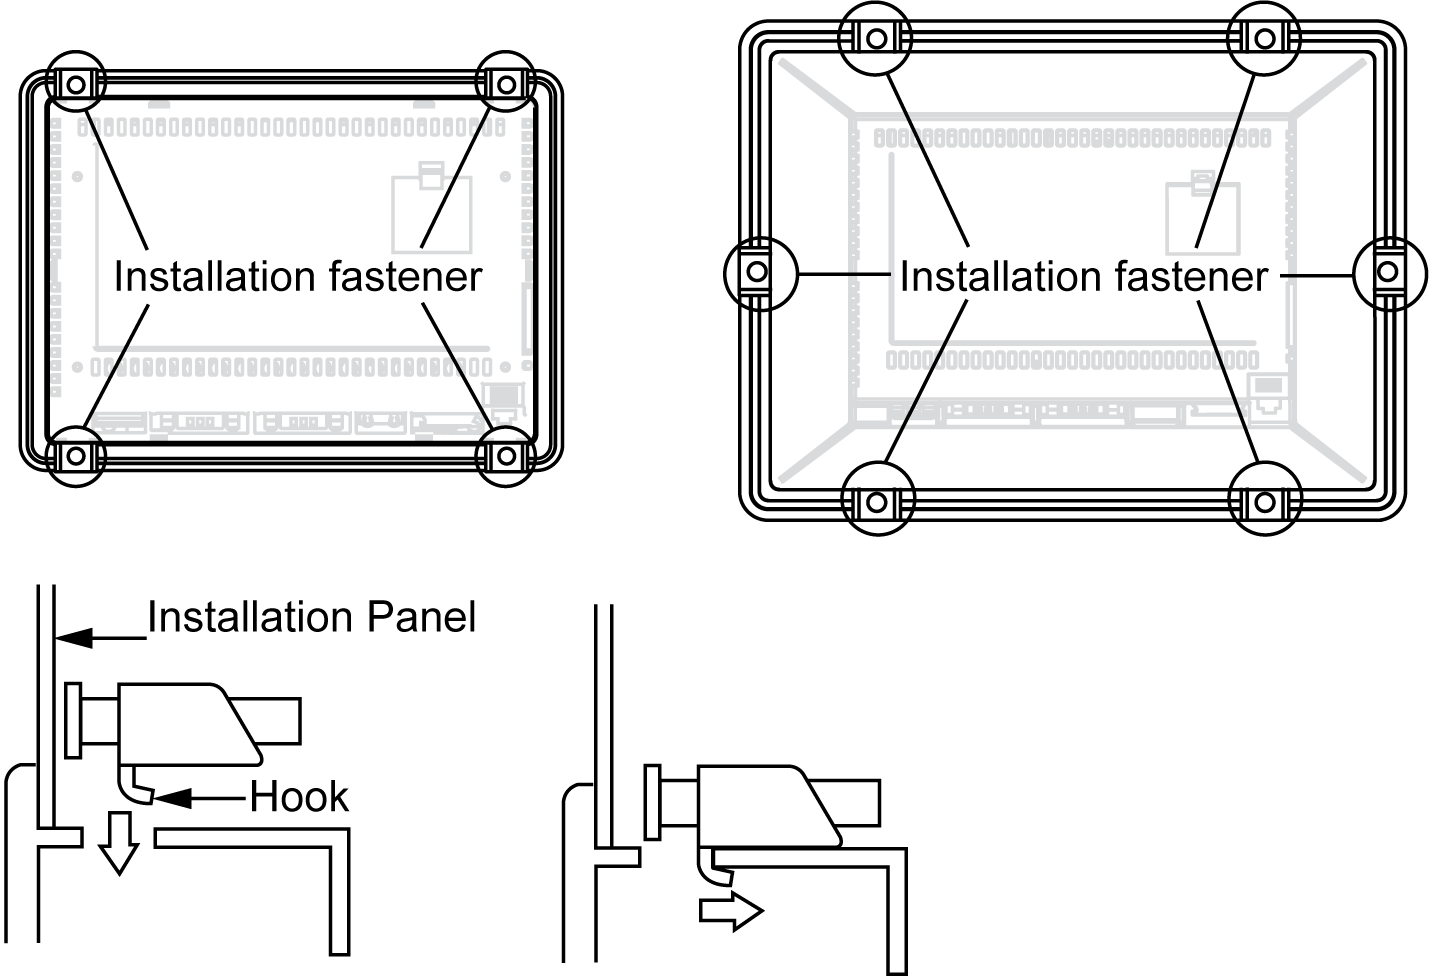
|
|
6 |
Use a Phillips screwdriver to tighten each fastener and secure the panel in place. The necessary torque is 0.8...1 Nm (7.08...8.85 lb-in): 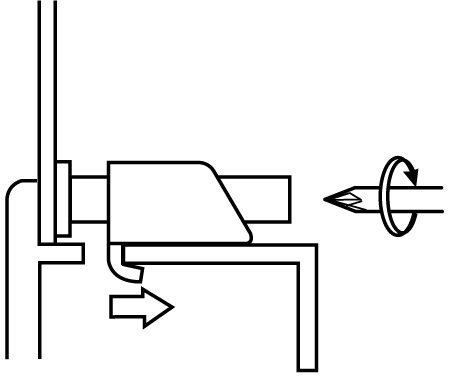
|
|
|
|
|
NOTICE |
|
|
BROKEN ENCLOSURE |
|
|
Do not exert more than 1 Nm (8.85 lb-in) of torque when tightening the fastener’s screws. |
|
|
Failure to follow these instructions can result in equipment damage. |
|
|
|
|