Adding a Device on the Modbus IOScanner
This section describes how to add a device on the Modbus IOScanner.
Add a Device on the Modbus IOScanner
To add a device on the Modbus IOScanner, select the Generic Modbus Slave in the Hardware Catalog, drag it to the Devices tree, and drop it on the Modbus_IOScanner node of the Devices tree.
For more information on adding a device to your project, refer to:
• Using the Drag-and-drop Method
• Using the Contextual Menu or Plus Button
NOTE: The variable for the exchange is automatically created in the %IWx and %QWx of the Modbus Serial Master I/O Mapping tab.
Configure a Device Added on the Modbus IOScanner
To configure the device added on the Modbus IOScanner, proceed as follow:
|
Step |
Action |
|---|---|
|
1 |
In the Devices tree, double-click Generic_Modbus_Slave. Result: The configuration window will be displayed. 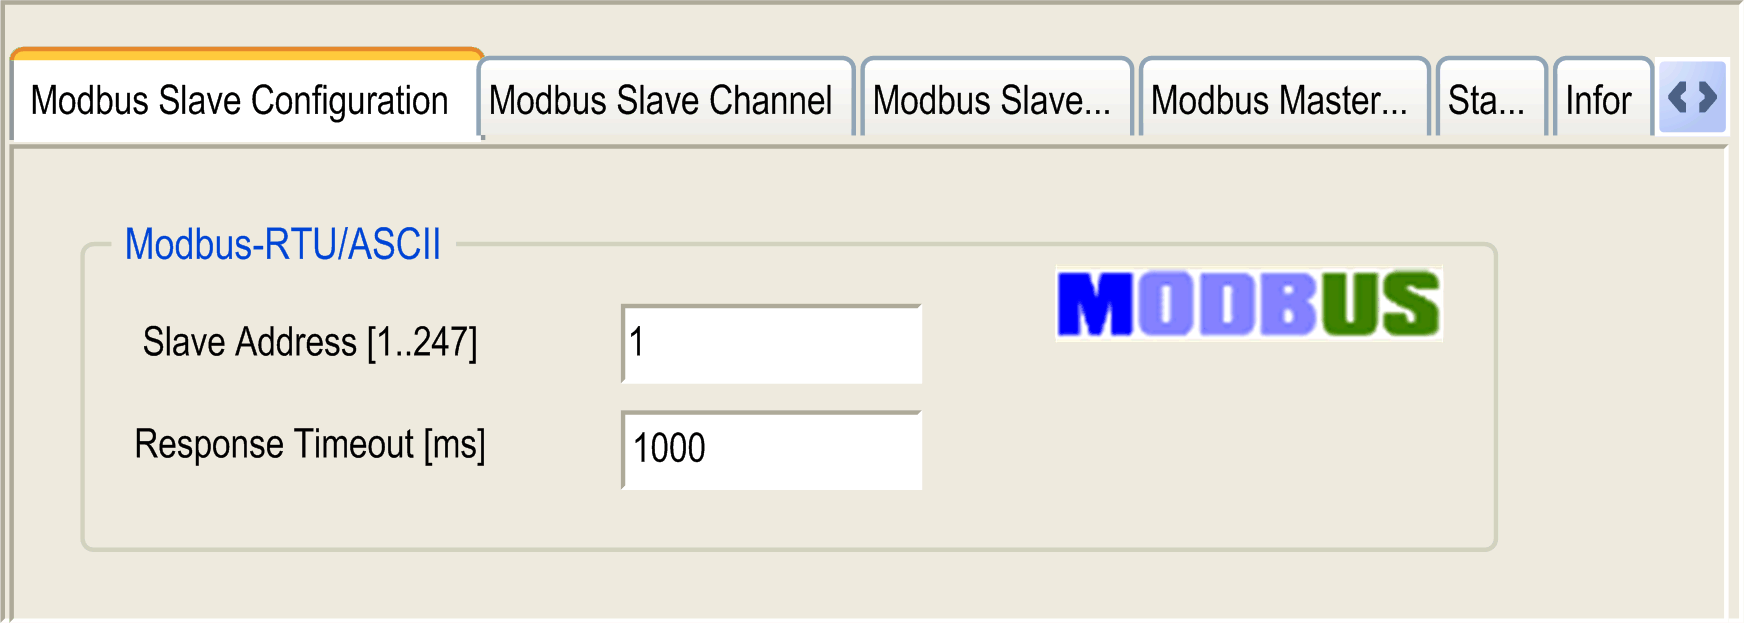
|
|
2 |
Enter a Slave Address value for your device (choose a value from 1 to 247). |
|
3 |
Choose a value for the Response Timeout (in ms). |
To configure the Modbus Channels, proceed as follow:
|
Step |
Action |
|---|---|
|
1 |
Click the Modbus Slave Channel tab: 
|
|
2 |
Click the Add Channel button: 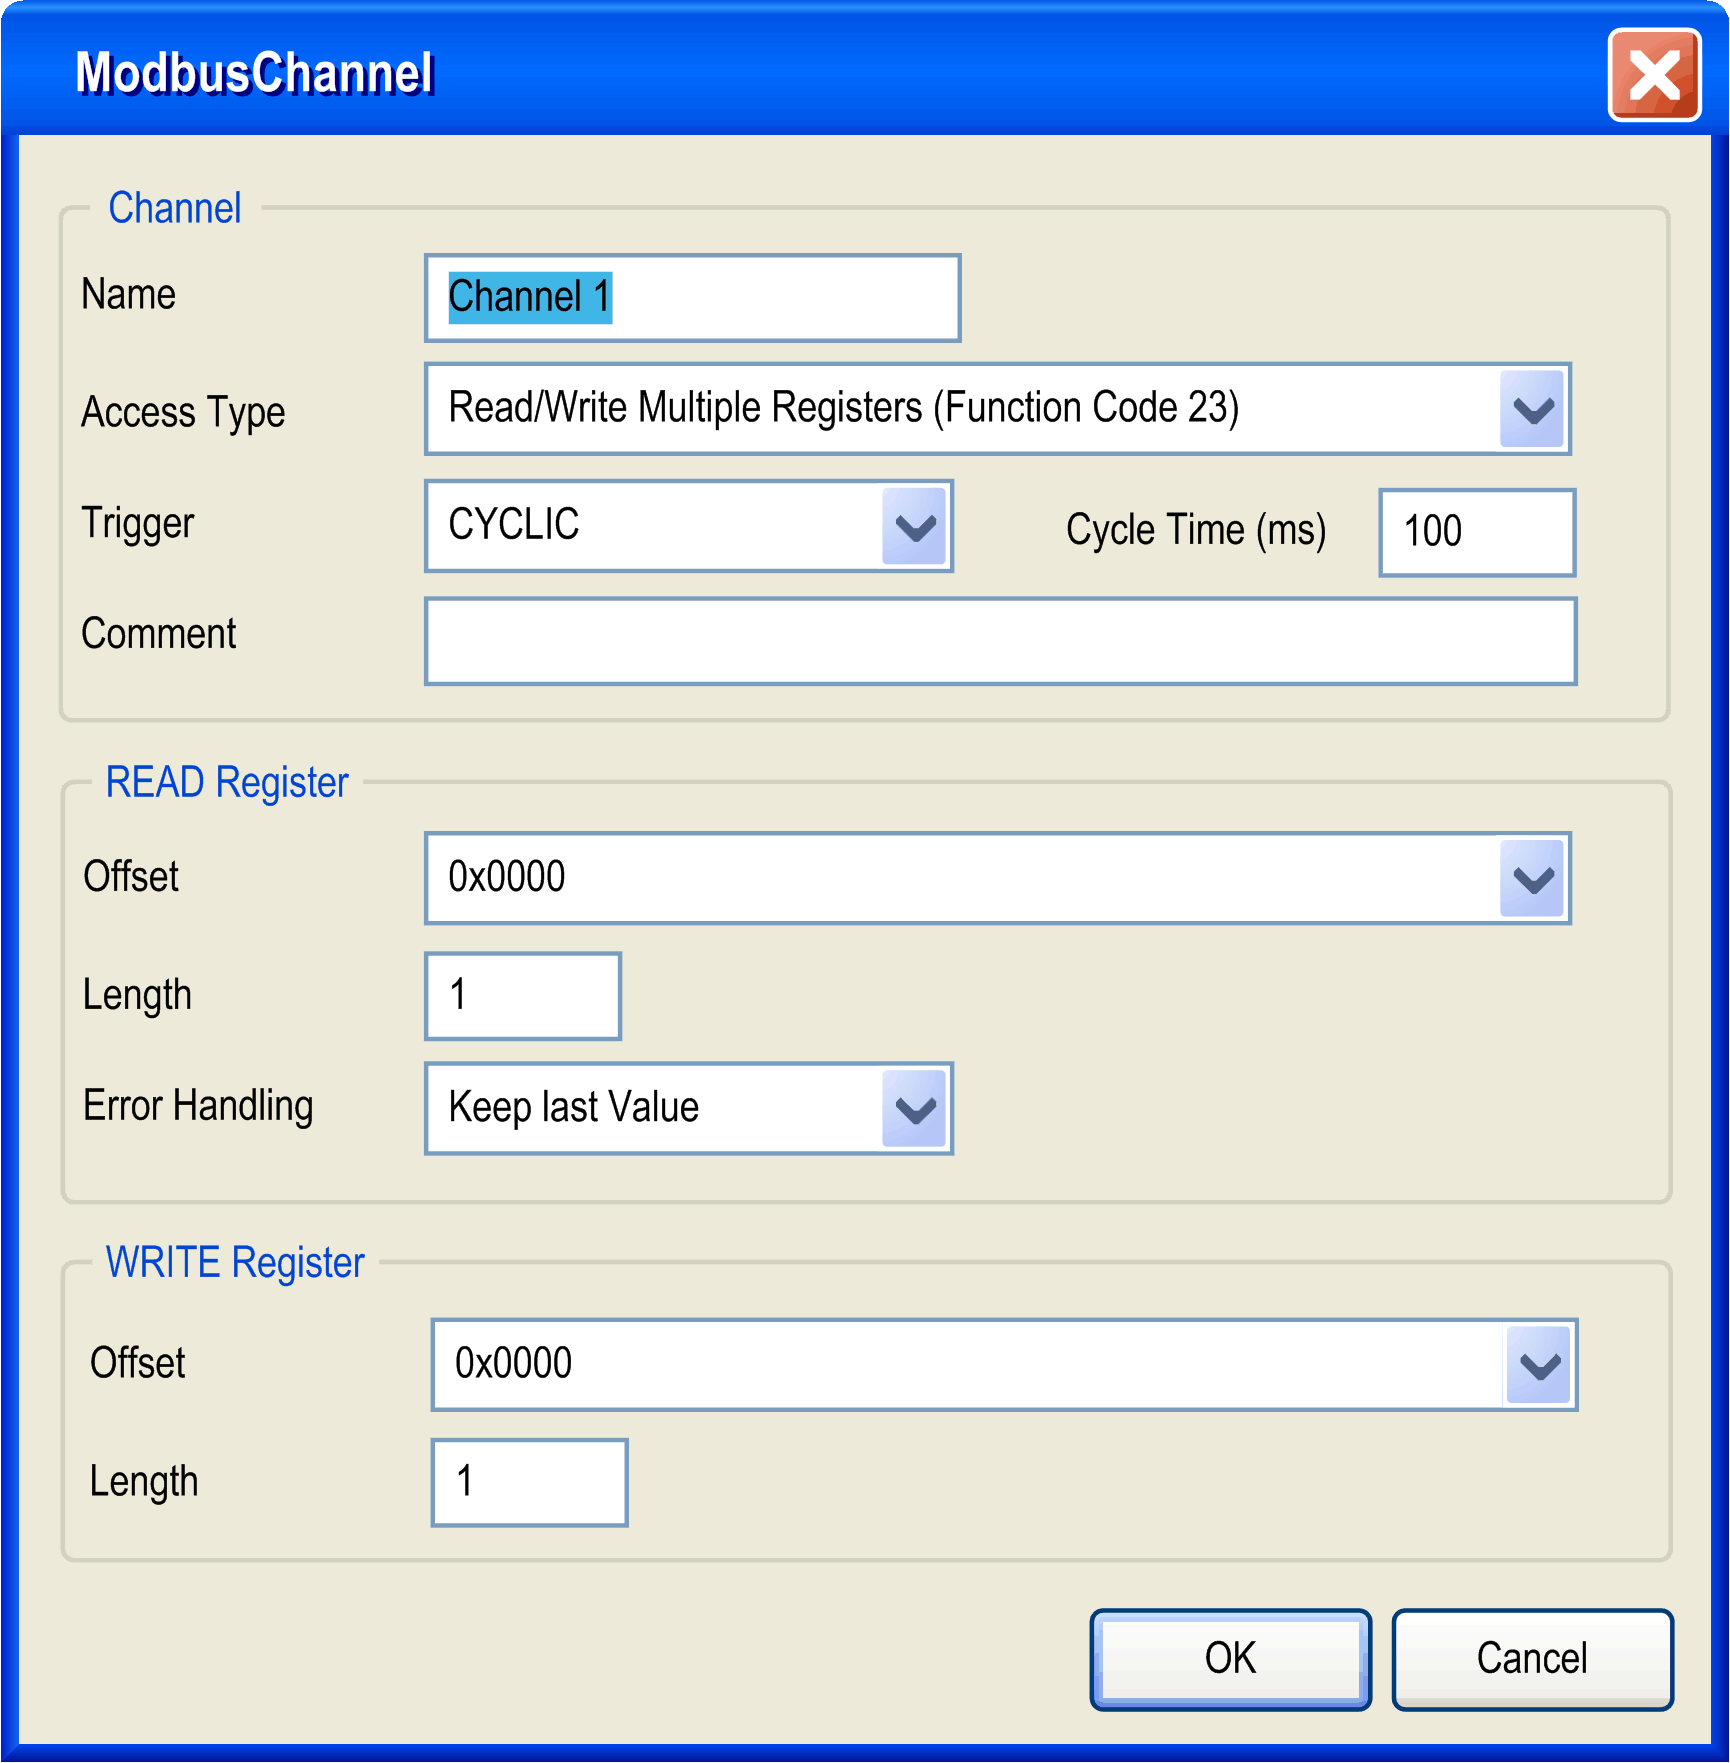
|
|
3 |
Configure the exchange: In the field Channel, you can add the following values: oChannel: Enter a name for your channel. oAccess Type: Choose the exchange type: Read or Write or Read/Write multiple registers. oTrigger: Choose the trigger of the exchange. It can be either CYCLIC with the period defined in Cycle Time (ms) field or started by a RISING EDGE on a boolean variable (this boolean variable is then created in the 'Modbus Master I/O Mapping' tab). oComment: Add a comment about this channel. In the field READ Register (if your channel is a Read or a Read/Write one), you can configure the %MW to be read on the Modbus slave. These registers will be mapped on %IW (see 'Modbus Master I/O Mapping' tab): oOffset: Offset of the %MW to read. 0 means that the first object that will be read will be %MW0. oLength: Number of %MW to be read. For example if 'Offset' = 2 and 'Length' = 3, the channel will read %MW2, %MW3 and %MW4. oError Handling: choose the behavior of the related %IW in case of loss of communication. In the field WRITE Register (if your channel is a Write or a Read/Write one), you can configure the %MW to be written to the Modbus slave. These registers will be mapped from %QW (see 'Modbus Master I/O Mapping' tab): oOffset: Offset of the %MW to write. 0 means that the first object that will be written to will be %MW0. oLength: Number of %MW to be written. For example if 'Offset' = 2 and 'Length' = 3, the channel will write %MW2, %MW3 and %MW4. |
|
4 |
Click the Delete button to remove a channel. Click the Edit button to change the parameters of a channel. |
|
5 |
Click OK to validate the configuration of this channel. |
To configure your Modbus Initialization Value, proceed as follow:
|
Step |
Action |
|---|---|
|
1 |
Click the Modbus Slave Init tab: 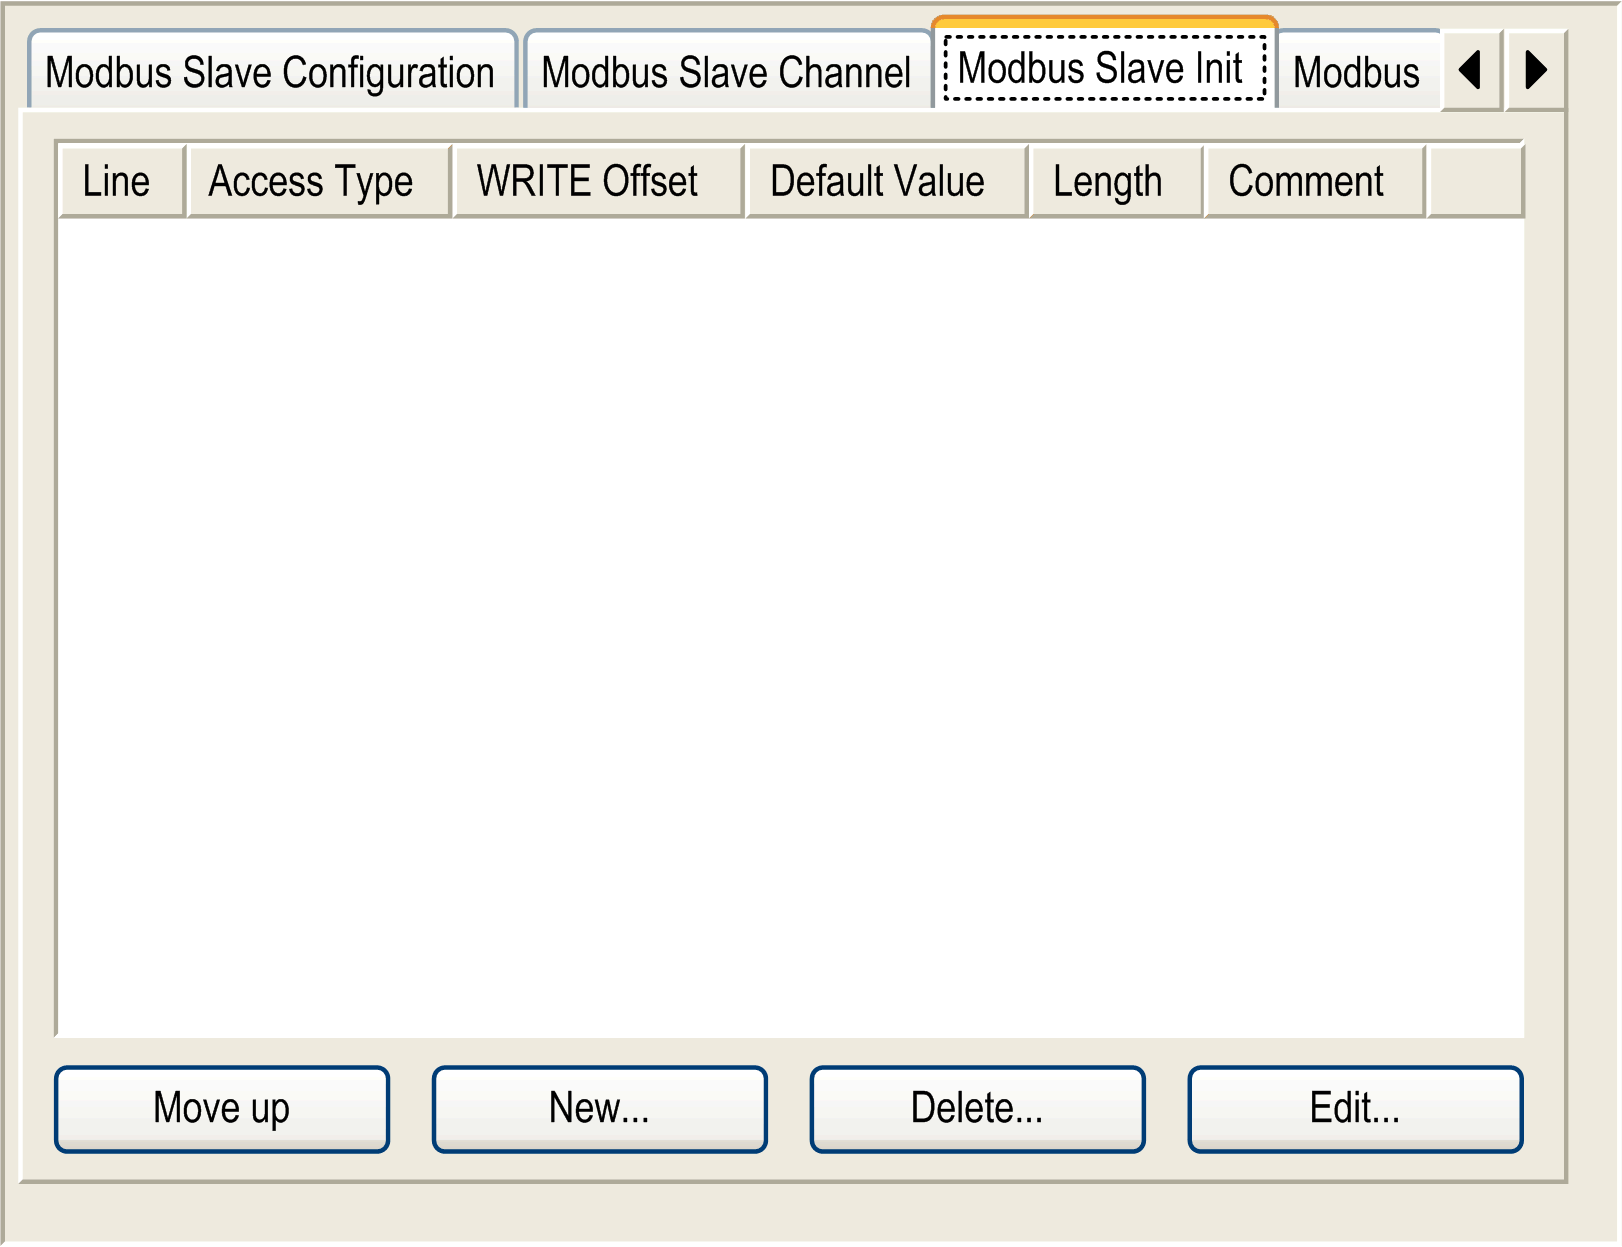
|
|
2 |
Click New to create a new initialization value: 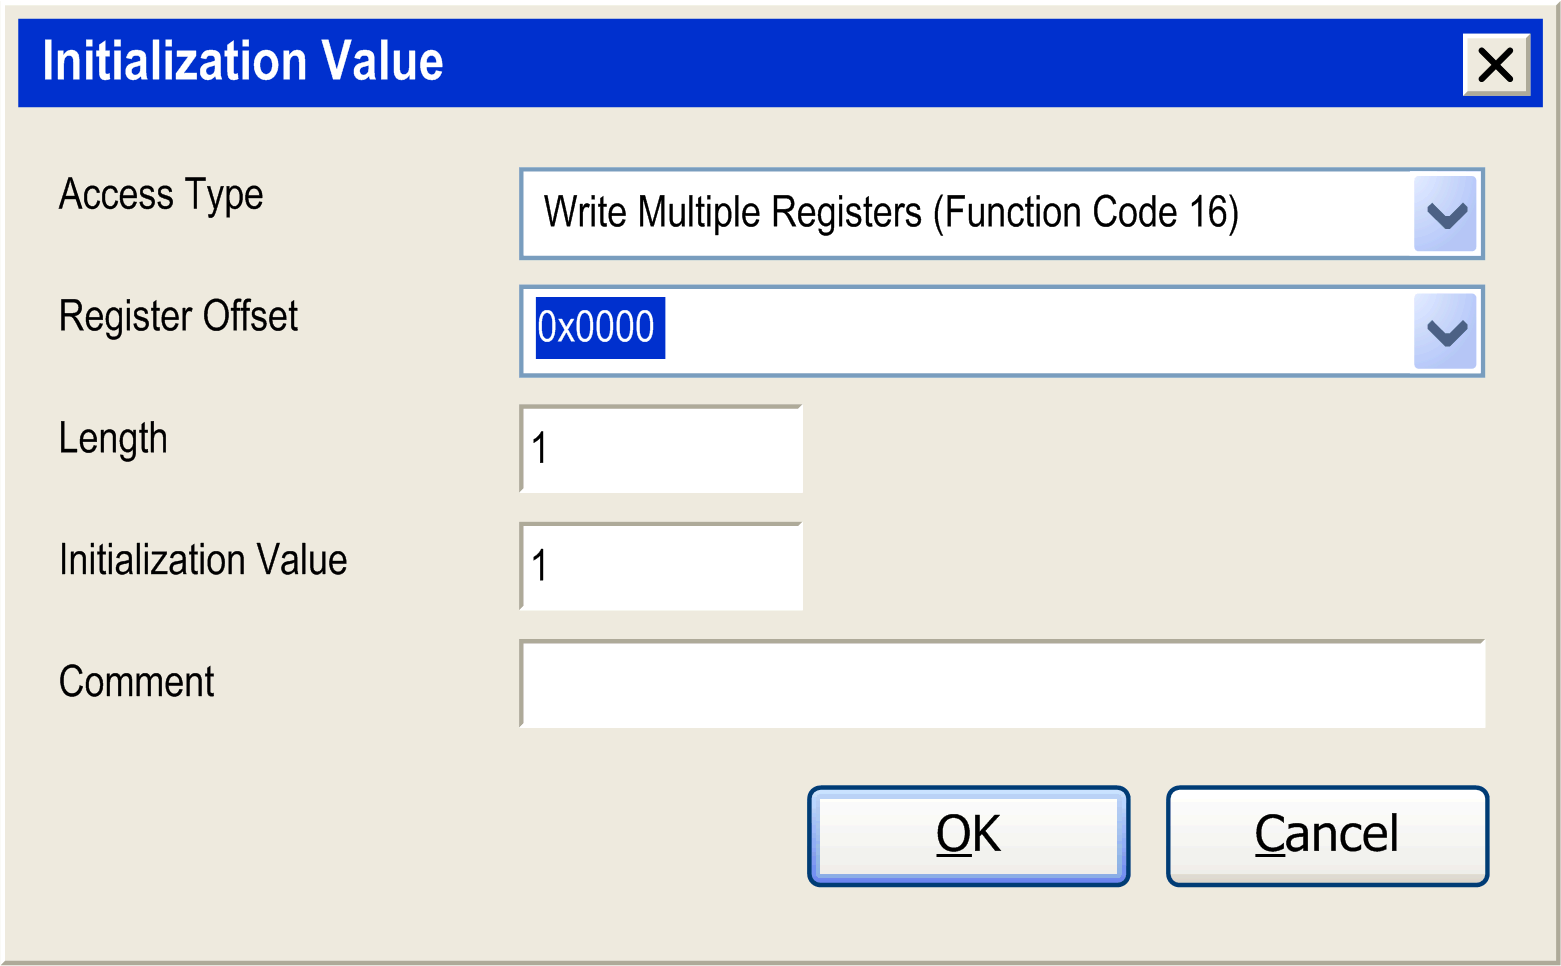
The Initialization Value window contains the following parameters: oAccess Type: Choose the exchange type: Write multiple registers. oRegister Offset: Register number of register to be initialized. oLength: Number of %MW to be written. For example if 'Offset' = 2 and 'Length' = 3, the channel will write %MW2, %MW3 and %MW4. oInitialization Value: Value the registers are initialized with. oComment: Add a comment about this channel. |
|
3 |
Click Move up to change the position of a value in the list. Click Delete to remove a value in the list. Click Edit to change the parameters of a value. |
|
4 |
Click OK to create a new Initialization Value. |
To configure your Modbus Master I/O Mapping, proceed as follow:
|
Step |
Action |
|---|---|
|
1 |
Click the Modbus Master I/O Mapping tab: 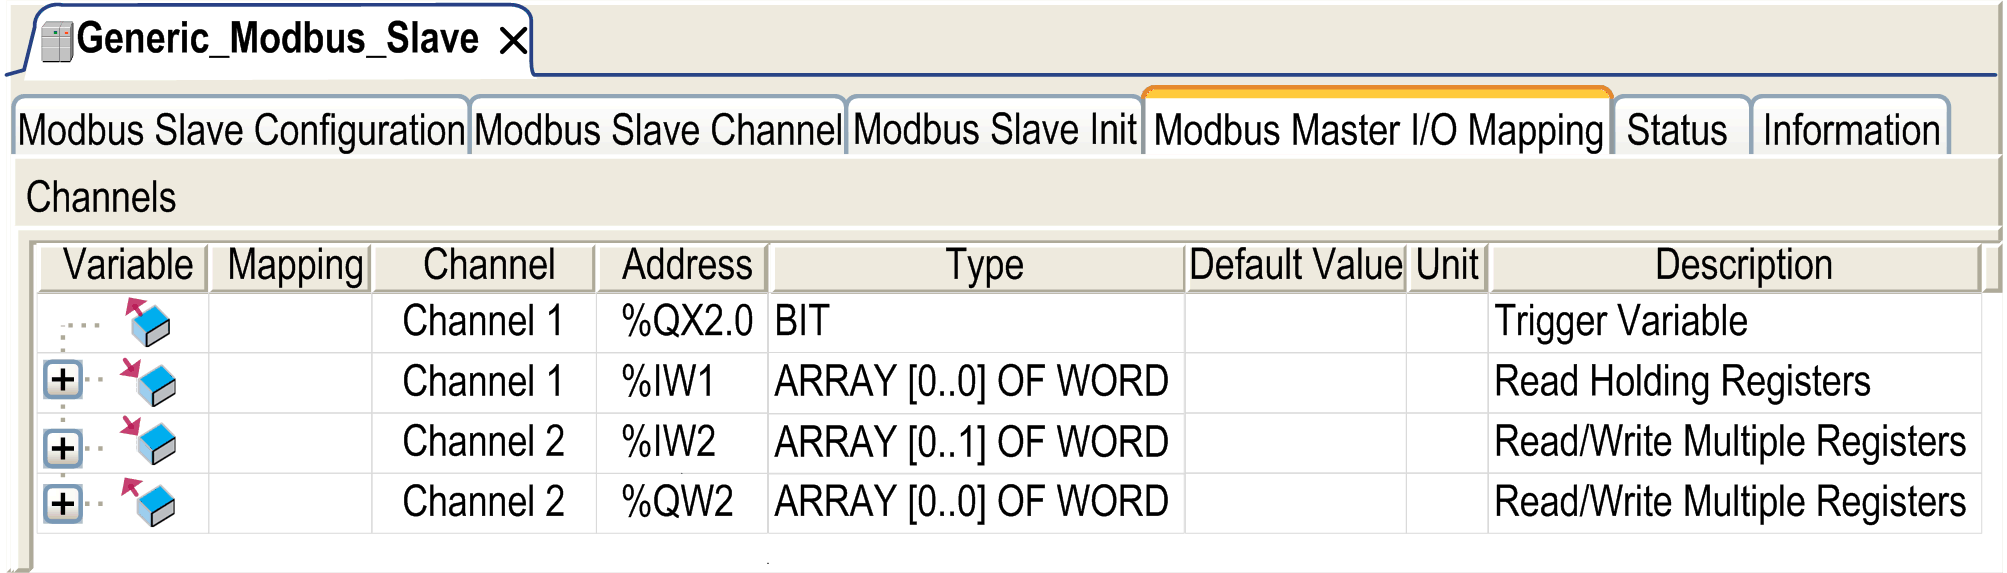
|
|
2 |
Double-click in a cell of the Variable column to open a text field. Enter the name of a variable or click on the browse button [...] and chose a variable with the Input Assistant. |
|
3 |
For more details about I/O mapping, refer to the EcoStruxure Machine Expert Programming Guide. |