Connecting the Magelis SCU HMI Controller to a PC
Connecting the Controller to a PC
To transfer and run applications, connect your HMI SCU to a PC that has SoMachine installed. To transfer an application, use Ethernet, serial link or a USB memory key.
|
NOTICE |
|
POSSIBLE ELECTRICAL DAMAGE TO CONTROLLER COMPONENTS |
|
Connect the communication cable to the PC before connecting it to the controller. |
|
Failure to follow these instructions can result in equipment damage. |
NOTE: Only one HMI SCU can be connected to a computer at a time, except when using Ethernet.
Automatic Reboot after Application Transfer
The HMI SCU automatically reboots after a download of the application, this includes the control part (SoMachine) and the HMI part (Vijeo-Designer).
When transferring an application (via Ethernet, USB download cable, or a USB memory key), the firmware update is done automatically (with a user prompt for confirmation).
Application Download with Firmware Downgrade
The HMI SCU can download an application and downgrade the firmware from a USB memory key. You must first save the application and the appropriate firmware version on a USB memory key.
|
Step |
Action |
|---|---|
|
1 |
Turn off the power supply of your controller, prior to connecting the USB memory key. |
|
2 |
Connect the USB memory key containing the application and firmware into the USB port of your controller. |
|
3 |
Turn on your controller. Result: The application and the firmware version from the USB memory key are downloaded. |
NOTE: If you plug a USB memory key containing the application and firmware while the controller is on, a screen is displayed asking you whether you want to install the application from the USB memory key.
Saving your Application and Firmware on a USB memory key
|
Step |
Action |
|---|---|
|
1 |
Insert a USB memory key into the USB port of your computer. |
|
2 |
Use the Quick Toolswitch menu (upper left in window) to select Vijeo-Designer. Result: The project switches to HMI and the main Vijeo-Designer window is displayed. |
|
3 |
Right click on the controller node in the Navigator window, and select Properties. Result: The Property Inspector window is displayed. |
|
4 |
Select File System from the Download menu as shown in the following figure: 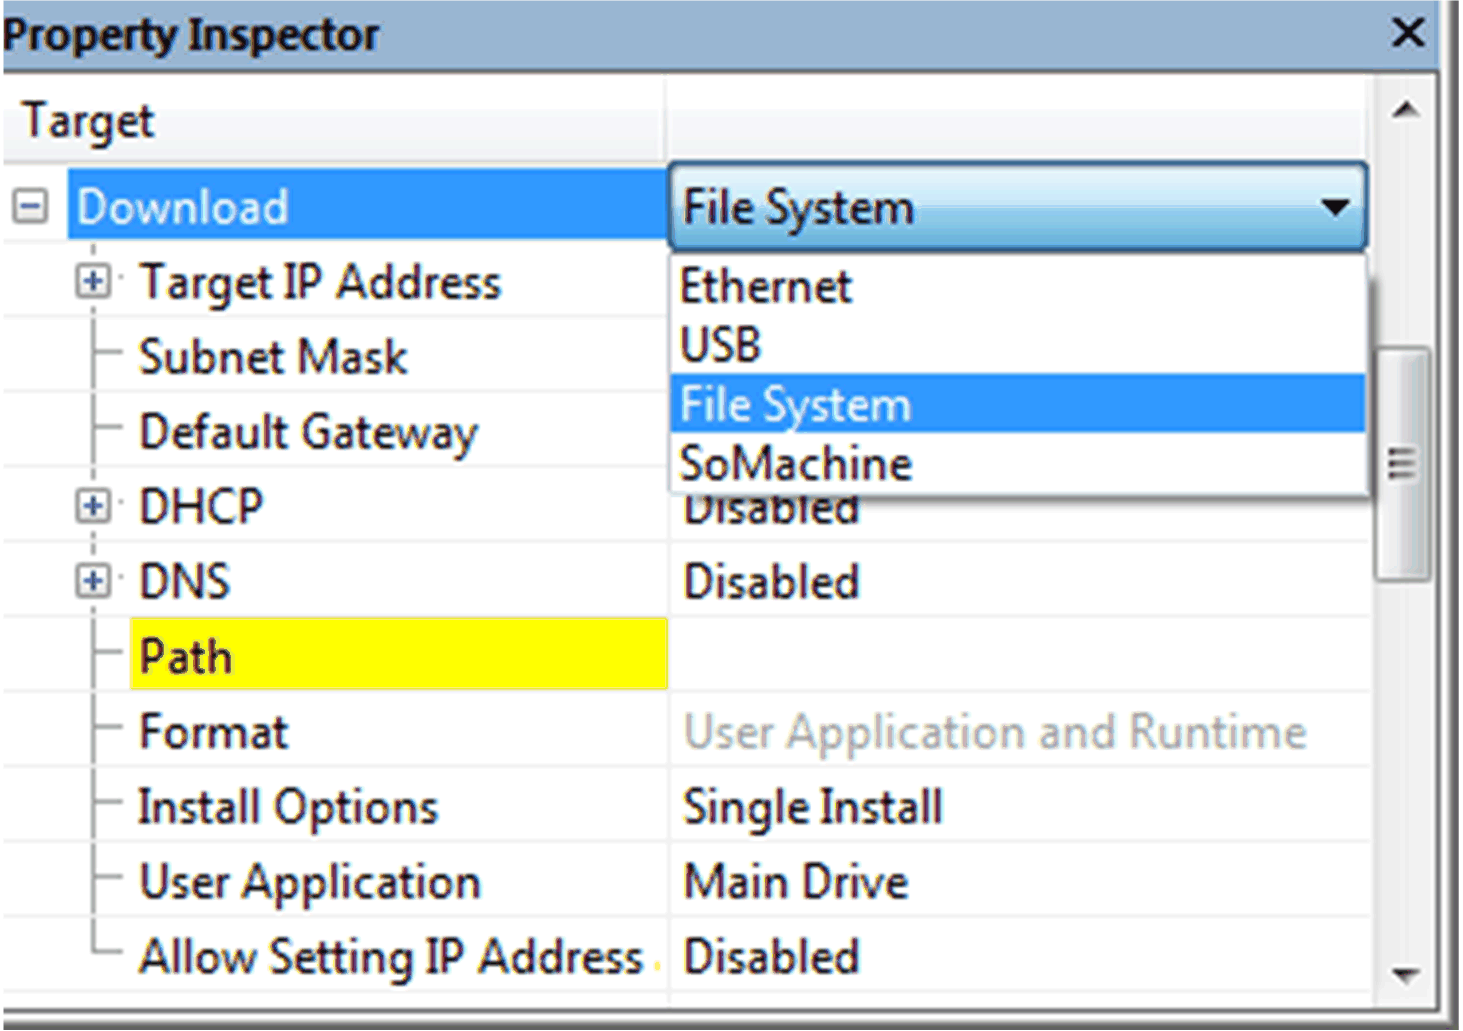
|
|
5 |
Set the directory from the Path menu to the USB memory key. NOTE: Select the root level of your USB memory key. |
|
6 |
Click the OK button. Result: The directory is now set to the USB memory key. |
|
7 |
Click Build > Download All from the Vijeo Designer main menu bar. Result: The application is saved onto the USB memory key. |
NOTE: Use a FAT32 USB memory key to save your application and firmware.