Replacing the Elastomer Coupling (Optional Equipment)
You need the following tools to remove the elastomer coupling:
oSet of hex keys
oSoft-faced hammer
NOTE: Do not use ball head hex keys. Excessive torque may cause the ball head to break away. A broken ball head makes the removal of the screw difficult.
For suitable parts, refer to Replacement Equipment and Accessories.
Perform the following procedures to replace the toothed belt:
oPreparing the replacement of the elastomer coupling
oReplacing the elastomer coupling
Preparing the Replacement of the Elastomer Coupling
|
Step |
Action |
|---|---|
|
1 |
Remove or support the payload and the carriage if the axis is tilted or mounted vertically. |
|
2 |
Remove the motor or the gearbox as described under Replacing the Motor or Gearbox. |
Replacing the Elastomer Coupling
|
Step |
Action |
|---|---|
|
1 |
Remove the four screws (1) at the motor adapter plate (2). 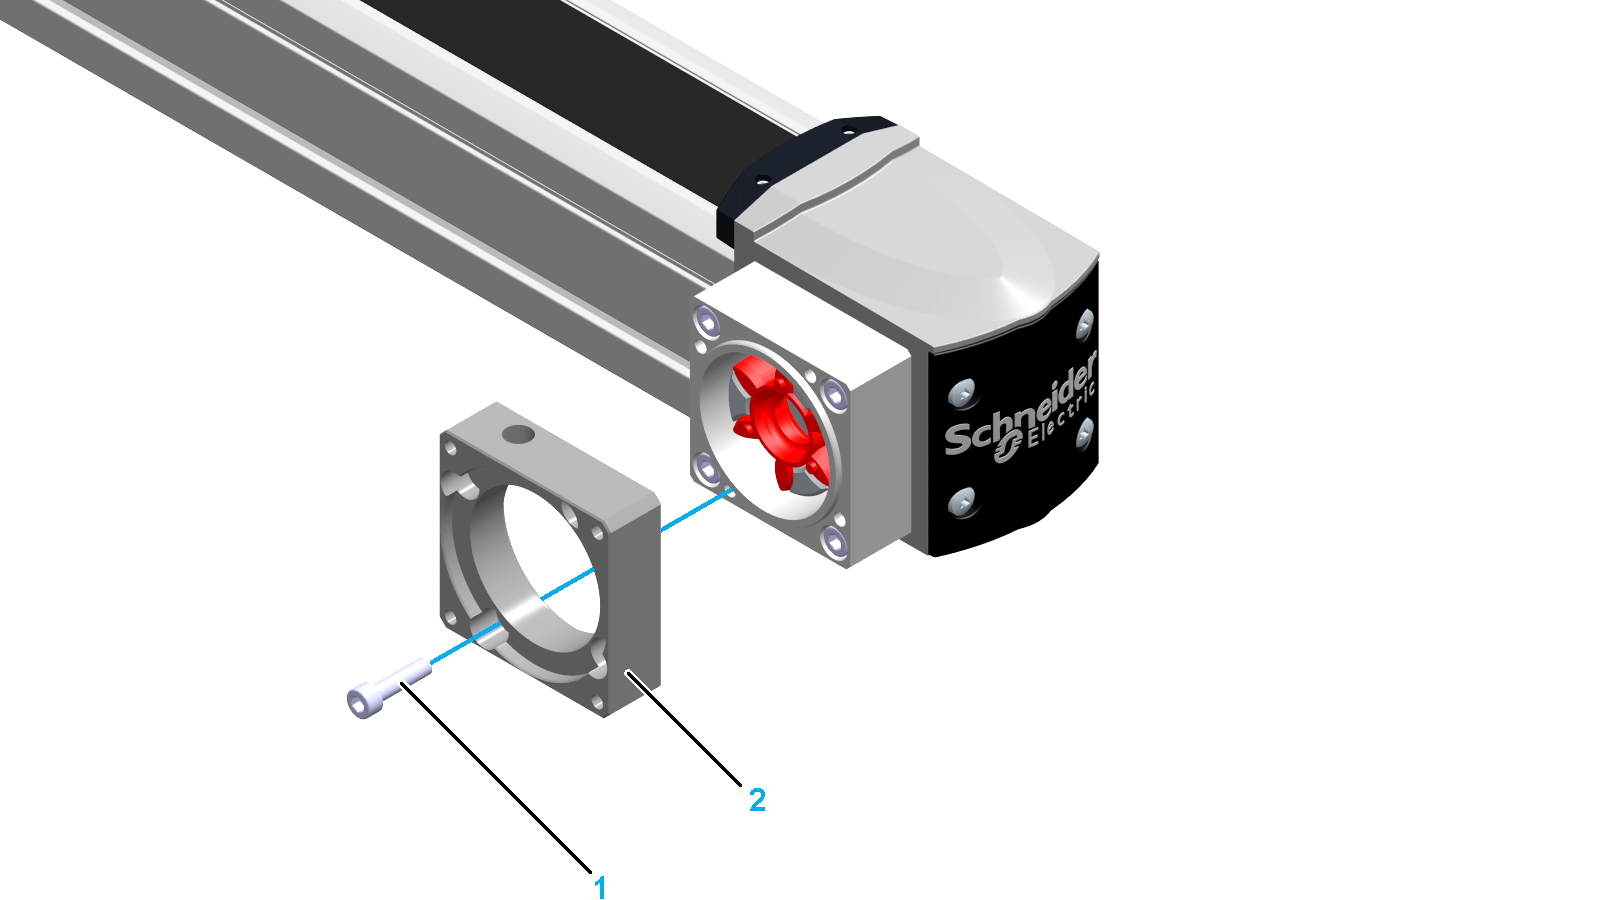
|
|
2 |
Remove the motor adapter plate. |
|
3 |
Remove the four screws (3) at the coupling housing (4). 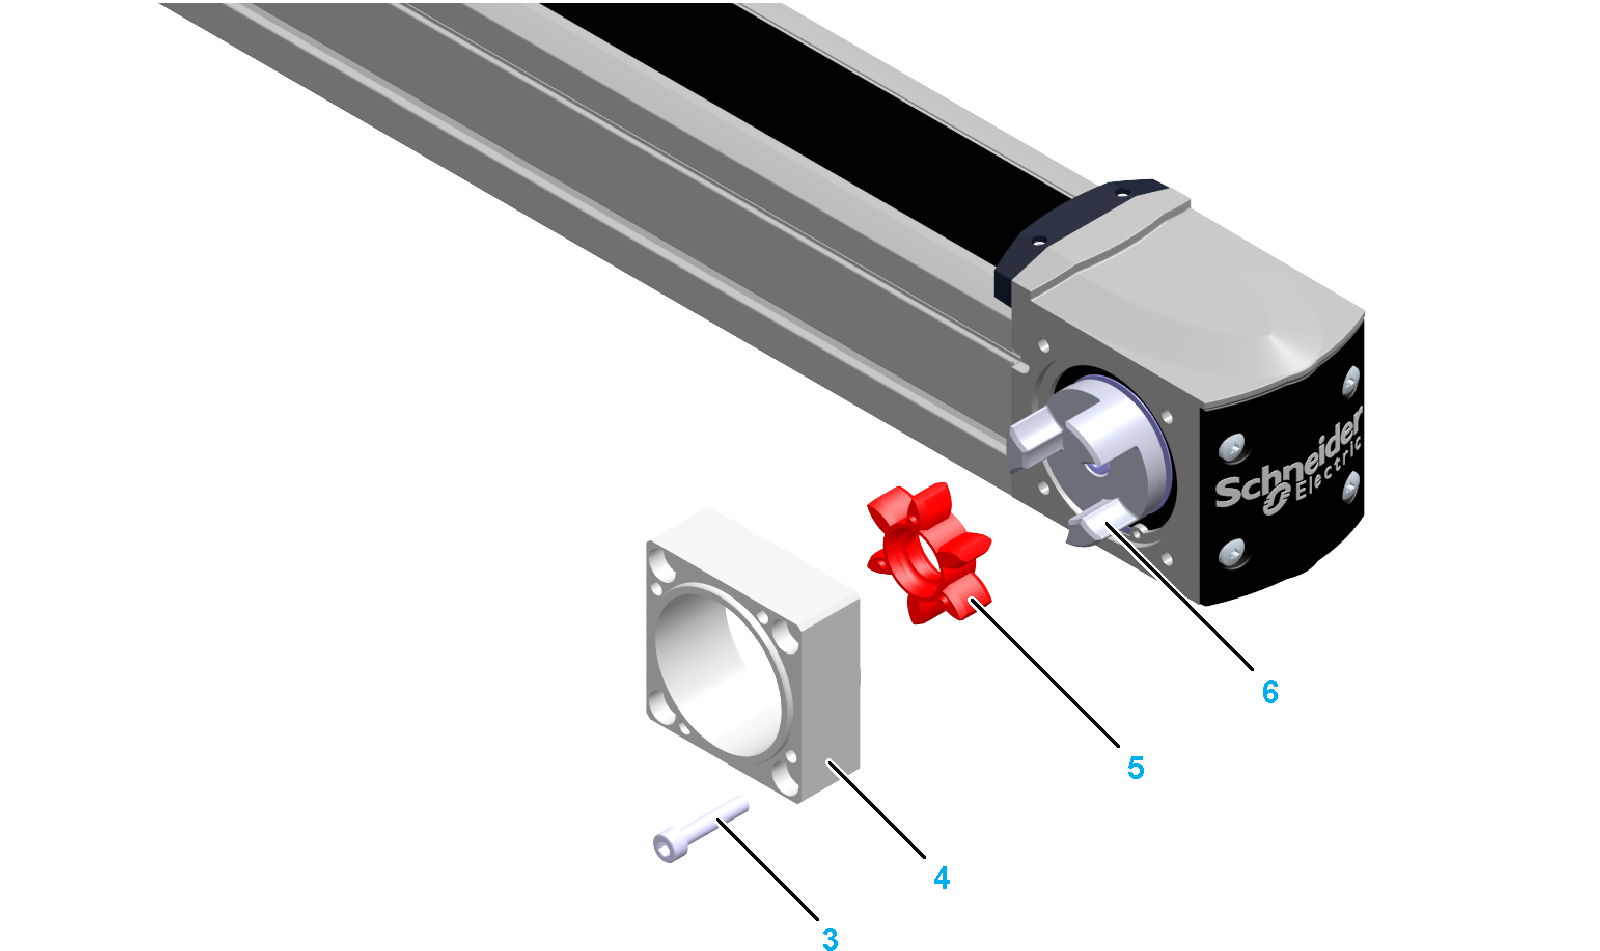
|
|
4 |
Remove the coupling housing. |
|
5 |
Withdraw the elastomer spider (5) from the expanding hub (6). |
|
6 |
Loosen the screw (7) on the expanding hub. 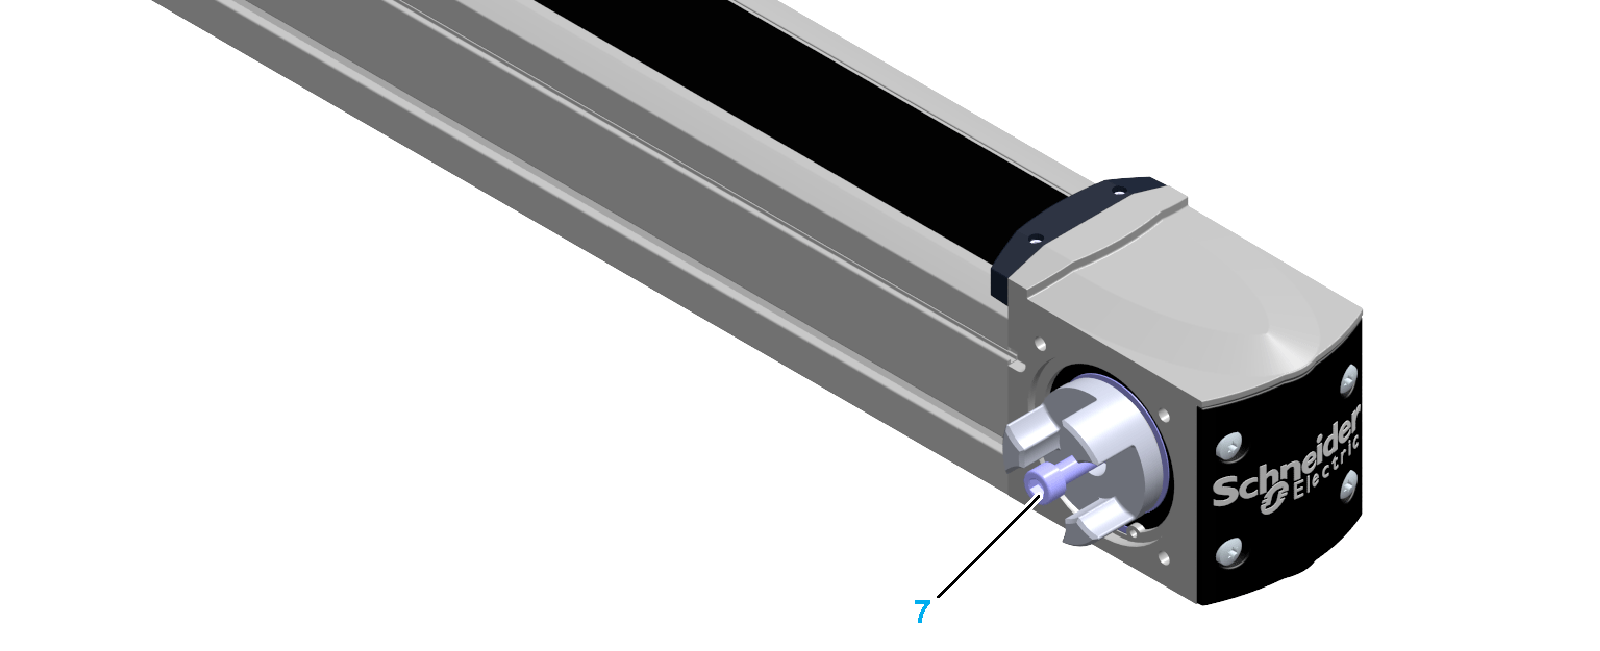
NOTE: As long as the toothed belt is installed correctly and the carriage is at the end position, the toothed belt pulley does not rotate further. For detailed information about toothed belt installation, refer to Mounting the Toothed Belt. |
|
7 |
Carefully tap on the screw head with a soft-faced hammer so that the cone of the expanding hub comes loose. NOTE: If you cannot reach the screw head, use a hex key as extension and tap carefully on the hex key. |
|
8 |
Pull the expanding hub carefully out of the hollow shaft of the toothed belt pulley (8). 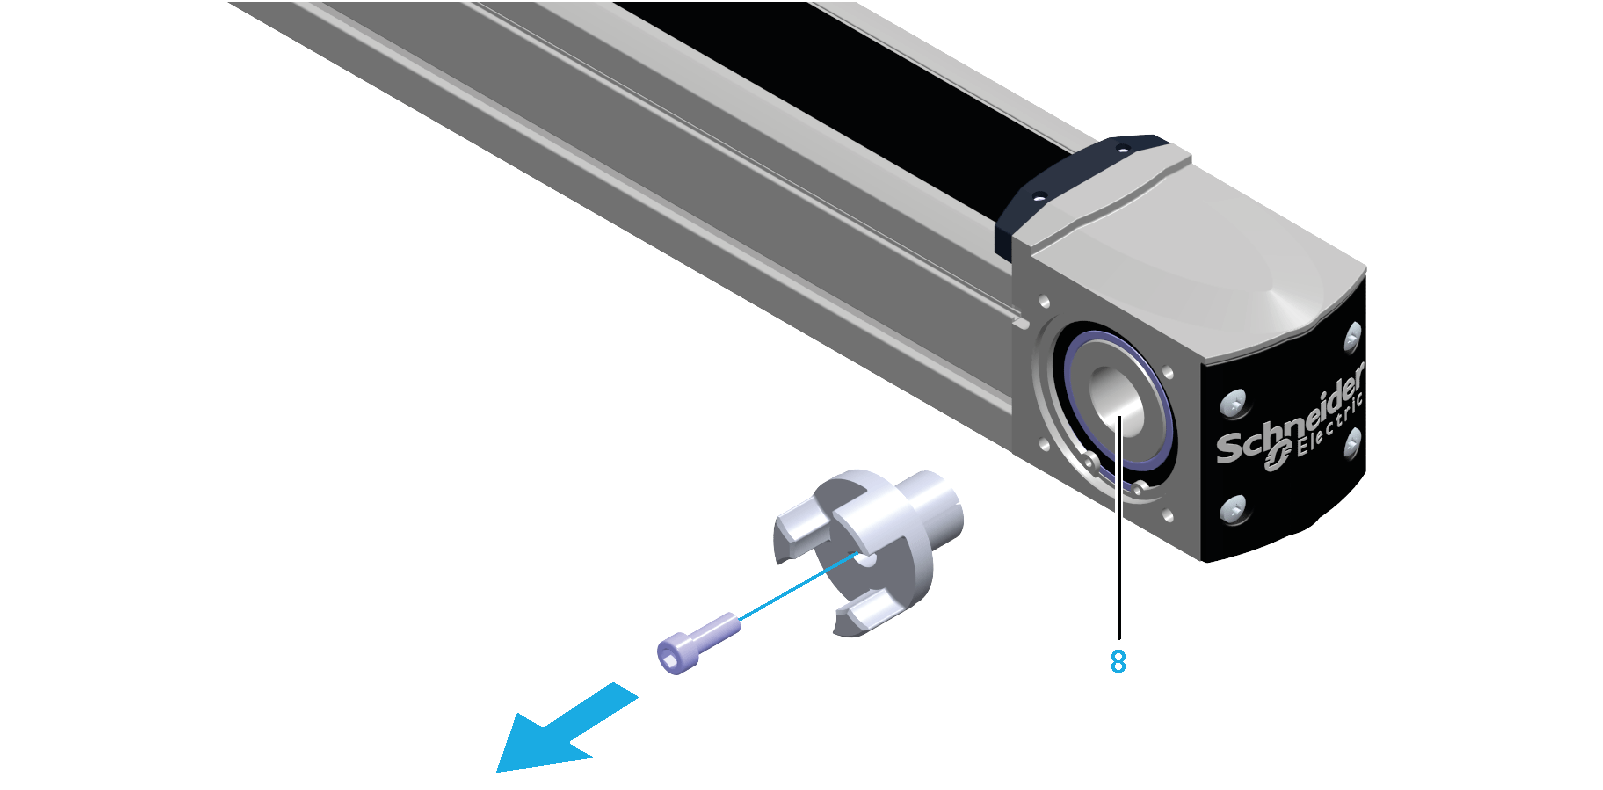
NOTE: This may require a considerable force. |
|
9 |
Mount the new elastomer coupling as well as the motor or the gearbox as described in Mounting the Motor and Gearbox. |