Calibration
Calibration Tab
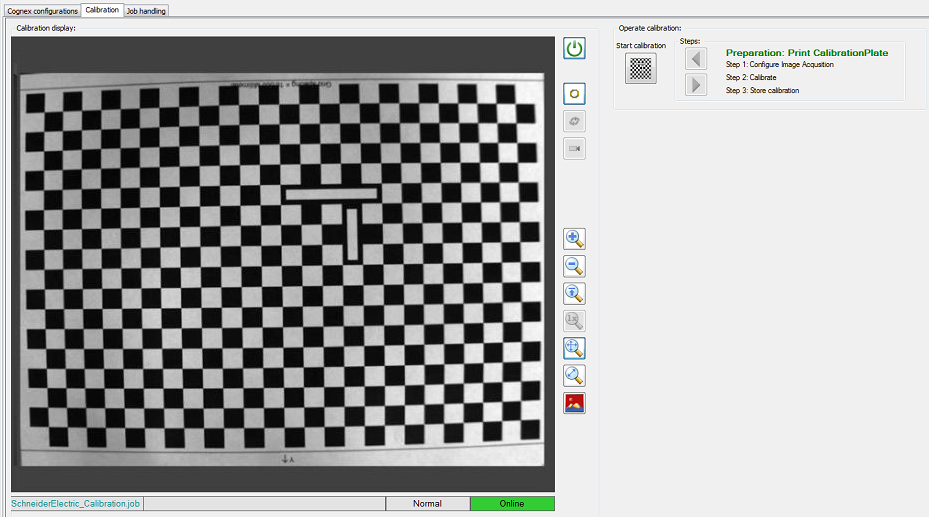
|
Element |
Description |
|---|---|
|
|
Shows the image received from the camera. |
|
|
The information bar at the bottom of the provides information on the job name and the operation mode (online / offline). |
|
|
Click this button to toggle between online and offline mode. |
|
|
Click the button to start the calibration. |
|
|
Click the button to move one calibration step forward. |
|
|
Click the button to move one calibration step backwards. |


Print Calibration Plate
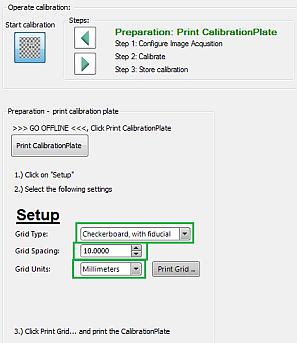
|
Step |
Action |
|---|---|
|
1 |
Click the |
|
2 |
Switch to offline mode. (Click the The selected mode is displayed in the information bar at the bottom of the ). |
|
3 |
Click the button. Result: The dialog to print a calibration grid is displayed. |
|
4 |
Click the tab and select the following values: |
|
5 |
Click button. |
|
6 |
In the dialog, select your printer settings and print the calibration plate. |
Configure Image Acquisition
After printing the calibration plate, click the step forward  button to go to the dialog.
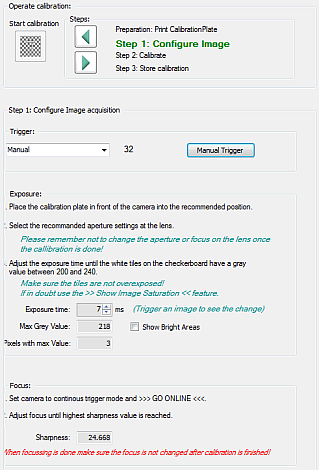
|
Step |
Action |
|---|---|
|
1 |
For , select . (Every time you click the button, a new image is retrieved from the camera). |
|
2 |
Place the printed calibration plate in front of the camera. |
|
3 |
Select the desired aperture value at the camera. |
|
4 |
Adjust until the white tiles on the checkerboard show a gray value from 200...240. You have to click the button to see the effect of changing exposure time.
NOTE: Keep in mind not to overexpose the white tiles. The image saturation
 button and the check box can help you to avoid overexposure. button and the check box can help you to avoid overexposure.
|
|
5 |
For , select . |
|
6 |
Switch to online mode. |
|
7 |
Increase / decrease the focus value at the camera until the maximum value is reached. |
Calibrate Camera
After configuring image acquisition, click the step forward button to go to the dialog.
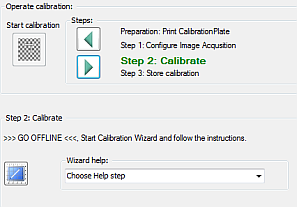
|
Step |
Action |
|---|---|
|
1 |
Switch to offline mode.
NOTE: The list provides additional help.
|
|
2 |
Click the Result: The dialog is displayed. |
|
3 |
Click and select the same values as in the dialog: |
|
4 |
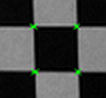
Click . Result: If calibration points are detected by the camera, the is refreshed and green dots are displayed at the corners of the tiles of the checkerboard.
|
|
5 |
Click the Calibrate button. Result: The calibration algorithm is executed, and the dialog provides feedback on calibration quality. |
|
6 |
If you agree with the results, confirm with . Else go back to the dialog and modify the settings. |
 button.
Store Calibration Results
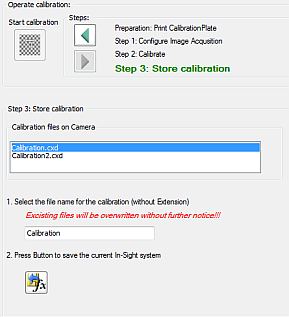
After calibrating the camera, click the step forward button to go to the dialog.
|
Step |
Action |
|---|---|
|
1 |
The lists the files already stored on the camera. |
|
2 |
Enter a name for your calibration file (without extension) to be stored on the camera. |
|
3 |
Click the button.
NOTE: Existing files are overwritten without requesting confirmation.
|
SchneiderElectric_Calibration.job file is provided with the Camera Module.