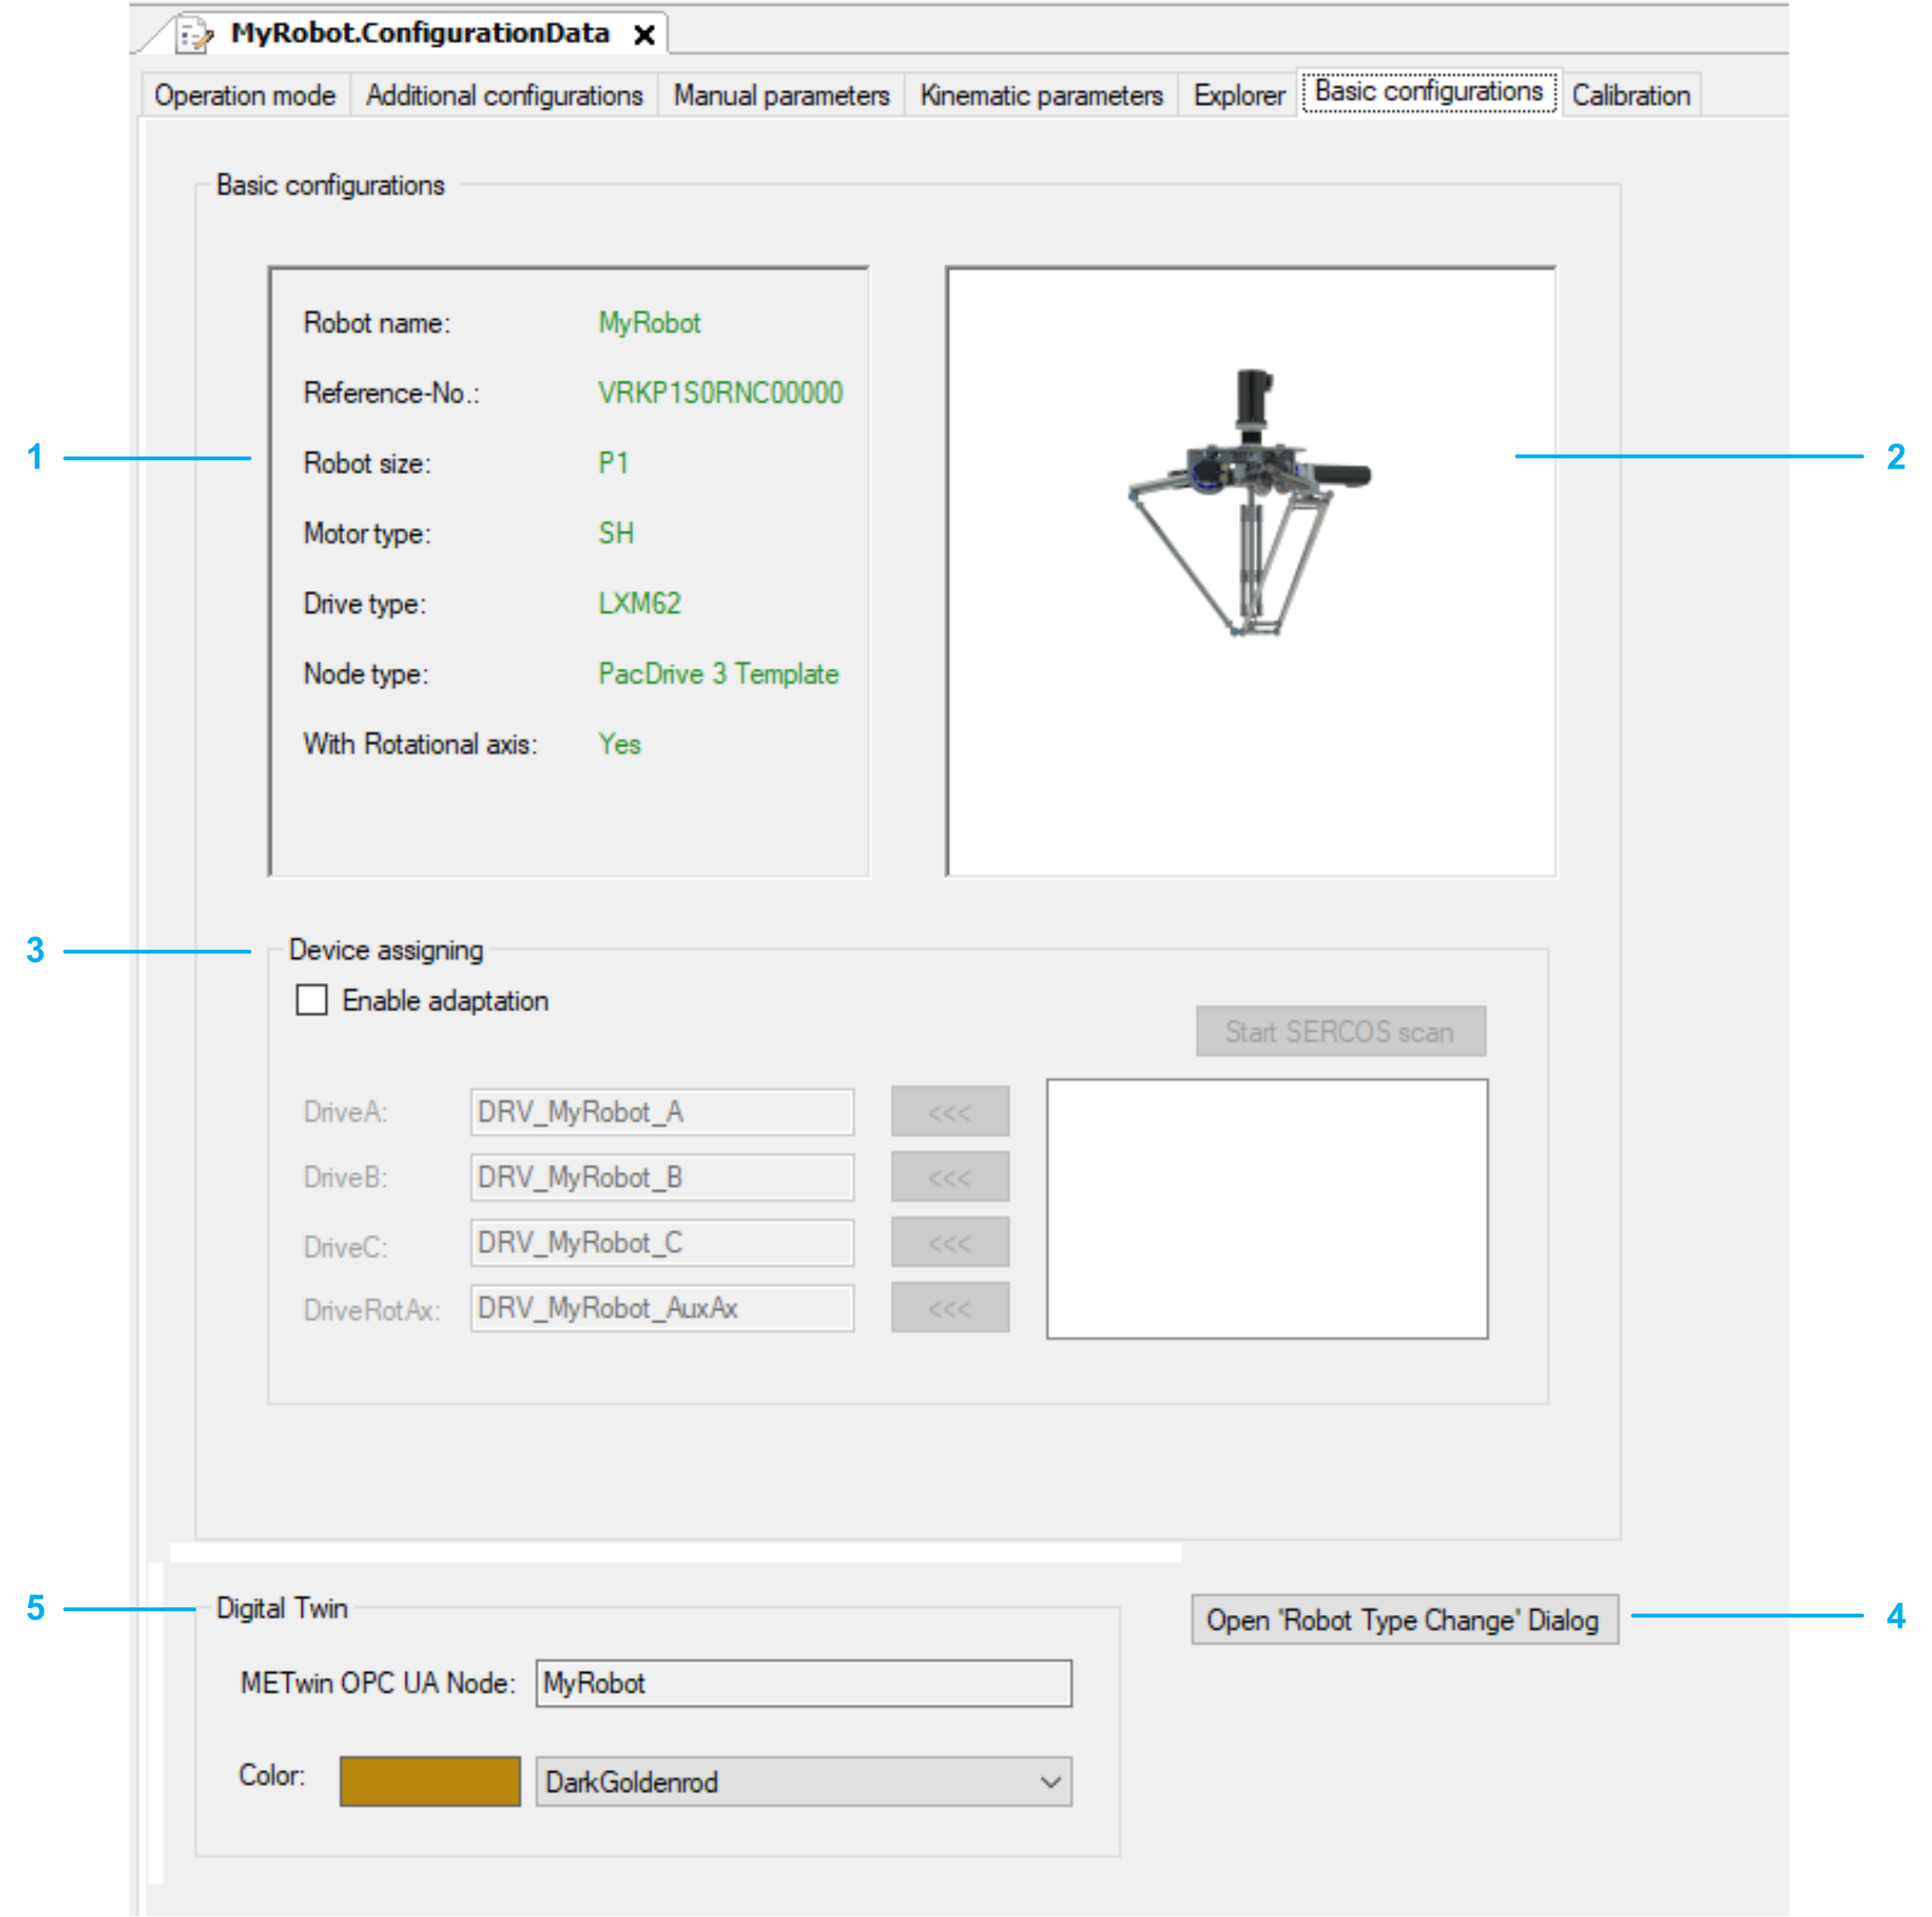
Basic Configurations
Overview
|
1 |
Displays the data of the selected robot. |
|
2 |
Displays a graphic of the selected robot. |
|
3 |
: Assigns devices to modules. |
|
4 |
: Opens the robot type change dialog box. |
|
5 |
: Displays the node name of the robot which is used for communication and displayed in the EcoStruxure Machine Expert Twin. In addition, you can select the color used in the EcoStruxure Machine Expert Twin to identify the robot. |
Device Assigning
To assign a device to a module, proceed as follows:
|
Step |
Action |
|---|---|
|
1 |
Activate the check box . |
|
2 |
Click the button. |
|
3 |
Select a device in the box below the button. |
|
4 |
Assign the selected device to a module by clicking the button beside the respective drive. |
Open Robot Type Change Dialog Box
To change the robot type, proceed as follows:
|
Step |
Action |
|---|---|
|
1 |
Click the button. Result: An additional dialog box opens next to the current dialog box to compare the previous settings with the new settings. |
|
2 |
Select the new. You can use the filter , , (if configuration is possible) and to find the Robot type. |
|
3 |
Click . Result: The configuration is processed with the new parameters. When the changes are successfully completed, the Robot ‘Type Change‘ Feature dialog box opens with the request to proceed a ‘Clean All’ and ’Rebuild All’. Confirm with Ok. |
For detailed information on robot type change configuration, refer to How to Change Robot Types.