Mounting a Lexium™ MC12 carrier
Overview
-
Carriers have strong local magnetic fields. Refer to Transporting the Lexium™ MC12 carriers.
-
The carriers have strong drive magnets and can attract metal objects that are in their proximity.
-
A carrier can move suddenly and fast due to magnetic attraction.
| WARNING | |
|---|---|
The carrier has two magnets which, together with the magnetic fields in the segments, move the carrier on the track. These two magnets are glued onto the carrier. A shock to the carrier can cause the glued-on magnets to flake off and the magnets can splinter.
In addition, the carrier has an encoder magnet. This can be demagnetized by improper handling, for example, if the magnets of another carrier come too close.
| WARNING | |
|---|---|
For information on filling the lubrication reservoirs refer to Filling the Lubrication Reservoirs.
Mounting
|
Step |
Action |
|
|---|---|---|
|
1 |
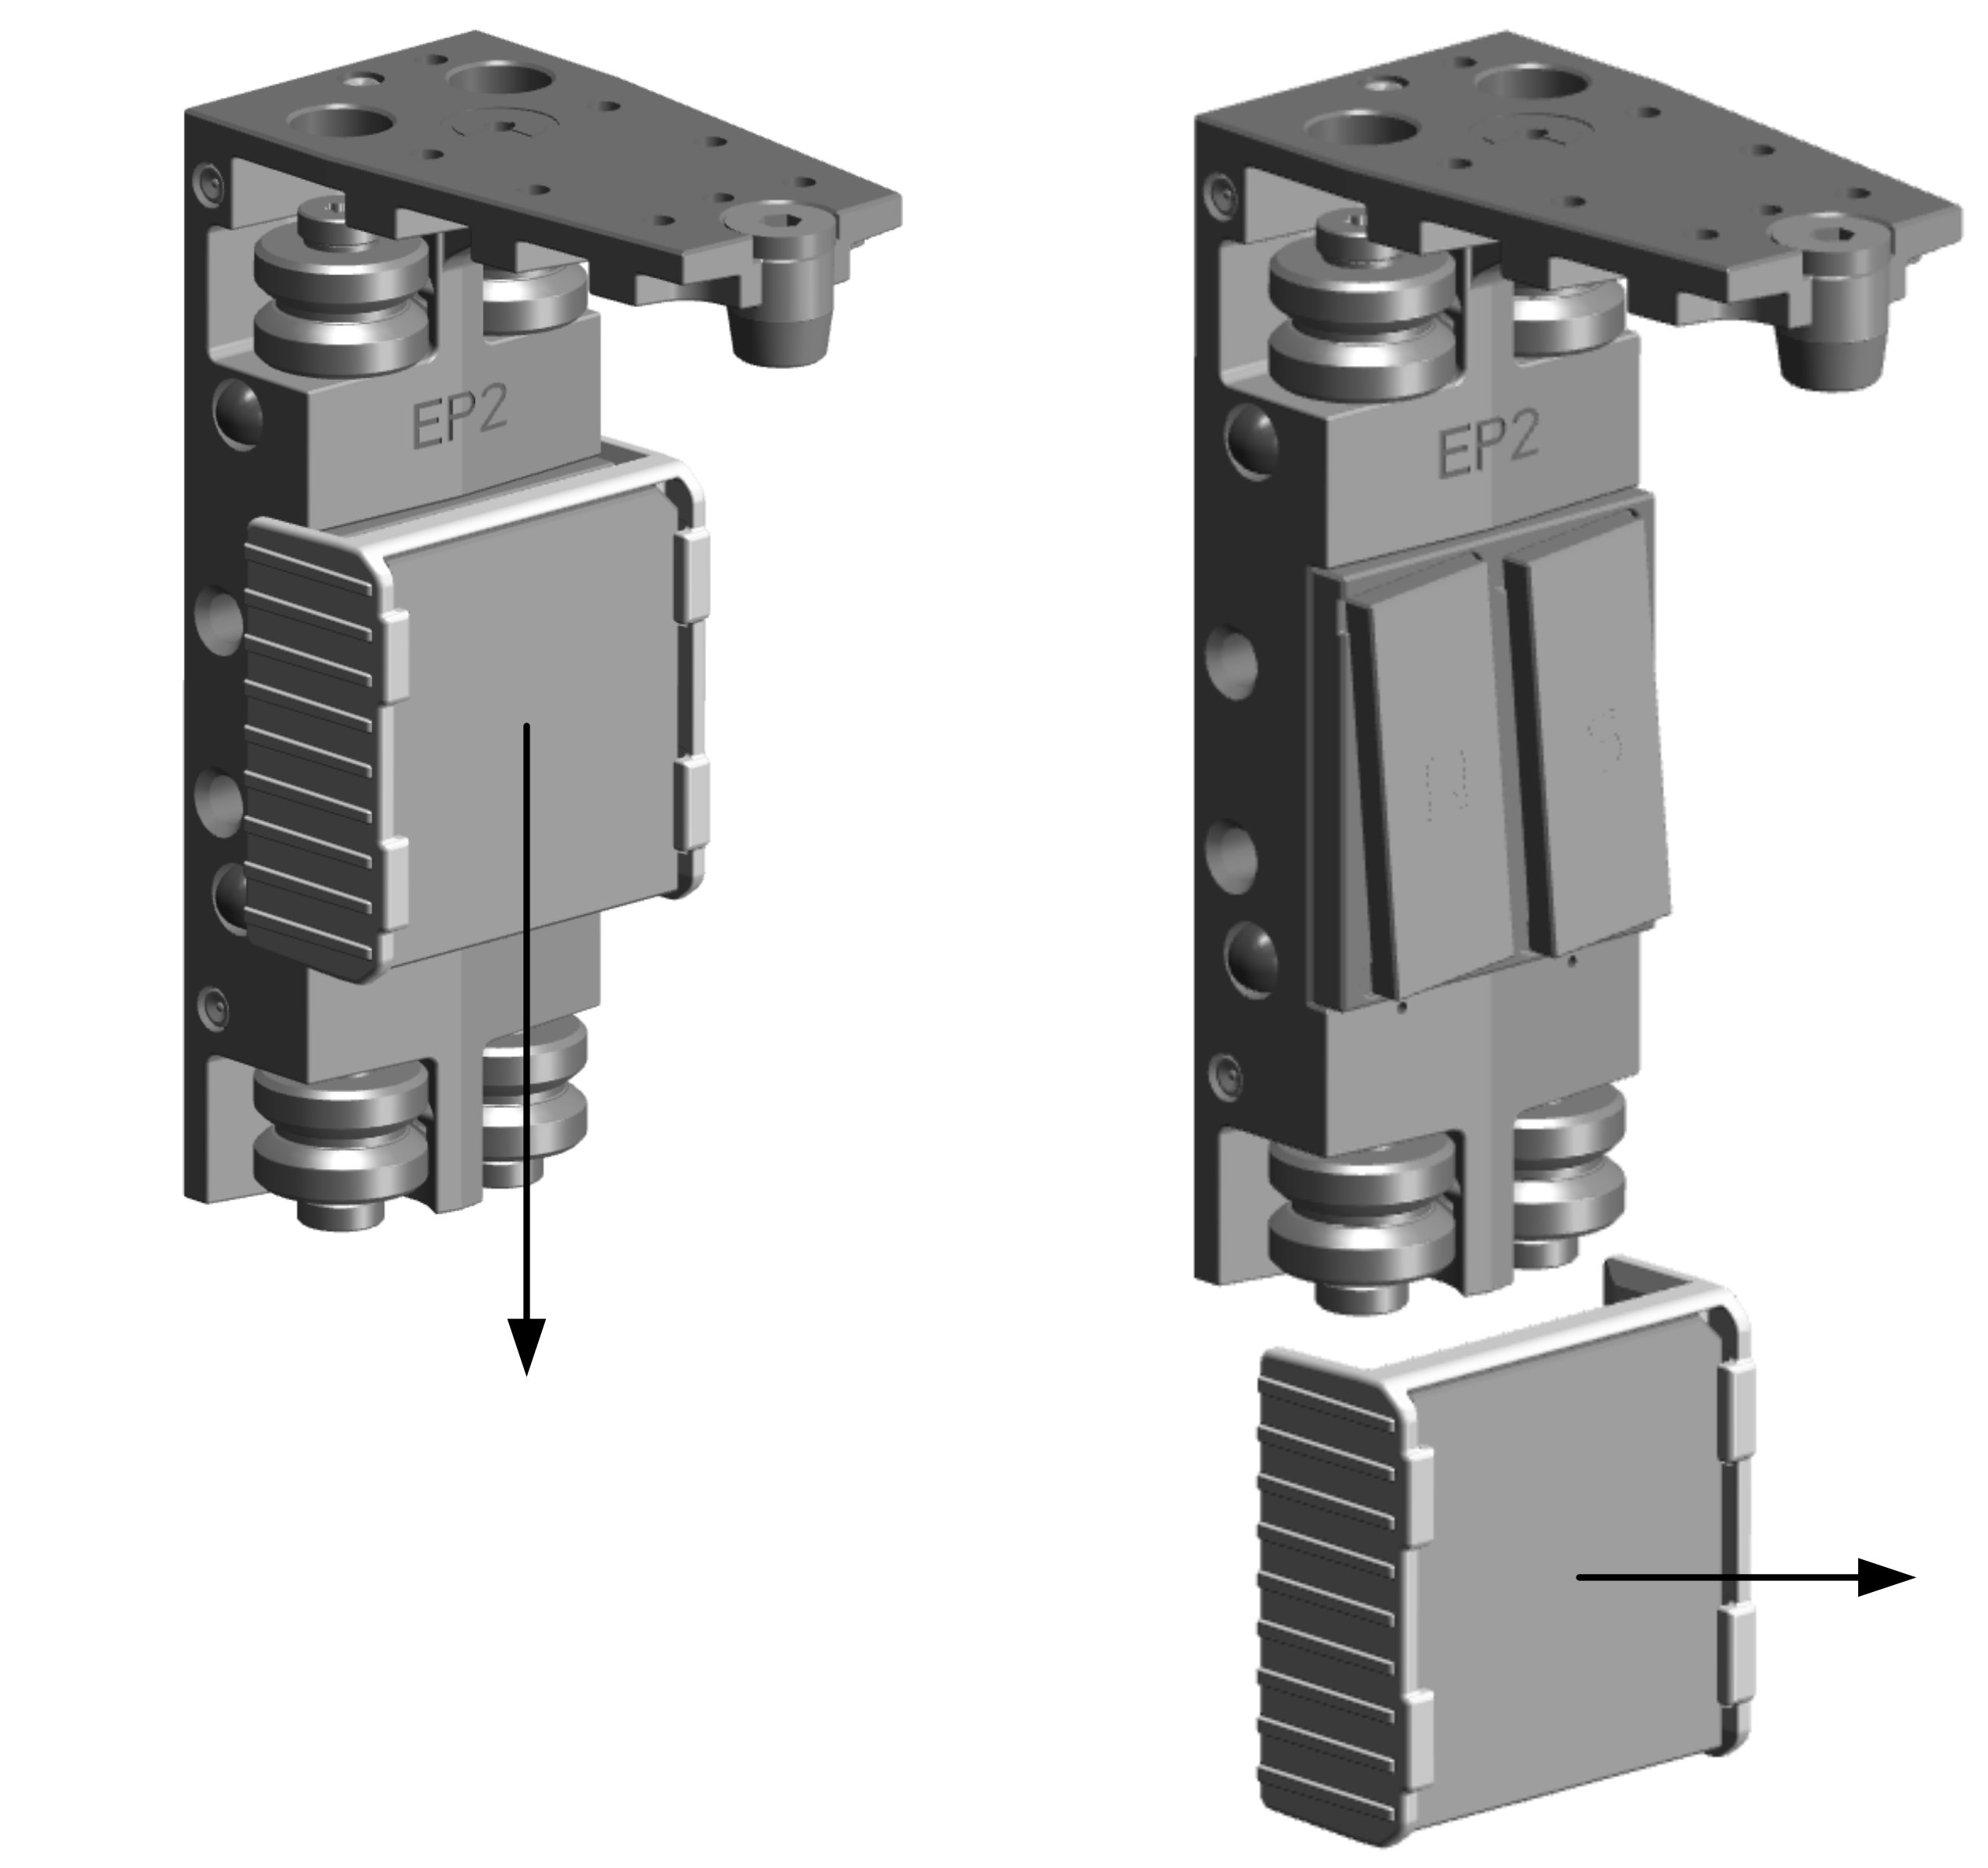
Install the protective cover of the drive magnets by sliding it onto the magnets if it is not already installed. |
|
|
2 |
Fill the lubrication reservoirs of the carriers before first use. Refer to Filling the Lubrication Reservoirs. |
|
|
3 |
Attach the Lexium™ MC carrier handling tool to the carrier. 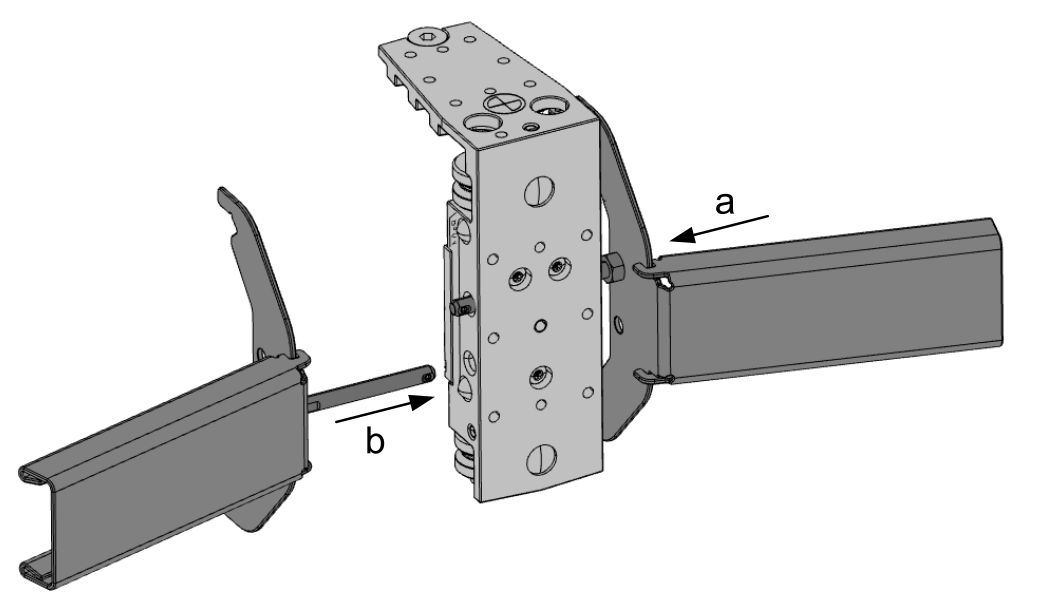
NOTE: The Lexium™ MC carrier handling tool consists of two identical parts.
Push the guide bolt (a) of the first part of the Lexium™ MC carrier handling tool from the right through the carrier. Push the guide bolt (b) of the second part of the Lexium™ MC carrier handling tool from the left through the carrier.
NOTE: The right and the left part of the Lexium™ MC carrier handling tool are secured by circlips at the upper end of the guide bolts.
|
|
|
4 |
Remove the protective cover of the drive magnets by sliding it from the magnets. For more details, refer to Removing the Protective Cover of the Drive Magnets. |
|
|
5 |
Place the upper and lower guide grooves (c) of the Lexium™ MC carrier handling tool on the upper and lower rails. 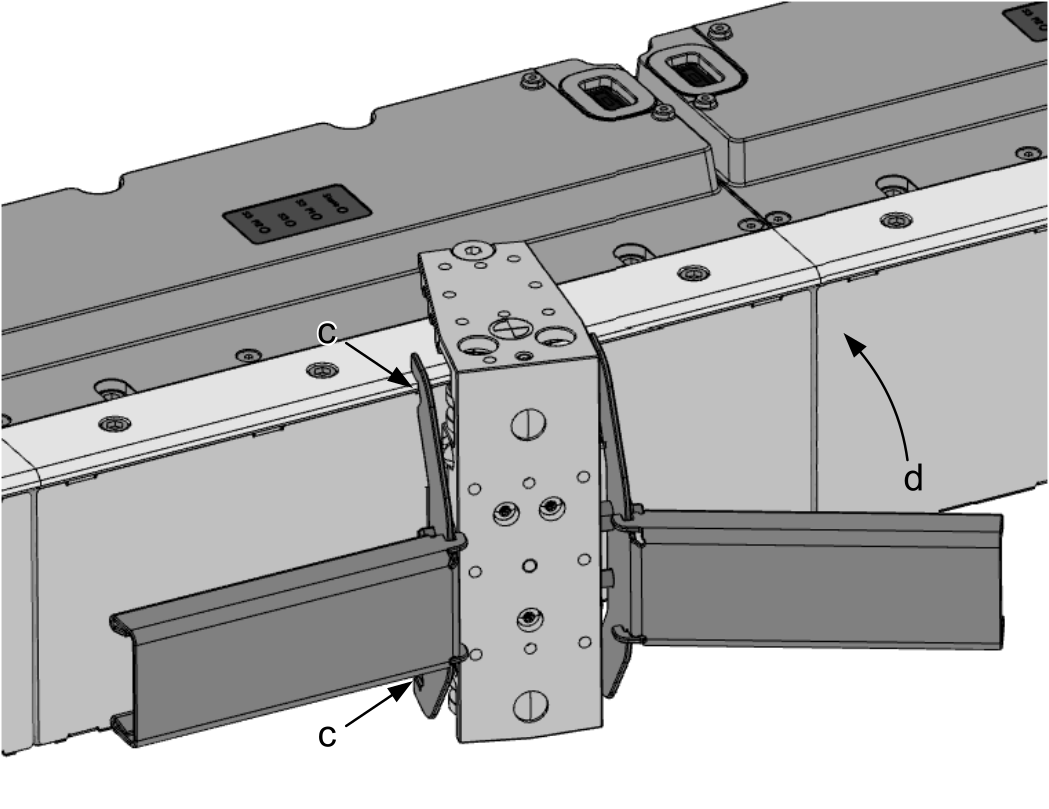
|
|
|
6 |
Swivel the Lexium™ MC carrier handling tool with the carrier towards the segment until the carrier is magnetically attracted to the segment (d). Result: The two upper rollers (e) and the two lower rollers (f) of the carrier are positioned on the rails. The carrier can be moved manually along the rails. 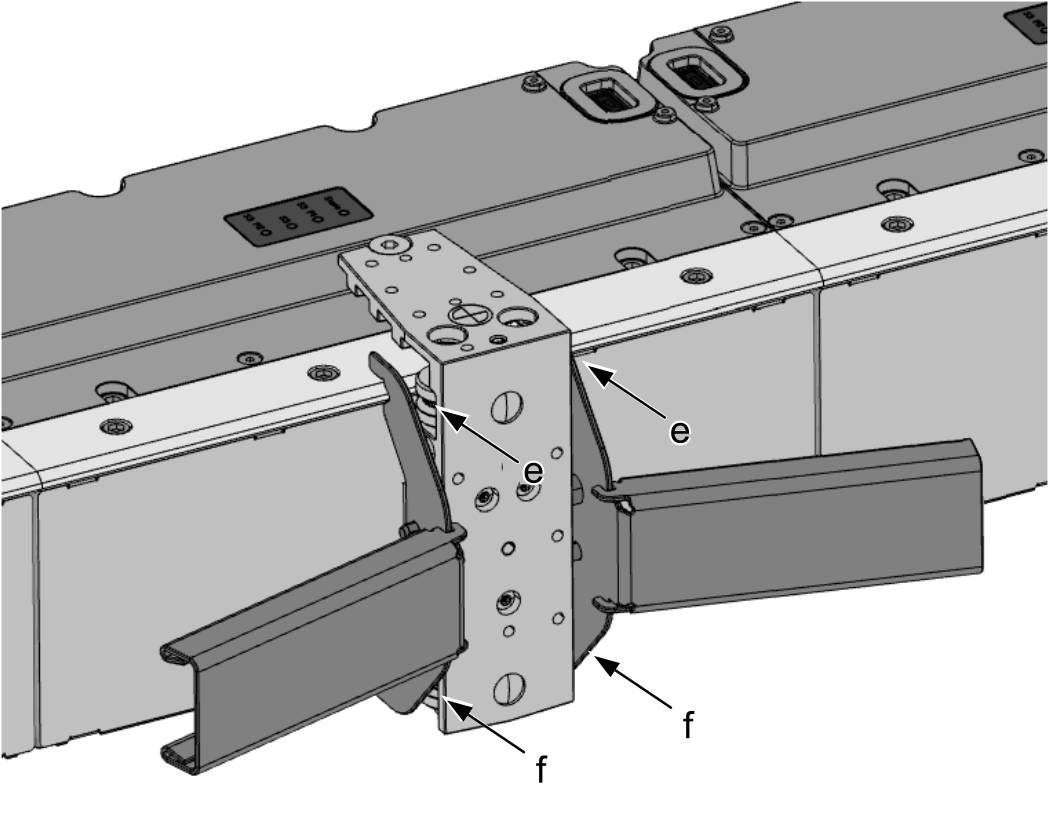
|
|
|
7 |
Disassemble the Lexium™ MC carrier handling tool from the Lexium™ MC12 carrier. |
|