When the cover strip is cut to length, the edges may be sharp.
|
|
|
SHARP EDGES |
|
Wear protective gloves when cutting and installing the cover strip. |
|
Failure to follow these instructions can result in death, serious injury, or equipment damage. |
NOTE: When the cover strip is mounted, the stroke of the axis decreases.
Mounting Parts for the Cover Strip
A set for mounting the cover strip consists of the following components:

1 Cover strip clamps
2 Strip deflectors
3 Magnetic strips
4 Cover strip
You need the following tools to remove the cover strip:
oScissors
oTorque wrench with a set of hexagon sockets
oMetal shears
NOTE: Do not use ball head hex keys. Excessive torque may cause the ball head to break away. A broken ball head makes the removal of the screw difficult.
For suitable parts, refer to Replacement Equipment and Accessories.
Perform the following procedures at both ends of the carriage and at both ends of the axis to mount the cover strip:
oPreparing the mounting of the cover strip
oFastening the magnetic strips
Preparing the Mounting of the Cover Strip
|
Step |
Action |
|---|---|
|
1 |
Clean all parts. |
|
2 |
Inspect all parts for damage. |
|
NOTICE |
|
UNINTENDED EQUIPMENT OPERATION |
|
oReplace any damaged parts immediately. oClean all parts before assembly and use. |
|
Failure to follow these instructions can result in equipment damage. |
|
Step |
Action |
|---|---|
|
1 |
Clean the mounting surfaces of the magnetic strips at the axis body (1) such that they are free of grease. 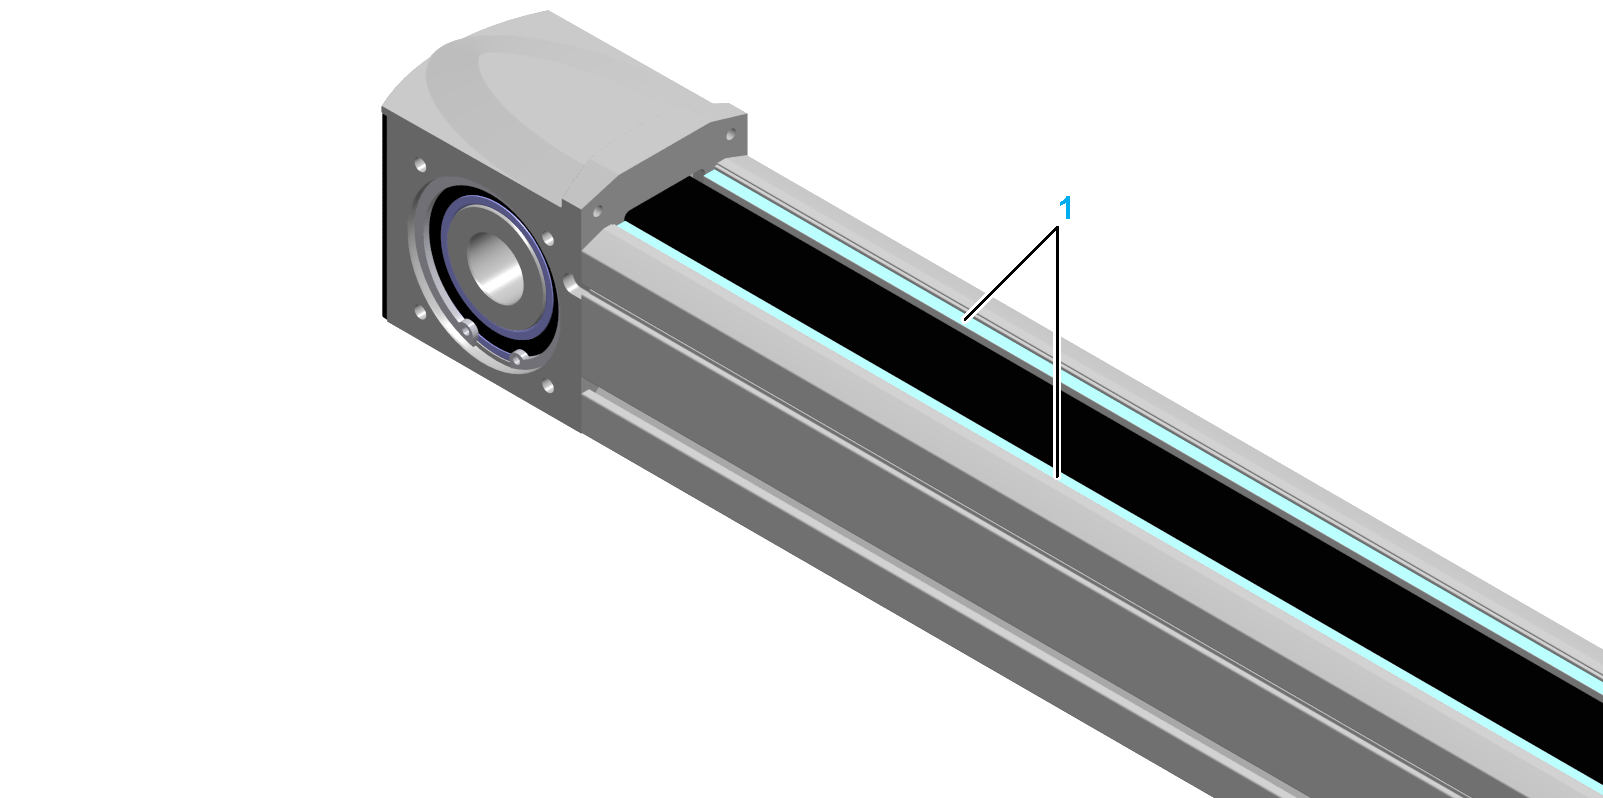
|
|
2 |
Place the magnetic strips along the axis body and cut them with the scissors to the same length as the axis body. |
|
3 |
Peel off the film of the magnetic strips (2) and fasten them with the glued side onto the mounting side of the axis body. 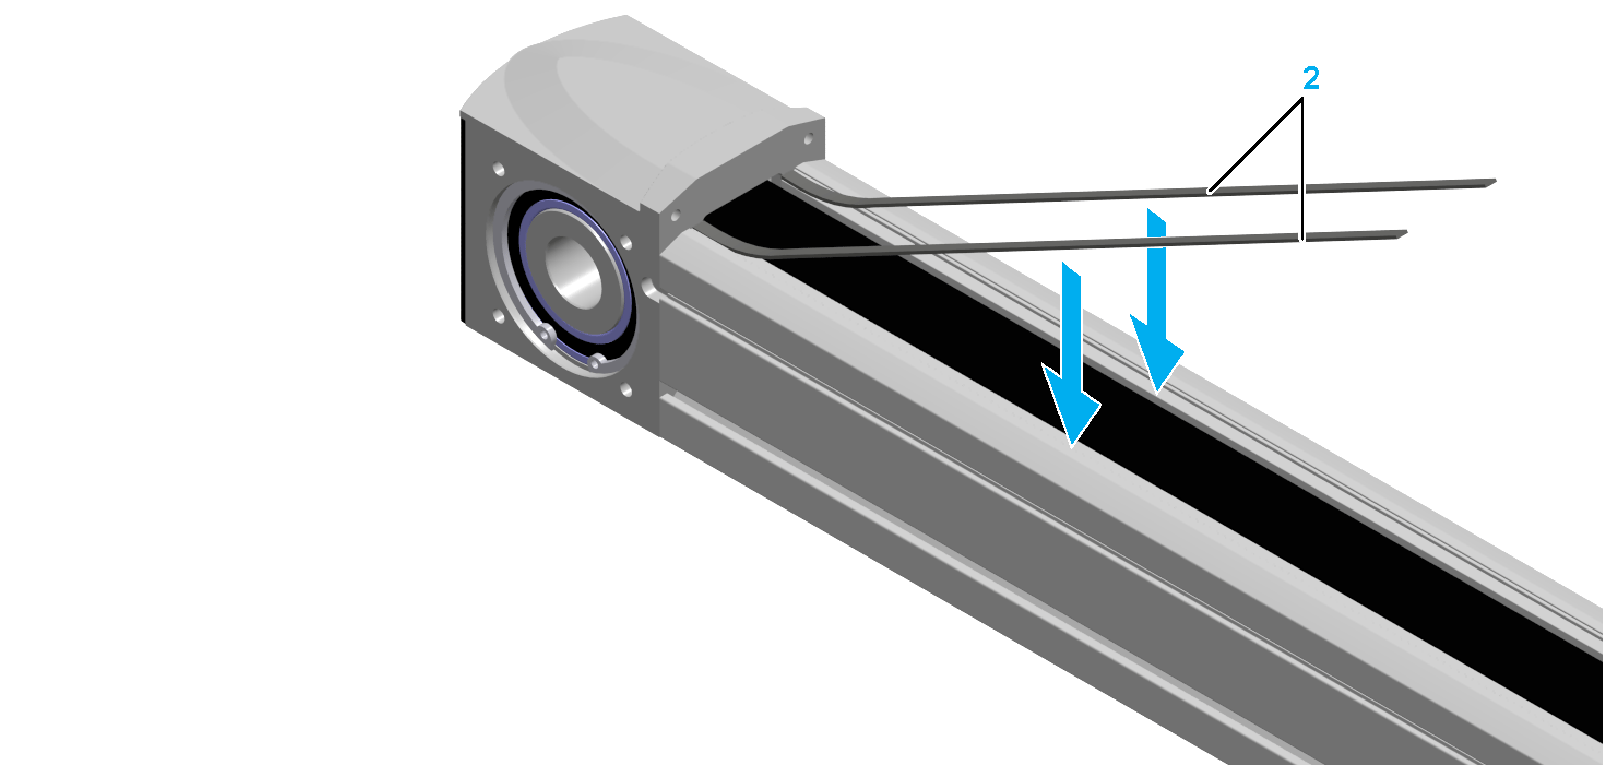
NOTE: Allow the adhesive to cure for 24 hours. |
|
Step |
Action |
|---|---|
|
1 |
Guide the cover strip (2) through the guide channel inside the carriage (1). 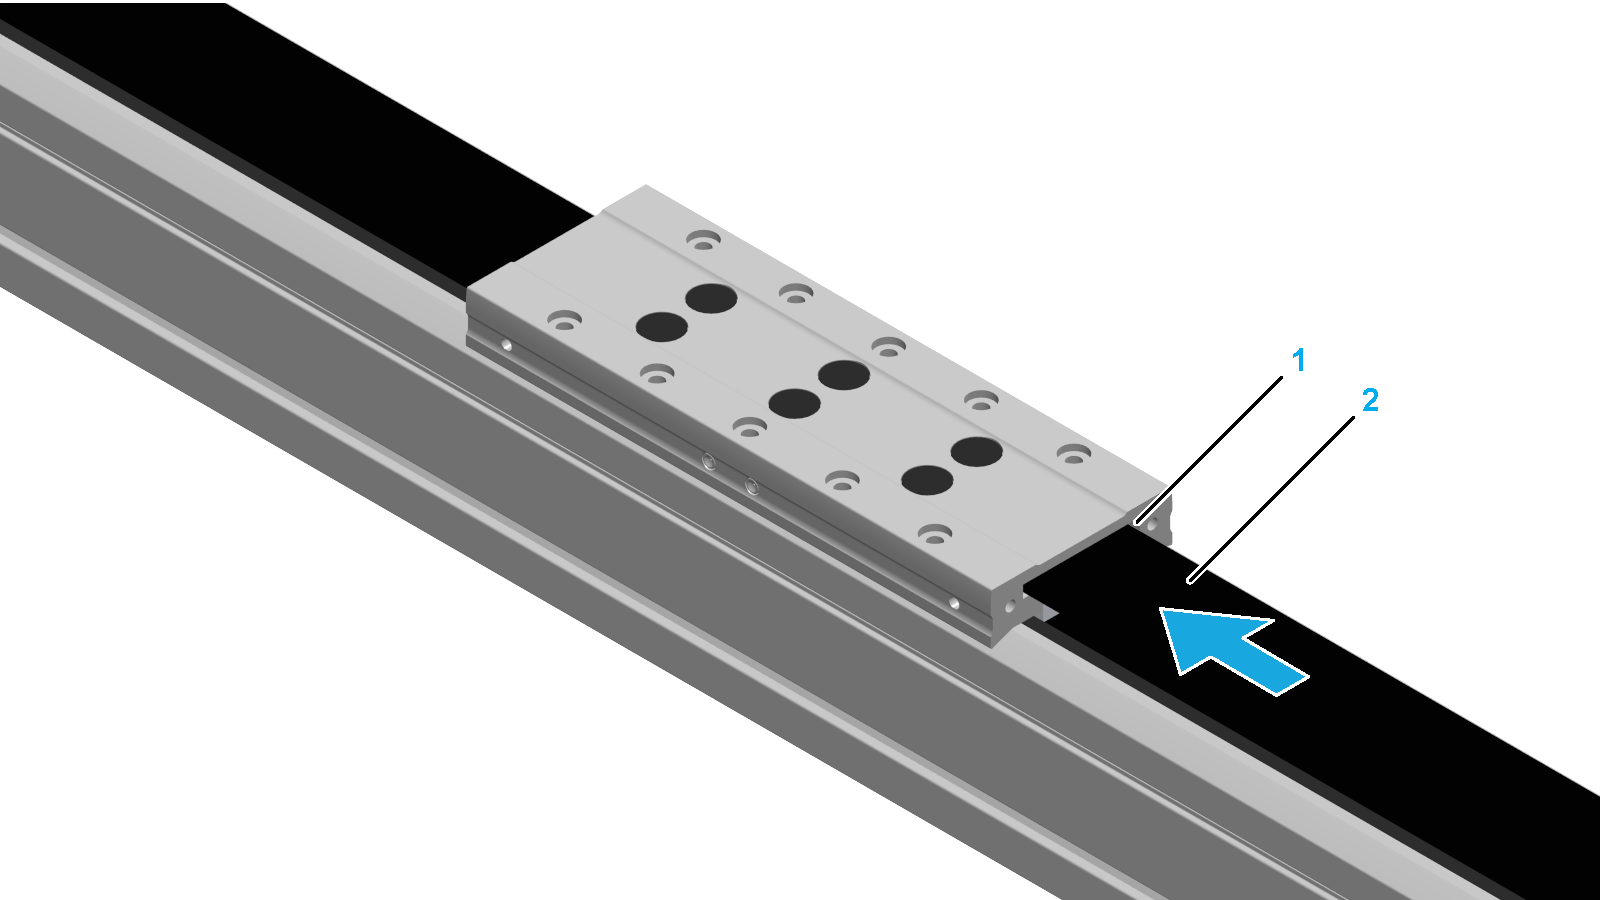
|
|
2 |
Guide the cover strip through the strip deflectors (3) at both sides of the carriage. 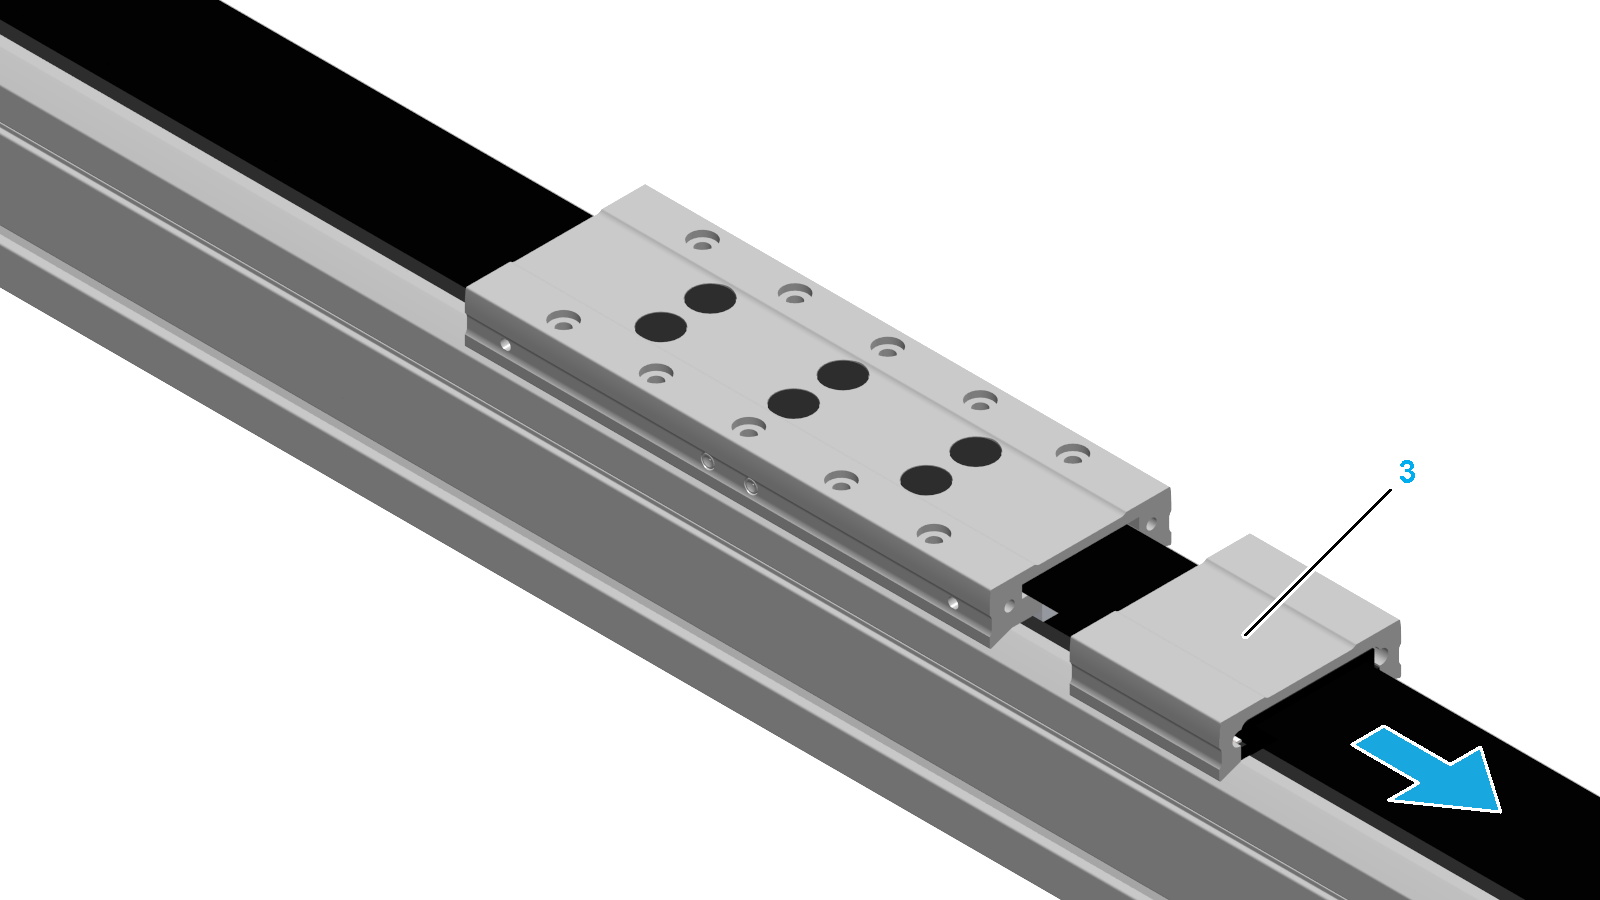
|
|
3 |
Fasten the strip deflector and the holding plate (4) to the carriage with the two screws (5) at both sides of the carriage. Use the standard tightening torque. Verify that there is no clearance between the carriage, the strip deflectors, and the holding plates such that the surfaces are flush. 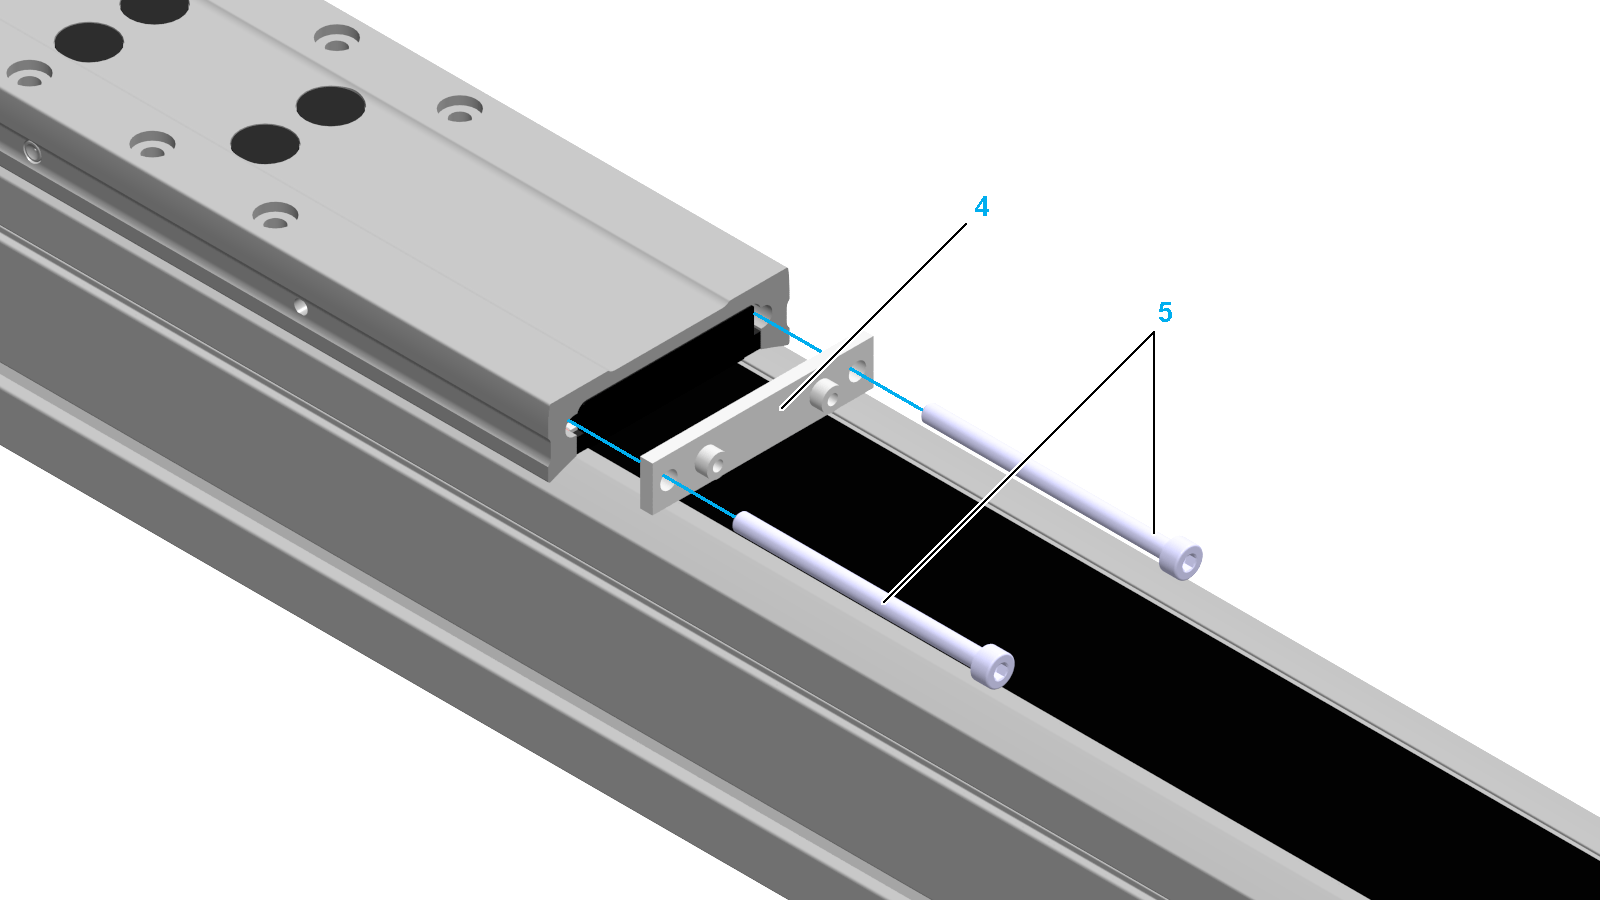
|
|
4 |
Place the cover strip from one of the two end blocks at a distance of 1…2 mm (0.04…0.08 in). Verify that there is no clearance between the cover strip and the magnetic strips such that the surfaces are flush. 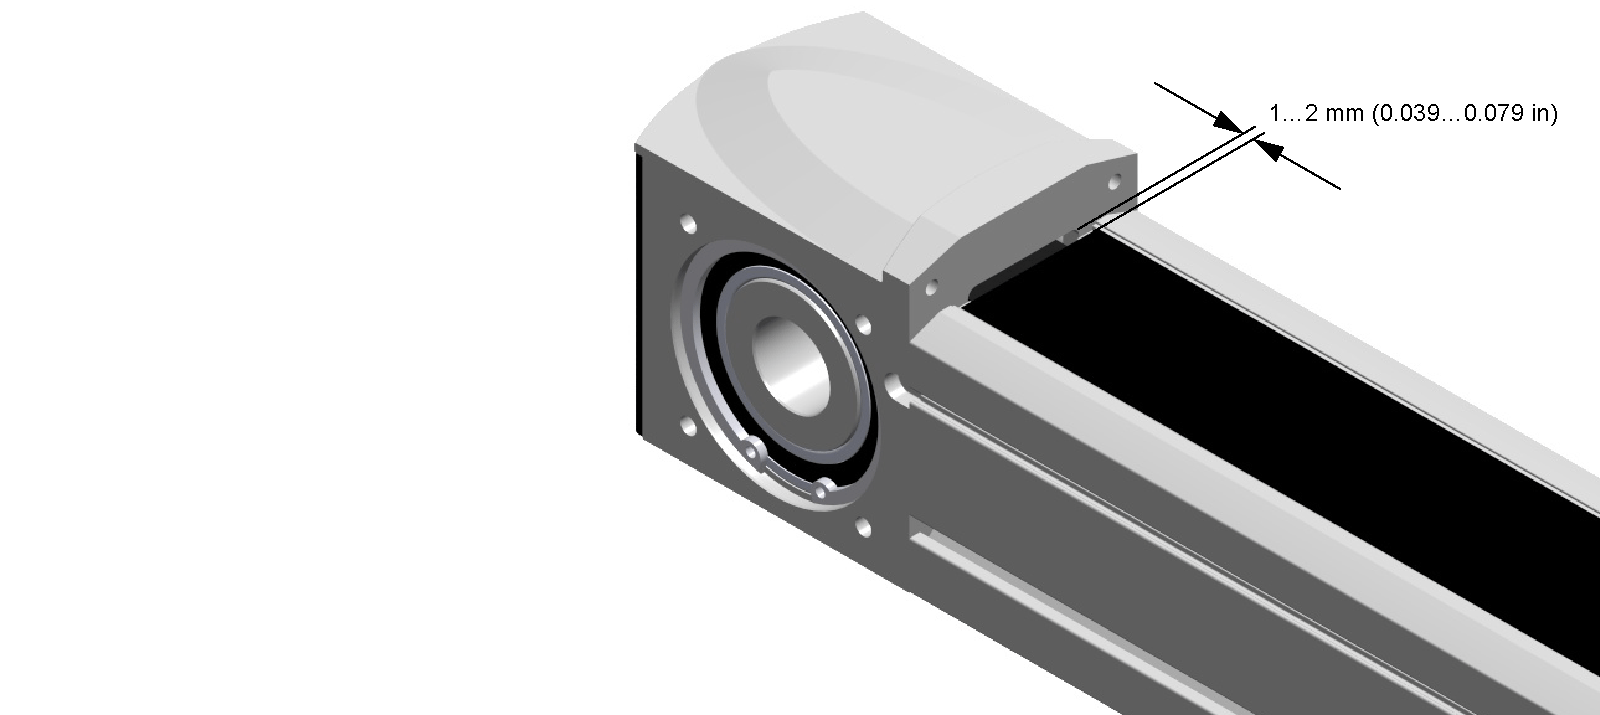
|
|
5 |
Fit the clamping plate (6) into place. 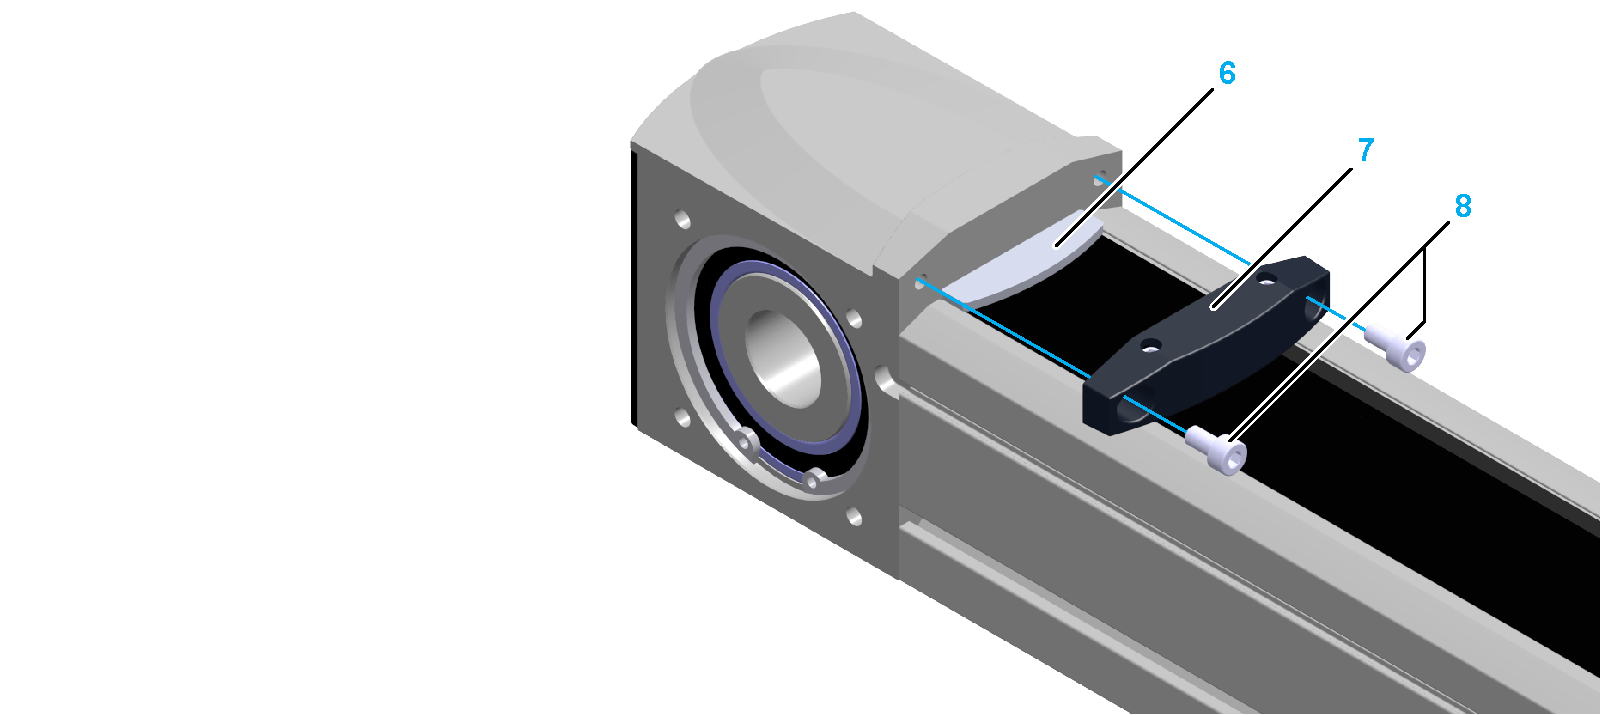
|
|
6 |
Fasten the cover strip clamp (7) to the end block with the two screws (8). Verify that there is no clearance between the cover strip clamp and the end block such that the surfaces are flush Tightening torque: oFor PAS41: 0.6 Nm (5.3 lbf-in) oFor PAS42: 1 Nm (8.9 lbf-in) oFor PAS43: 1.5 Nm (13.3 lbf-in) oFor PAS44: 3 Nm (26.6 lbf-in) |
|
7 |
Tighten the two setscrews (9) of the cover strip clamp. Tightening torque: oFor PAS41: 0.2 Nm (0.0079 lbf-in) oFor PAS42: 0.3 Nm (0.0118 lbf-in) oFor PAS43: 0.4 Nm (0.0157 lbf-in) oFor PAS44: 0.5 Nm (0.0197 lbf-in) 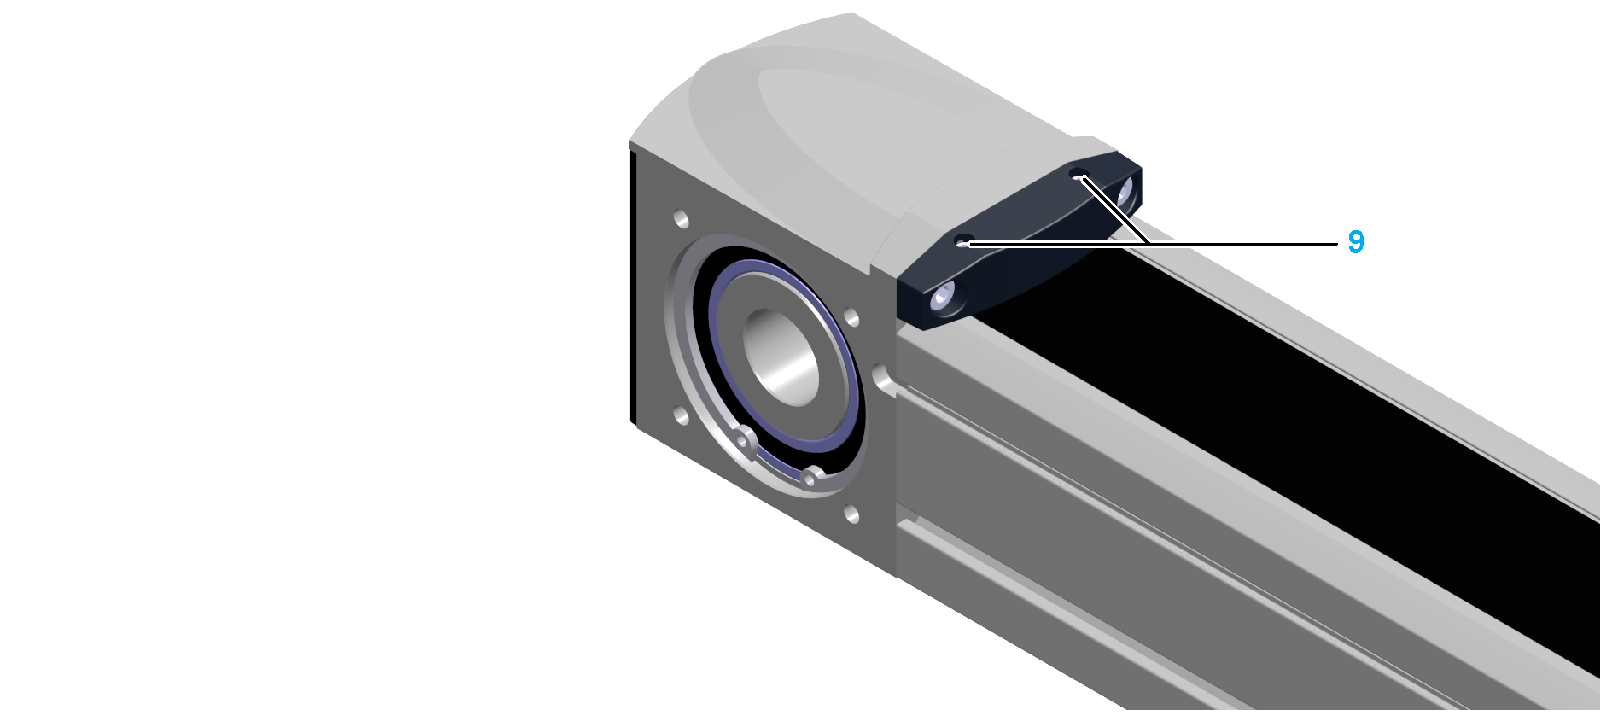
|
|
8 |
Cut the cover strip at the other end with the metal shear to length such that the distance between the cover strip and the second end block is also 1…2 mm (0.04…0.08 in). |
|
9 |
Repeat steps 5, 6 and 7 for the second end block. |
|
10 |
Fasten the rubber buffers (10) to the holding plates at both sides of the carriage with the two screws (11). Verify that there is no clearance between the rubber buffers and the holding plates such that the surfaces are flush. Tightening torque: oFor PAS41: 1.1 Nm (9.7 lbf-in) oFor PAS42: 1.1 Nm (9.7 lbf-in) oFor PAS43: 2.5 Nm (22 lbf-in) oFor PAS44: 2.5 Nm (22 lbf-in) 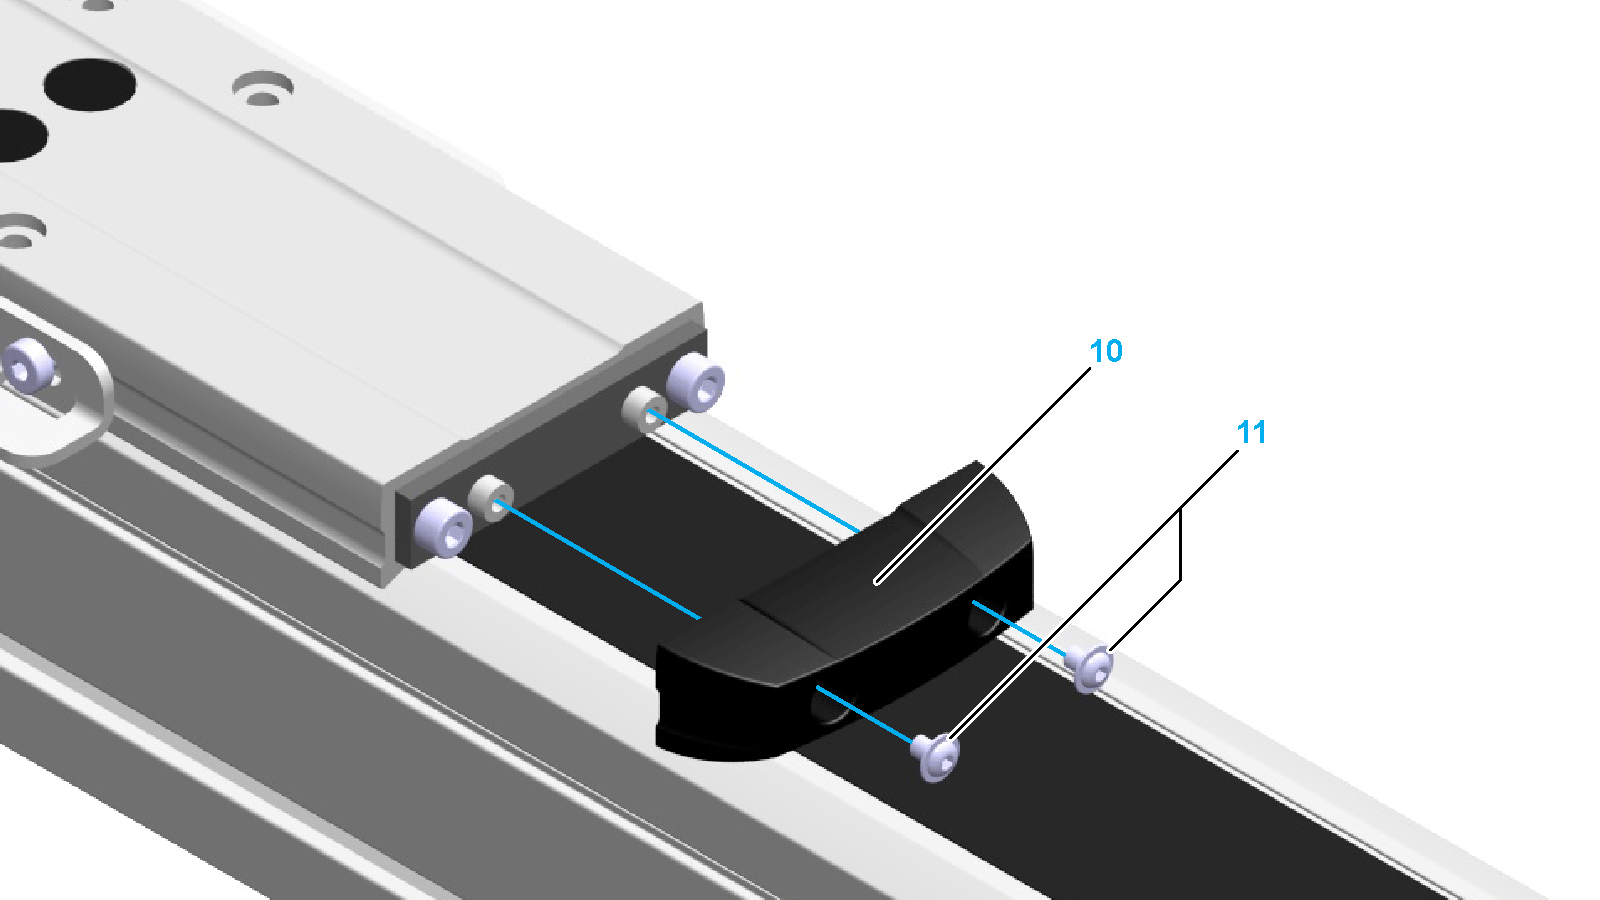
|
|
Step |
Action |
|---|---|
|
1 |
Run initial tests at reduced velocity. |
|
2 |
Verify proper function of the cover strip. |
