Target Types Tab
Overview
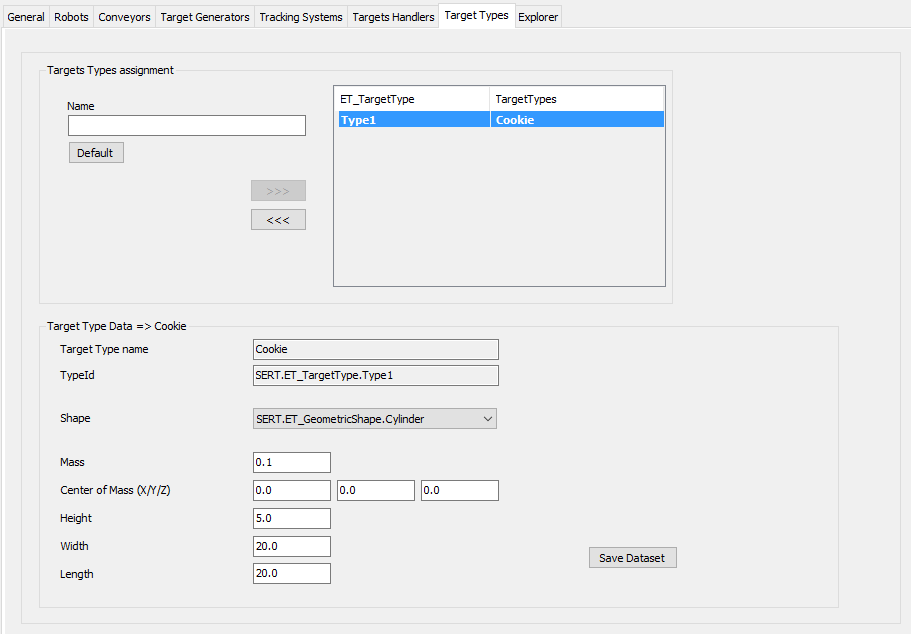
In this tab, you can create target types, for example, to display different target types with regard to shape, and size in a visualization.
Target Types Assignment
|
Element |
Description |
|---|---|
|
|
Enter a name for the target type. |
|
|
Click this button to create a default for the target type. |
|
|
Click this button to use the created target type in the RobotCell Module. Result: The target type is displayed in the list on the right of . |
|
|
Click this button to remove the target type from being used in the RobotCell Module. Result: The target type is displayed in the list on the left of . If you use the button, you are prompted by a dialog box to confirm. |
Target Type Data
Select a target type in the list on the right of to display the dataset of the target type.
|
Element |
Description |
|---|---|
|
|
Name of the selected target type. |
|
|
Id of the selected target type. The Id is automatically created from the target type name, for example, SERT.ET_TargetType.Type1. |
|
|
Select a parameter for the shape. Possible values are: ... Set this parameter to a value unequal to . |
|
|
Enter a value for the mass of the target type. |
|
|
Enter the value for the center of the mass of the target type (X/Y/Z). |
|
|
Enter a value for the height of the target type. |
|
|
Enter a value for the width of the target type. |
|
|
Enter a value for the length of the target type. |
|
|
Click this button to save the modified data. Also refer to Verifying of Parameter Modifications. |