How to Change Robot Types
Restrictions
-
Robot name
-
Node type
-
Generate POU instance (option if node type is equal to Non-Template)
Selecting the Robot Type
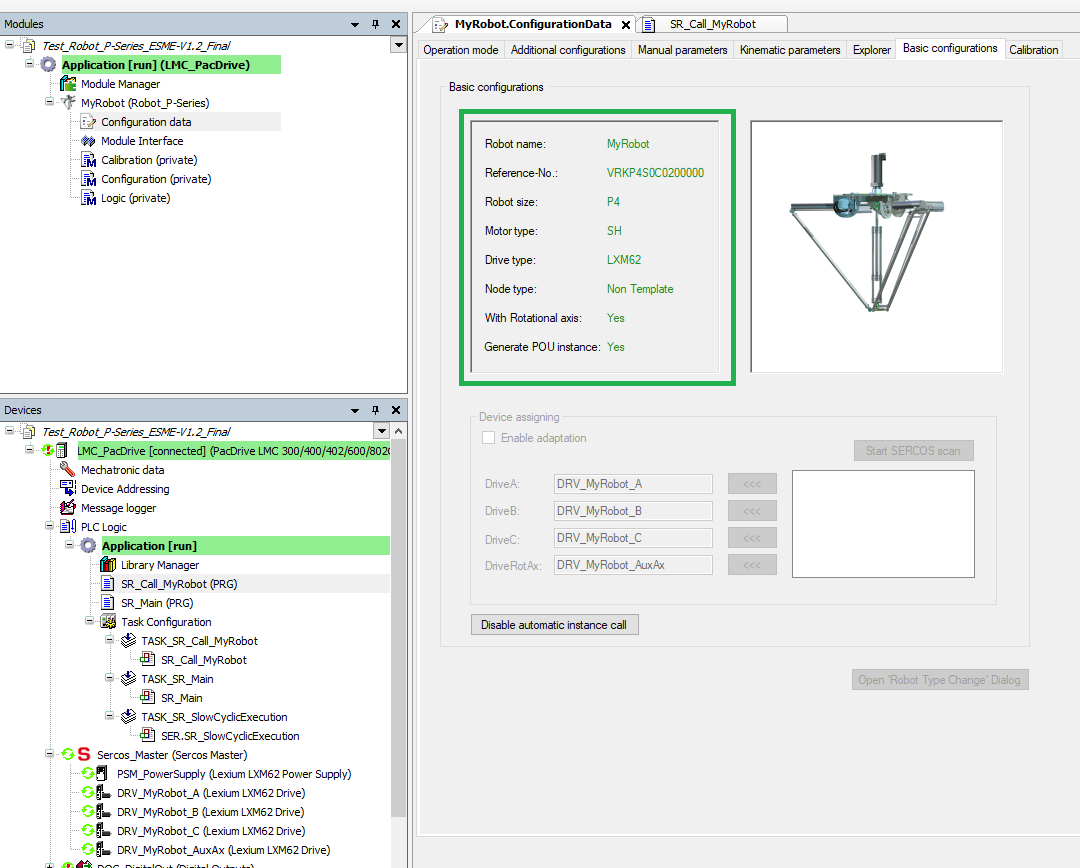
This example includes a P4 robot with the following basic configuration parameters as shown below:
The P4 robot should be changed to a P5 robot with the following configuration parameters:
-
VRKP4S0C0200000:P4, SH motor, LXM62 drive, with Rotation axis
-
VRKP5L0FNC00000: P5, ILM motor, ILM62 drive, no Rotation axis
| Step | Action |
|---|---|
|
1 |
Open the Robot Type Change dialog box. Select and press the corresponding button. |
|
2 |
Select the desired robot by entering the number of the robot or by using the different filters. 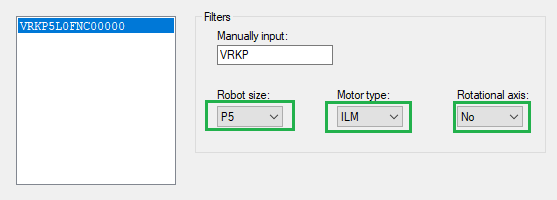
Result: The new robot is displayed in the Change Robot Type dialog box. |
Starting Robot Type Change
| Step | Action |
|---|---|
|
1 |
Select .
NOTE: It will take few minutes to process all the changes.
NOTE: During the program execution, do not operate in other windows until the process is finished.
|
|
2 |
Press OK the ‘Robot Type Change’ Feature dialog box. Result: The Basic configuration window will be updated with the new robot type. |
Results of Type Change Procedure
The results of the type change procedure is shown in the updated Basic configurations tab:
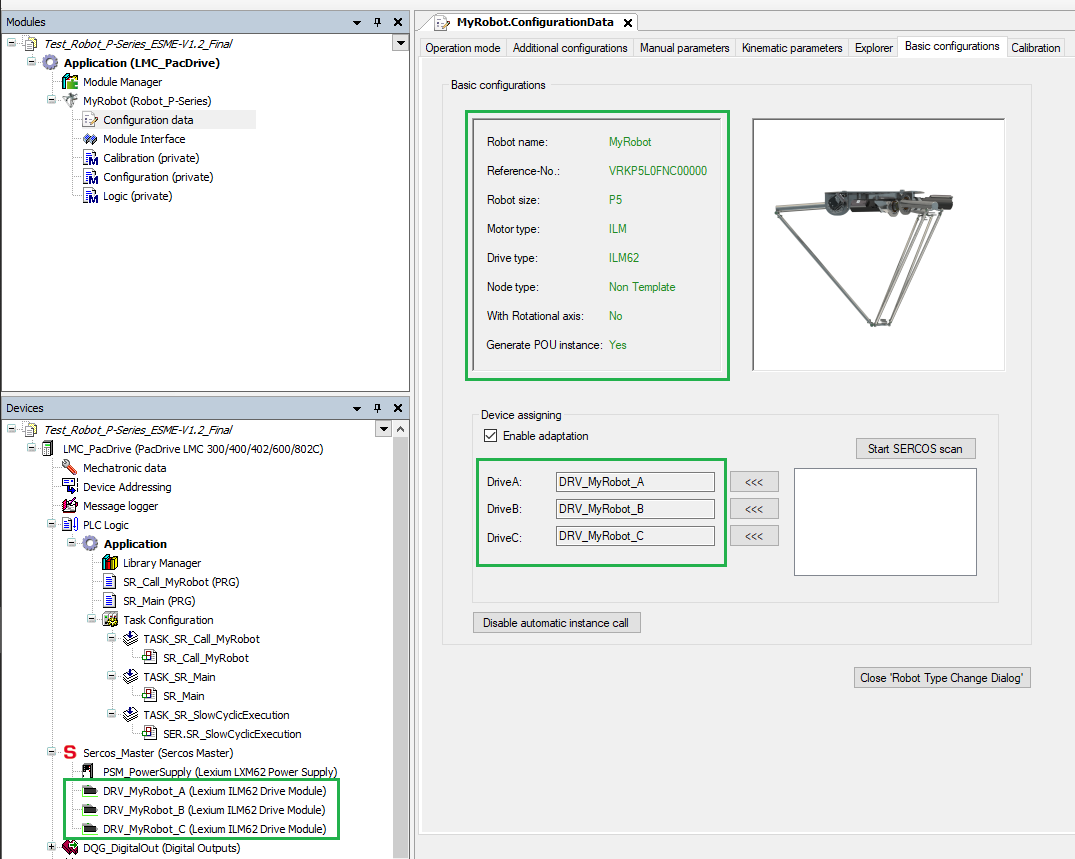
The robot configuration changes are:
| Parameter | Before Type Change | After Type Change |
|---|---|---|
|
VRK Reference |
VRKP4S0C0200000 |
VRKP5L0FNC00000 |
|
Robot size |
P4 |
P5 |
|
Motor type |
SH |
ILM |
|
Drive type |
LXM62 |
ILM62 |
|
Rotational axis |
Yes |
No |
|
Sercos devices tree |
Drive types modified to Lexium ILM62 and rotation axis drive has been deleted. |
|