Job Handling
Overview
In general there are two operation modes for job handling:
-
mode
This mode is described in this section.
-
mode
This mode provides to handle jobs based on spreadsheet programming.
To use this mode, you have to be familiar with spreadsheet programming.
This mode is not described in this section.
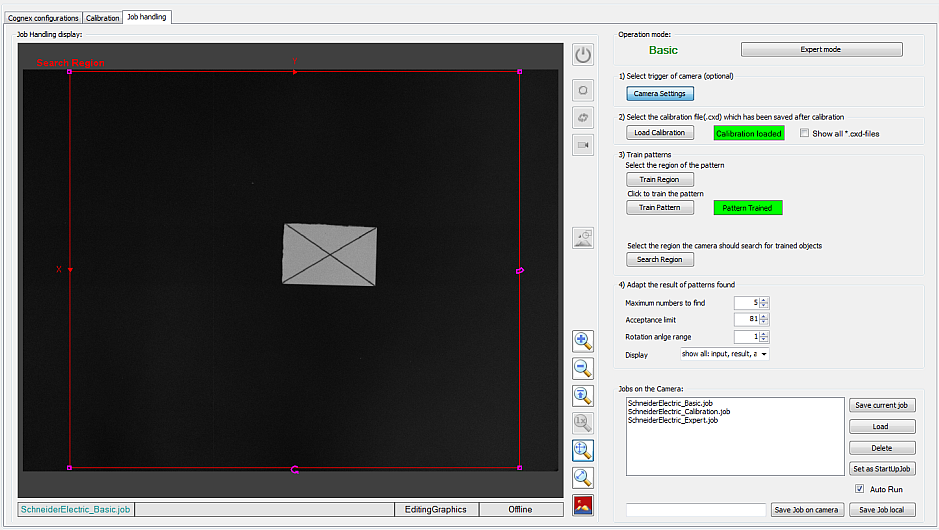
The tab in mode provides:
|
Element |
Description |
|---|---|
|
|
Shows the image received from the camera and the rectangle to train the pattern and to train the search region. |
|
|
The information bar at the bottom of the provides information on the job name and the operation mode (online / offline). |
|
|
The right-hand side of the tab provides a step-by-step instruction for job handling. |
Edit Camera Settings

|
Step |
Action |
|---|---|
|
1 |
For mode, select . |
|
2 |
Click the button. |
|
3 |
In the dialog, select:
|
|
4 |
Confirm with or close the dialog with . |
Select and Load a Calibration File

|
Step |
Action |
|---|---|
|
1 |
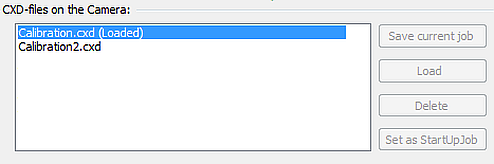
Activate the check box. Result: The list is displayed. |
|
2 |
Select a file and click . Result: The label is highlighted in green. |
SchneiderElectric_Calibration.job file is provided with the Camera Module.
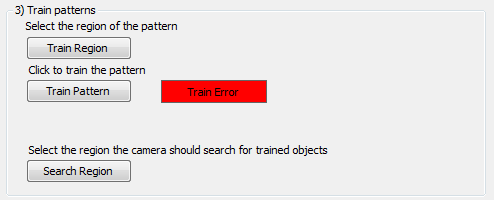
Train Patterns
|
Step |
Action |
|---|---|
|
1 |
Click the button. Result: A red selection frame is shown on the . |
|
2 |
Use this frame to select the pattern to search for. |
|
3 |
Confirm with the key and click the button. Result: The red label is replaced by the green label . |
|
4 |
Click the button. Result: A red selection frame is shown on the . |
|
5 |
Use this frame to select the region where trained patterns should be found. |
|
6 |
Confirm with the key. |
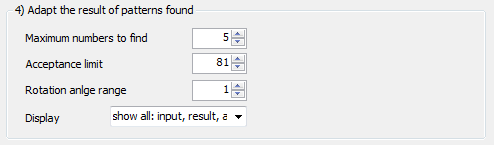
Adapt Results
|
Step |
Action |
|---|---|
|
1 |
To adapt the results of patterns found, select the following parameters:
|
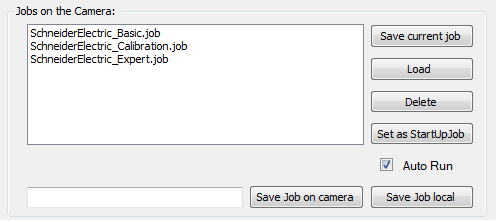
Save / Load / Delete Jobs
|
Step |
Action |
|---|---|
|
1 |
To save your job, enter a name and click the button or the button. |
|
2 |
The list displays the jobs already stored on the camera. Select a job and use one of the following buttons:
|
SchneiderElectric_Basic.job file and the SchneiderElectric_Expert.job file are provided with the Camera Module.
Buttons Available in Basic / Expert Mode
Buttons indicated with an are available with the respective mode.
|
Button |
Description |
Basis mode |
Expert mode |
|---|---|---|---|
|
|
Toggle between online / offline mode of the camera. |
X |
X |
|
|
Request one image from the camera. |
X |
X |
|
|
Enter mode. Images are requested with a continuous trigger from the camera. |
X |
X |
|
|
Enter mode. Images are continuously requested from the camera. |
X |
X |
|
|
Show / hide the semitransparent spreadsheet overlay. |
- |
X |
|
|
Toggle the display of the , as defined in the dialog. |
- |
X |
|
|
Show / hide graphical overlays associated with spreadsheet functions. |
- |
X |
|
|
Increase the spreadsheet overlay transparency. The image becomes more visible. |
- |
X |
|
Decrease spreadsheet overlay transparency. The image becomes less visible. |
- |
X |
|
|
|
Zoom in the background image. |
X |
X |
|
Zoom out the background image. |
X |
X |
|
|
|
Zoom the background image to maximum size. |
X |
X |
|
|
Set zoom ratio to 1:1. The image represents a 1:1 pixel mapping between the image and your display resolution. No automatic scaling is performed. |
- |
X |
|
|
Fill the entire display with the image. No empty space appears around the image, but a part of the image may be cropped (not visible). |
X |
X |
|
|
Fit image to display. The image is automatically scaled so that the entire image is visible. The original aspect ratio of the image is kept. Some empty (gray) space may appear around the image. |
X |
X |
|
|
Enable / disable the highlighting of pixels in the image with a gray level less than or equal to the low saturation level (in blue) and greater than or equal to the high saturation level (in red). |
X |
X |


