Virtual ViewX Security
HTTP Strict Transport Security (HSTS) helps to protect websites against man-in-the-middle attacks, such as cookie hijacking and downgrade attacks. It requires web servers to only interact with web browsers using HTTPS connections. It also requires that the connections to the web browser have to be secured using a valid trusted certificate that fulfills the following criteria:
-
The certificate must be valid and be trusted by the client.
-
The certificate must not be expired.
-
The certificate must contain the domain or subdomain that was called in the browser.
If you enforce an HTTPS-only connection policy in your company and use Virtual ViewX, we recommend that you enable HSTS on the Virtual ViewX (web) server. Before you do this, you have to configure the web server to use a trusted certificate.
Enable HSTS on the IIS Web Server
rejection of self-signed certificates and inability to access the web server site via http
-
Once HSTS is turned on, any browser that accesses the web server site will be locked to using HTTPS for the amount of time that is defined by the web server.
-
HSTS prevents the browsers from allowing users to accept a self-sign certificate (or any unrecognized certificate) from the web server site. As such, users will only be able to use Virtual ViewX if the web server is configured to use trusted certificates that have not expired.
Be aware of the above before you enable HSTS on the web server.
Configure the Virtual ViewX (web) server to use a trusted certificate
You typically specify whether the Virtual ViewX server is to use a trusted certificate during the installation process
If you need to change the configuration of the web server because it is not currently configured to use a trusted certificate:
-
Obtain a valid certificate from a trusted certificate authority (CA).
-
Load that certificate into the Windows certificate store on the web server machine.
-
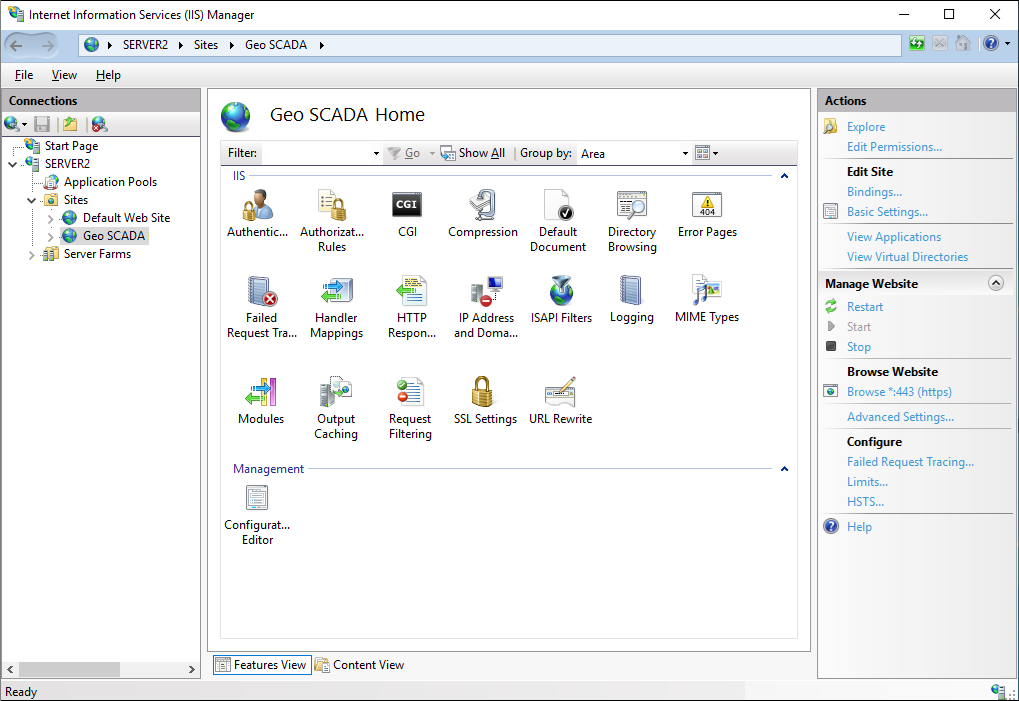
Use the IIS Manager tool in Windows to navigate to the reverse proxy website of the Virtual ViewX (web) server.
-
Select the Bindings entry from the Actions section of the right-hand pane.
-
Select the HTTPS binding entry from the Site Bindings dialog box that is displayed.
-
Select the Edit button and then configure the required certificate in the dialog box that is displayed.
To enable HSTS on the IIS web server:
(Only do this after you have obtained and installed a valid trusted certificate for the web server to use and have configured the web server to use that certificate.)
-
Use the IIS Manager tool in Windows to navigate to the reverse proxy website of the Virtual ViewX(web) server.
-
Select the HSTS entry in the Manage Website section of the right-hand pane.
The Edit Website HSTS dialog box is displayed.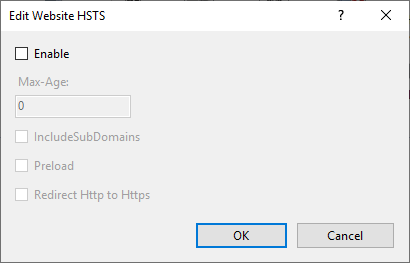
-
Select the Enable check box to enable HSTS on the Virtual ViewX (web) server.
The other properties in the dialog box become available for use. -
In the Max-Age field, specify the number of seconds for which the user is prevented from using HTTP to visit the website once they have used the browser to visit the site using HTTPS.
-
Use the IncludeSubDomains check box to specify whether HSTS should also be enabled for subdomains. This is not required for the Geo SCADA Expert reverse proxy.
-
Only select the Preload check box if the site is to be added to the HSTS preload list. This is unlikely to be the case for most Virtual ViewX (web) servers.
-
Use the Redirect Http to Https check box to specify whether to instruct the user's browser to change to HTTPS if the browser initially attempts to access the website using HTTP.
Customize the Web Headers in Virtual ViewX
The headers that are included in responses from the Virtual ViewX (web) server are used to control browser behavior. For example, the ability to embed Virtual ViewX within other web pages. The headers are configured in the following file:
C:\Program Files\Schneider Electric\VirtualViewX\web-headers.json
If you want to configure alternative options for the web headers, we recommend that you:
-
Copy the above file to the following location:
C:\ProgramData\Cybele Software\Thinfinity\VirtualUI\web-headers.json
-
Make your changes to the file at the latter location.
This will help to ensure that your customizations are not overwritten after a Virtual ViewX upgrade.