Collecting Data from the Controller
Overview
This chapter provides a step by step description for the most common type of data connection to a controller via .
Proceed as follows:
|
Step |
Action |
|---|---|
|
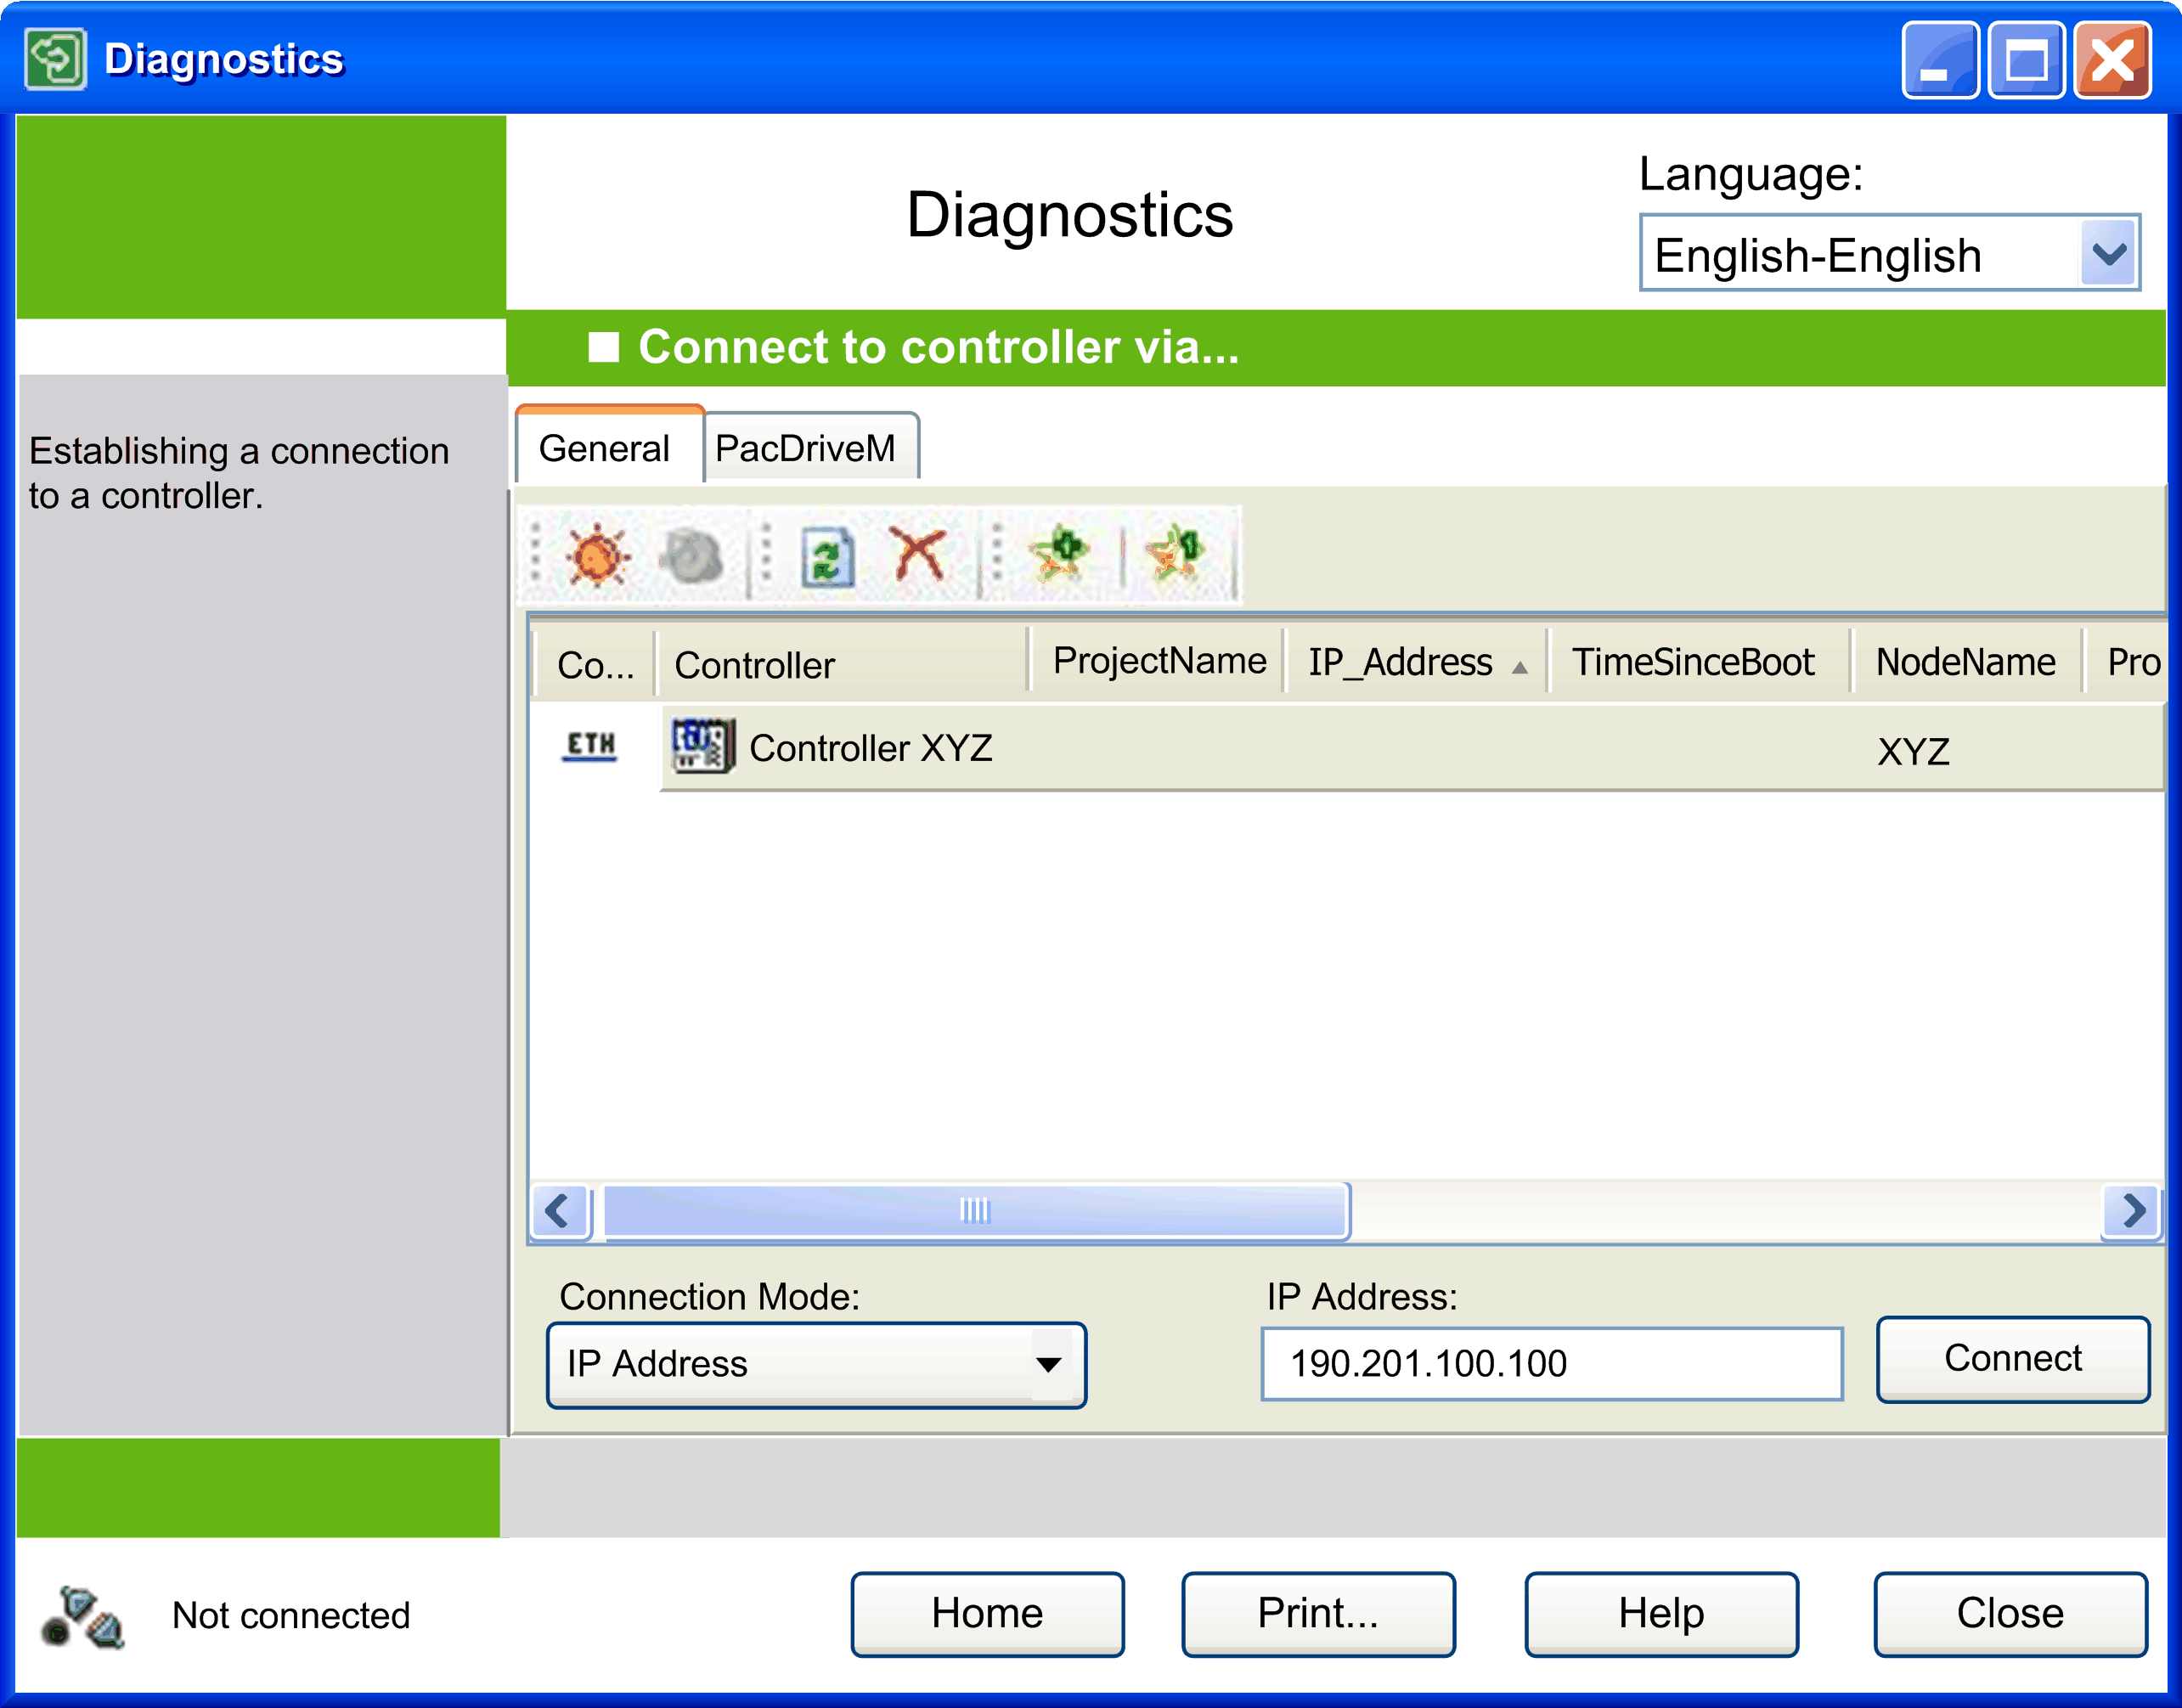
1 |
On the Home window, click the button. Result: The Connect to controller via... window opens. If the data was previously collected, you will see one dialog box to save it and then another one to select the controller. |
|
2 |
Verify that the PC and the desired controller are connected to the Ethernet network linked directly via a crossed network cable (RJ45). |
|
3 |
Verify the network settings of the PC.
NOTE: You can also use the tool Network Device Identification for detecting the correct address of the controller. This will display the IP address and subnetmask of that network, even if the network settings of your computer do not match. (Nevertheless, a cable must still be connected to an active network card of the PC). To configure your PC accordingly, the subnet mask must match the subnet mask of the controller. The IP addresses must differ in one of the last digits.
|
|
4 |
Select and enter the IP address of the controller into the field of the window, or select another connection mode, enter the required data, or double-click the controller you want to connect to. |
|
5 |
Click the button. For PacDrive controllers (except for PacDrive M controllers), you might be prompted for secured access to the controller. Result: After the data has been successfully collected, you are automatically returned to the Home window. From there, you can view, save, or send the data directly by email. |