Customizing the User Interface
You have the following options for adapting the user interface:
-
In the 'Options' dialog, define general program and editor settings as well as directory paths.
-
Position and show/hide windows and controls as required.
'Options' Dialog
The 'Project' menu provides the command 'Options...' which calls the 'Options' dialog. This dialog can be used to customize the user interface. The dialog is divided into several tabs:
|
Dialog tab |
Meaning |
|---|---|
|
'Toolbars' |
To hide a particular toolbar, deactivate the related checkbox. If the 'Show large buttons' checkbox is selected, all toolbar icons appear large with text. |
|
'General' |
General settings for the user interface.
|
|
'Directories' |
Default paths for the project directory and the device parameterization file directory. Click the corresponding browse button '...' to open the 'Select folder' browse dialog. |
|
'Graphical Editor' |
Default settings for graphical worksheets.
|
|
'Text Editor' |
Default settings for textual worksheets.
|
Adjusting Windows and Controls
The user interface can be adjusted by undocking windows and controls, docking them elsewhere, moving, and showing/hiding them.
-
Double-click the title bar of a window to undock the window from the user interface.
-
Drag an undocked window with the mouse at the title bar.
-
Modify the size of an undocked window by dragging the edge or corner of the window.
-
An undocked window is automatically re-docked if dropped at a suitable position.
-
To move a window without redocking it, hold the <Ctrl> key down while dragging the window.
-
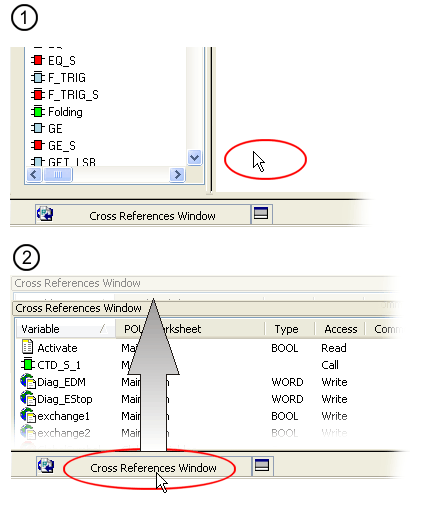
Auto-hide function: each window provides an auto-hide function which can be used to show/hide the window automatically depending on the cursor position. This function is particularly useful when working with a small monitor.
Enable and disable the auto-hide function via the pin symbol on the title bar of the window:
 : Auto-hide disabled. When moving the cursor outside of the window, the window remains displayed. (See (1) in the figure below.)
 : Auto-hide is enabled. When moving the cursor outside of the window, the window is minimized. Point to the minimized window to show the window again. (See (2) in the figure below.)

-
Close window: click the
 symbol in the title bar of the window, or select the corresponding menu item from the 'View' menu.