Replacing the Rollers of a Carrier
Overview
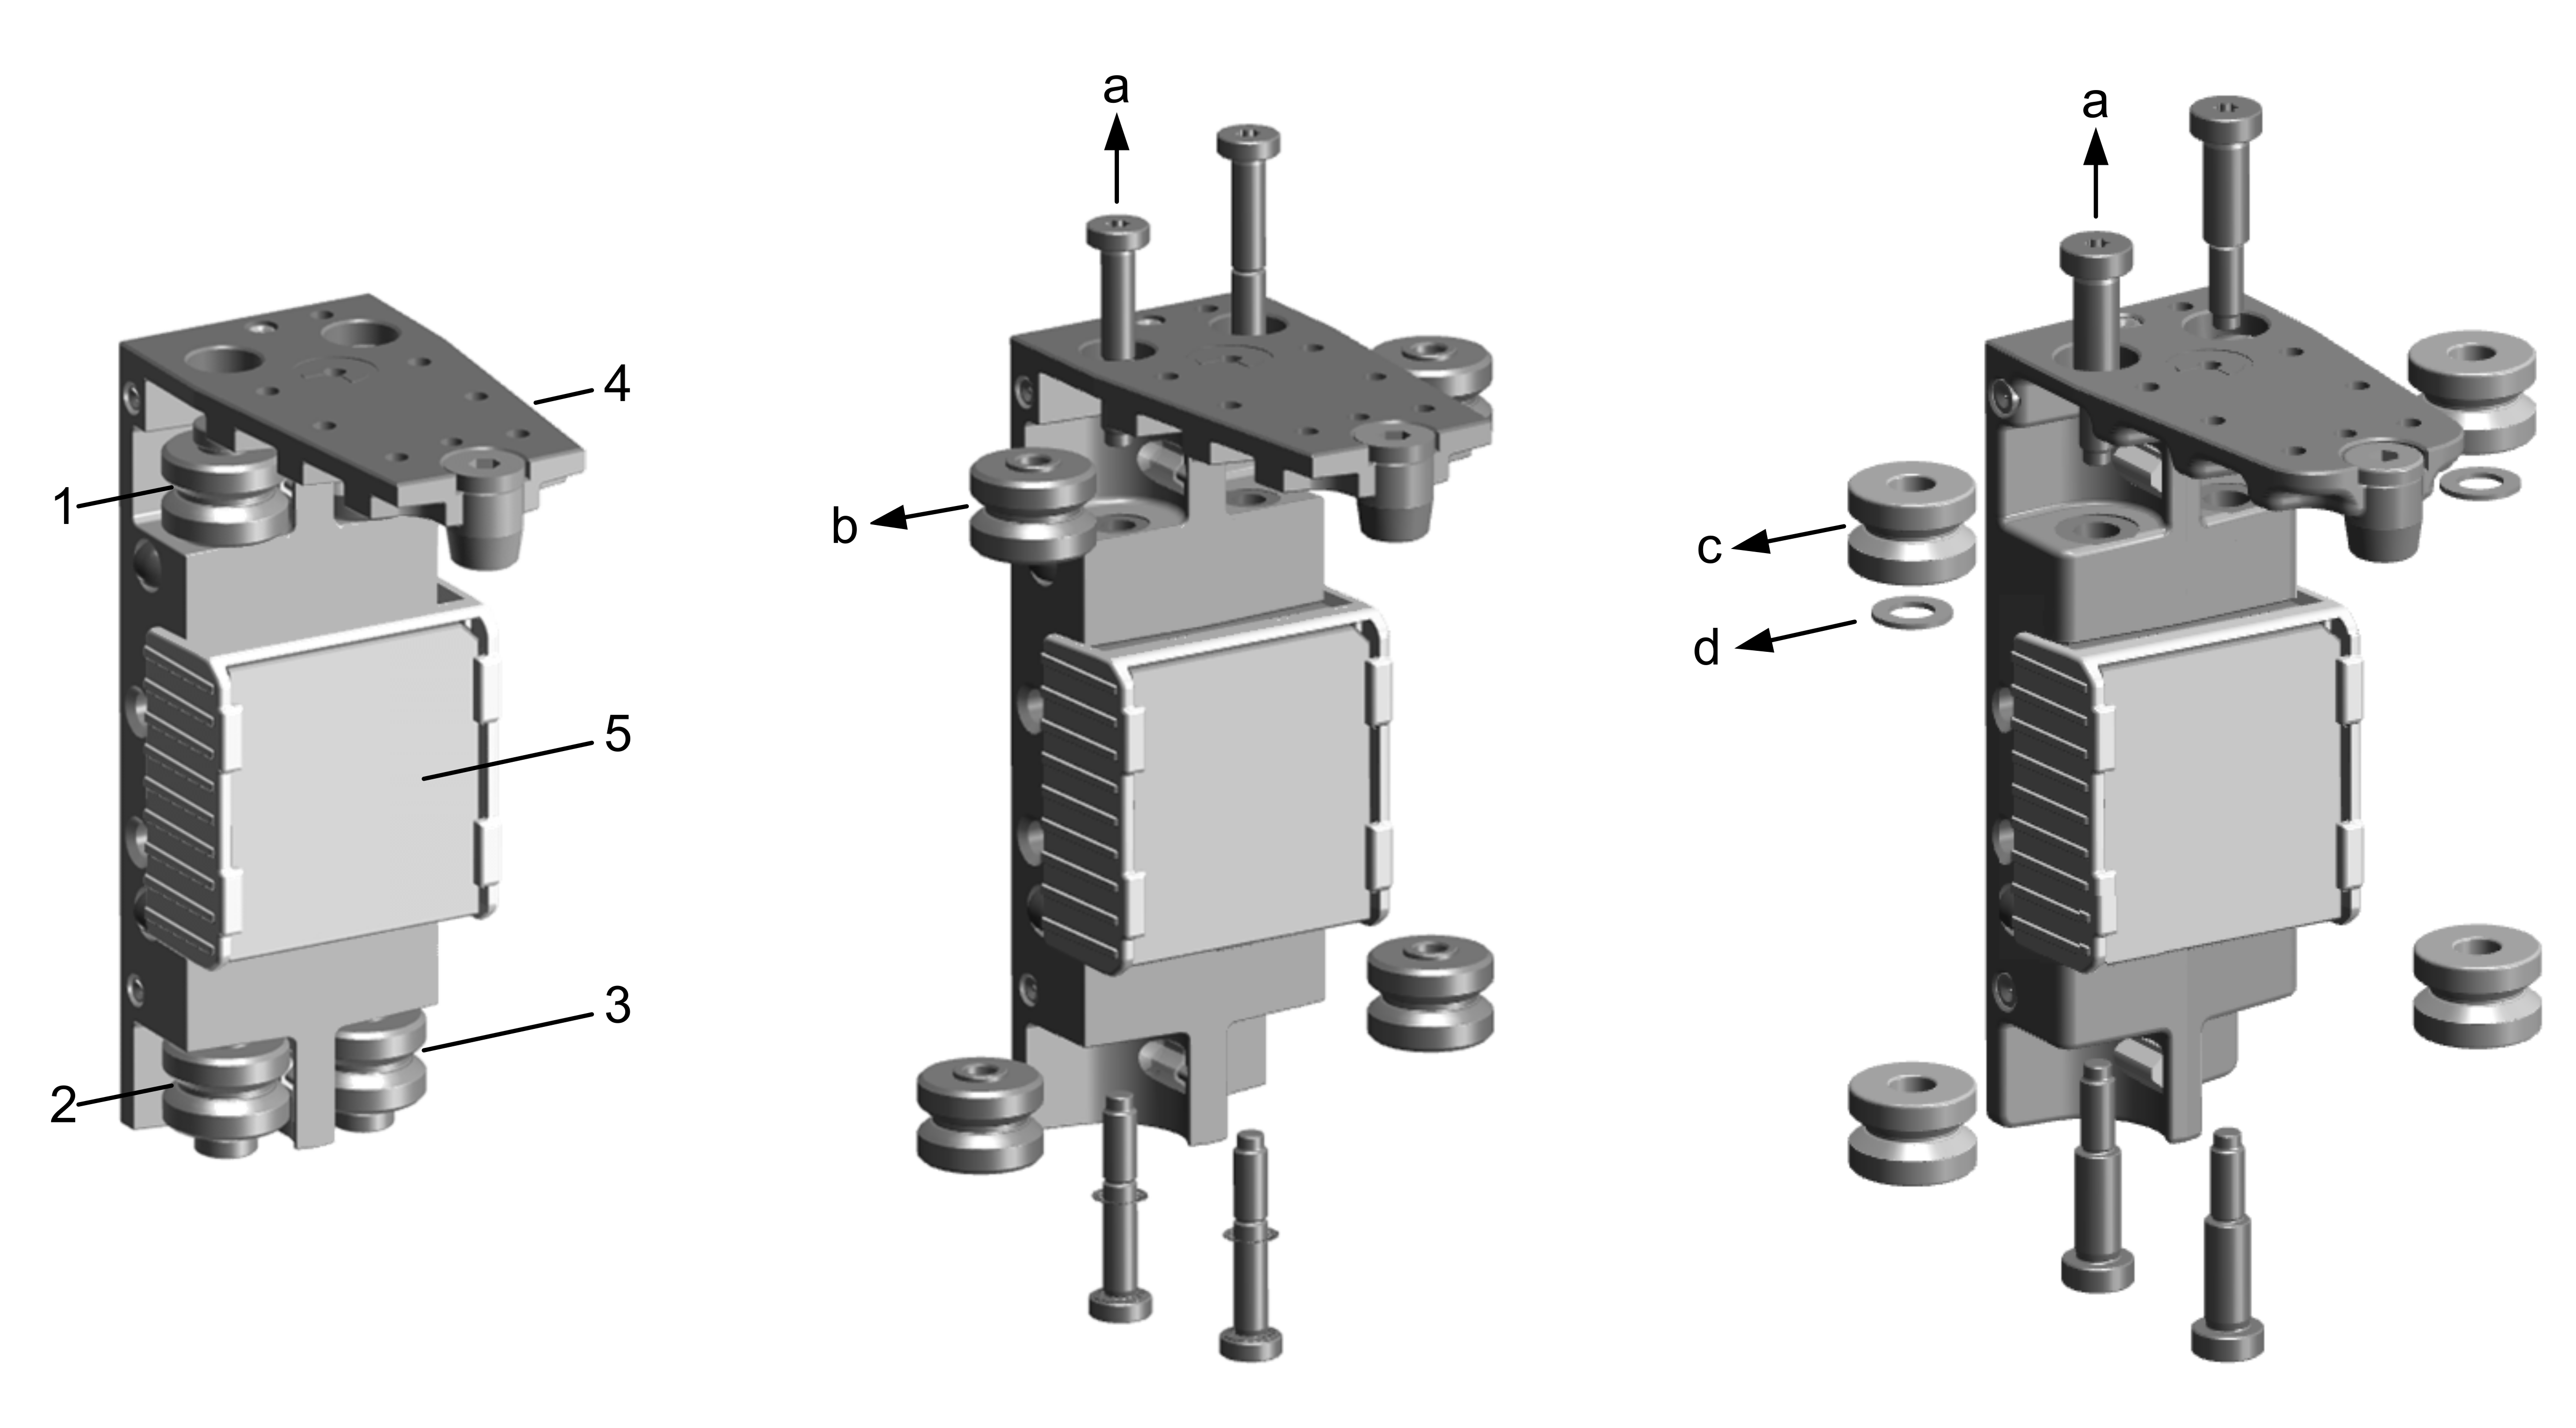
A Lexium™ MC12 carrier has four rollers which must be replaced at the same time.
Refer to the Maintenance Plan.
Replacing the Rollers
|
Step |
Action |
|---|---|
|
1 |
Install the protective cover (5) of the drive magnets by sliding it onto the magnets if it is not already installed. Refer to Removing the Protective Cover of the Drive Magnets.
NOTE: A Lexium™ MC12 carrier has four rollers (1–4) which must be replaced at the same time.
NOTE: The rollers are available in two versions:
|
|
2 |
Loosen and remove the screw (M6) with which the roller is fixed (a). |
|
3 |
Version 1: Remove the roller (b). Version 2: Remove the roller (c) and the corresponding washer (d).
NOTE: The lower rollers of type (c) are not provided with a washer (d).
|
|
4 |
Proceed in this way for all four rollers. |
|
5 |
Version 1: Insert a new roller (b) to the carrier and fix the roller with a new screw. Version 2, upper rollers (c) with a washer (d): First, insert the washer (d) in the hole. Then fix the roller with a new screw. Version 2, lower rollers (c) without washer (d): Insert a new roller (c) to the carrier and fix the roller with a new screw.
NOTE: Make sure that the hole thread is free of any residue.
NOTE: Use new screws (supplied by Schneider Electric) which already have locking adhesive applied.
|
|
6 |
Tighten the screw with a torque of 6 Nm (53.1 lbf-in). |
|
7 |
Proceed in this way for all four rollers. |