Replacing the Lubrication Pads of a Carrier
Overview
A Lexium™ MC12 carrier has two lubrication pads which must be replaced at the same time.
Refer to the Maintenance Plan.
Replacing the Lubrication Pads
|
Step |
Action |
|---|---|
|
1 |
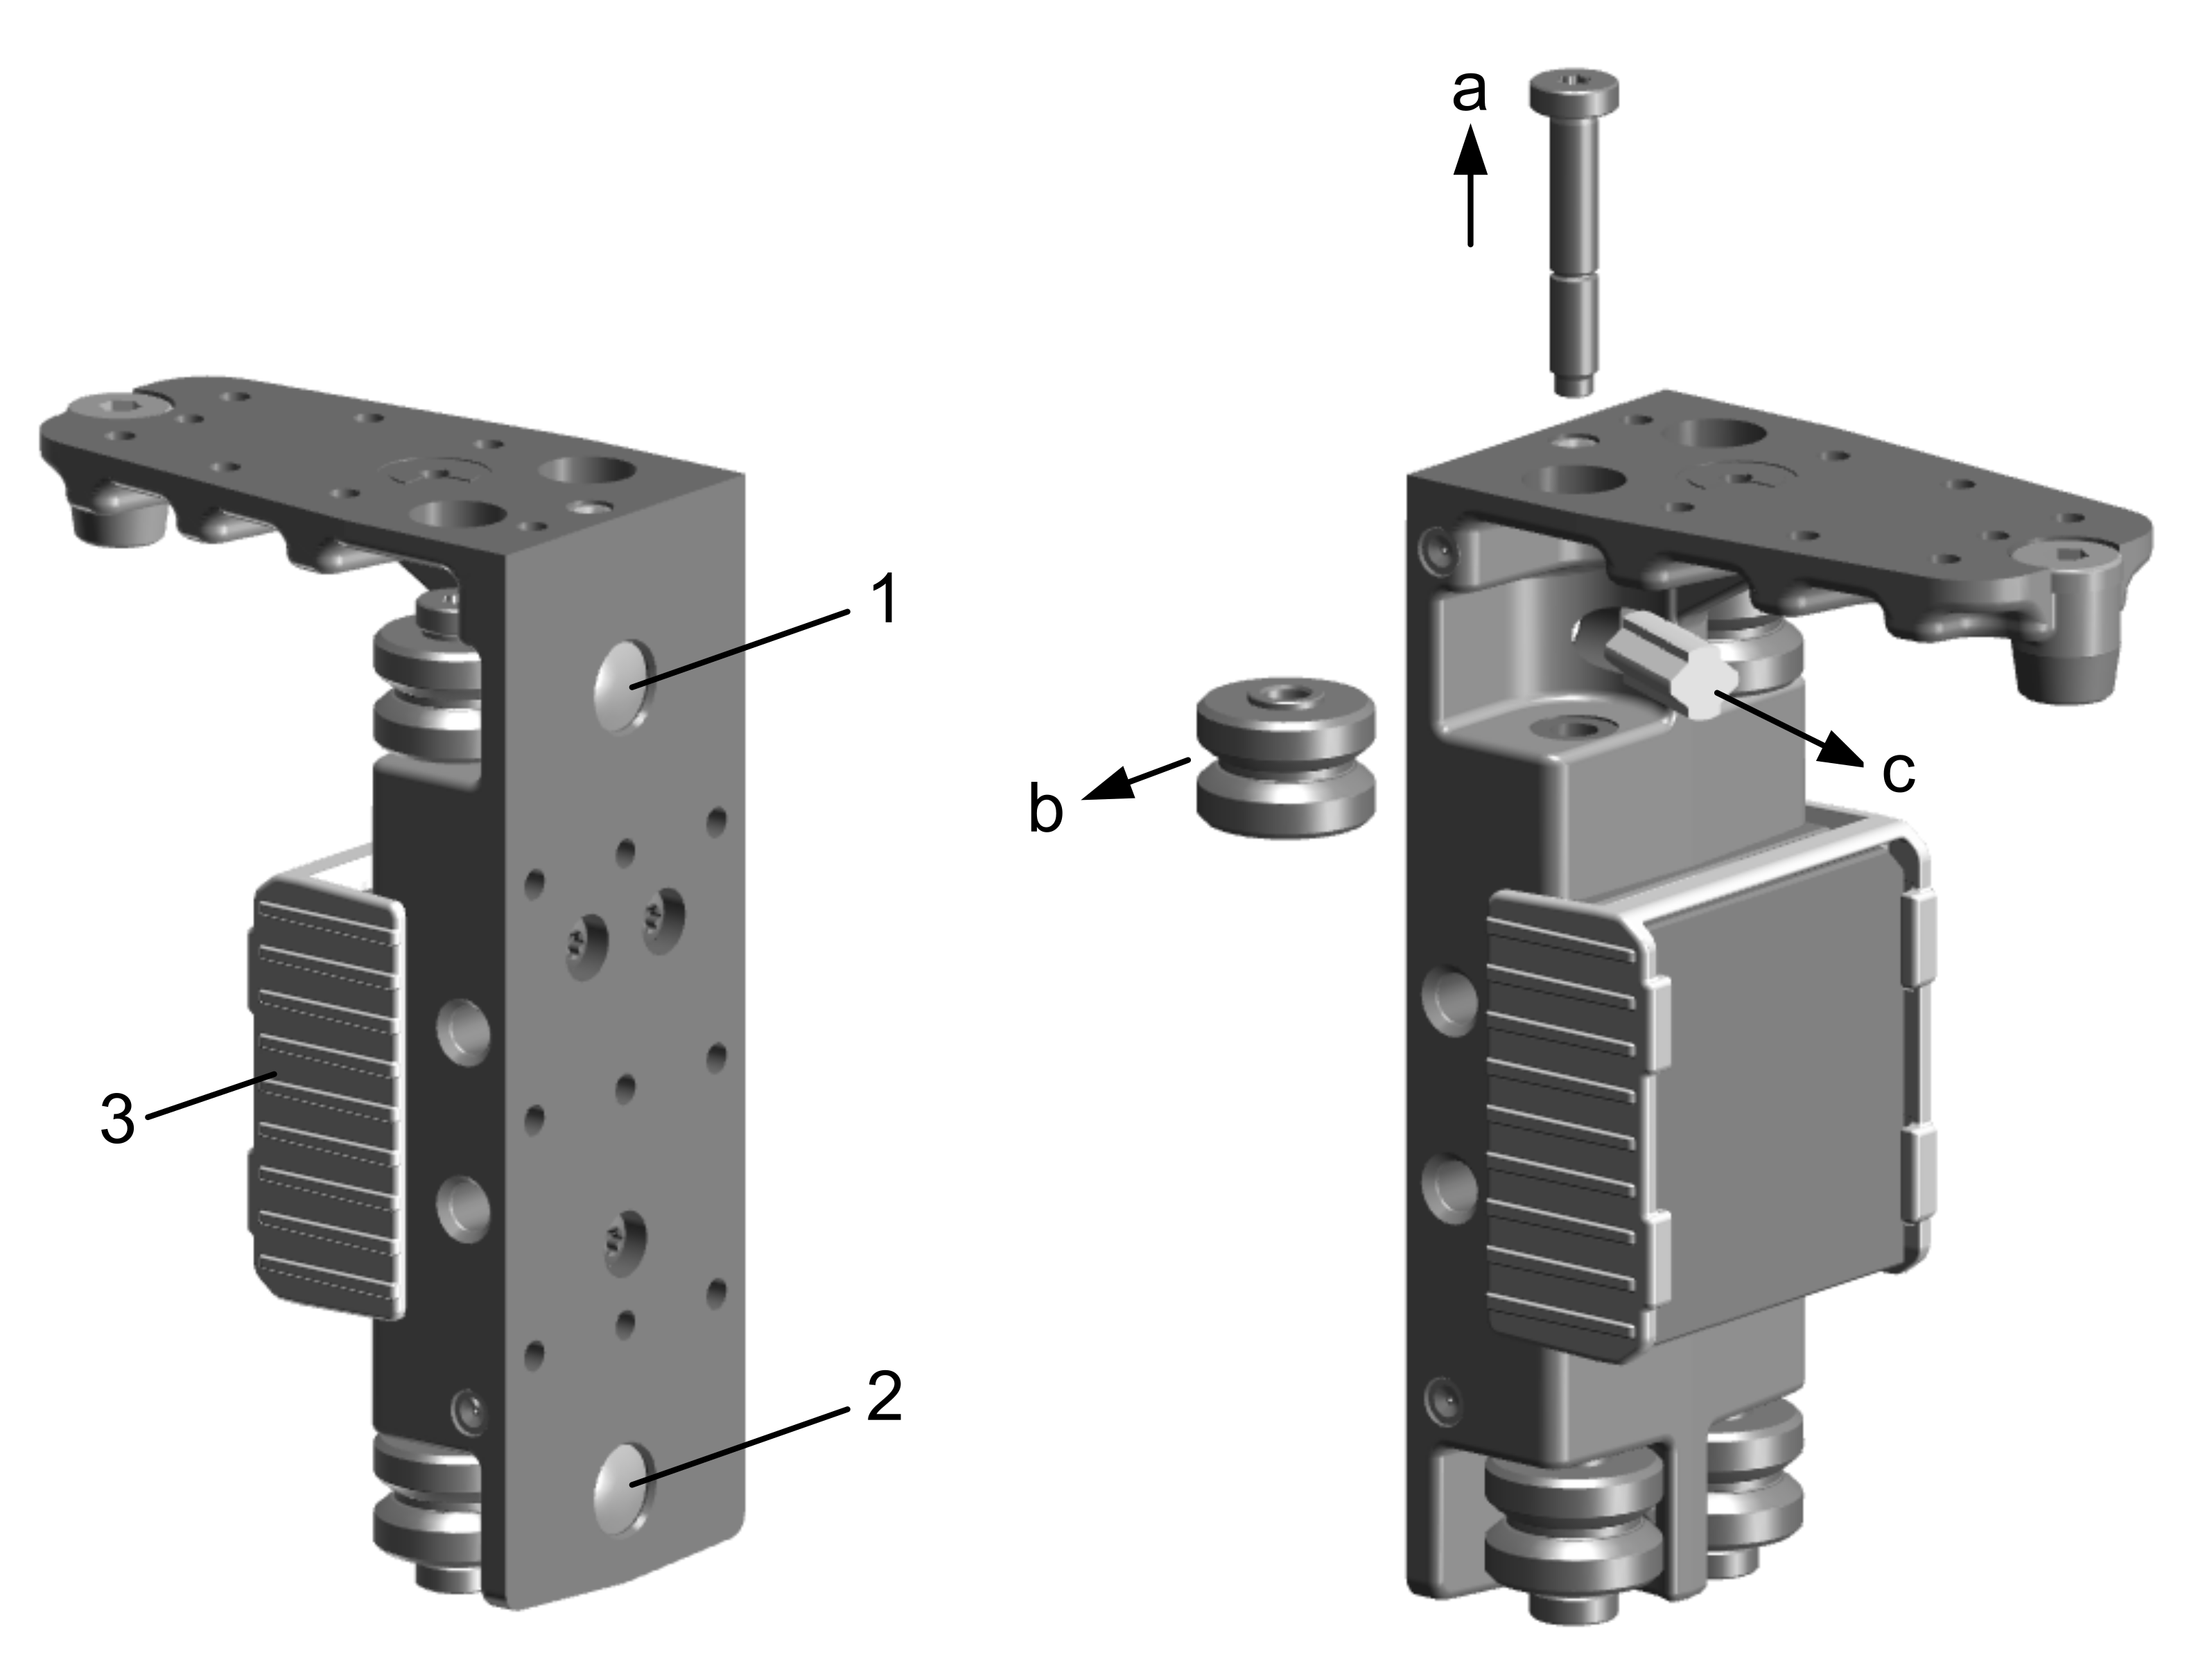
Install the protective cover (3) of the drive magnets by sliding it onto the magnets if it is not already installed. Refer to Removing the Protective Cover of the Drive Magnets.
NOTE: A Lexium™ MC12 carrier has two lubrication pads (1–2) which must be replaced at the same time.
|
|
2 |
Loosen and remove the screw (M6) with which the roller is fixed (a). |
|
3 |
Remove the roller (b). |
|
4 |
Use suitable tweezers to remove the lubrication pad (c).
NOTE: Do not reuse the removed lubrication pad.
|
|
5 |
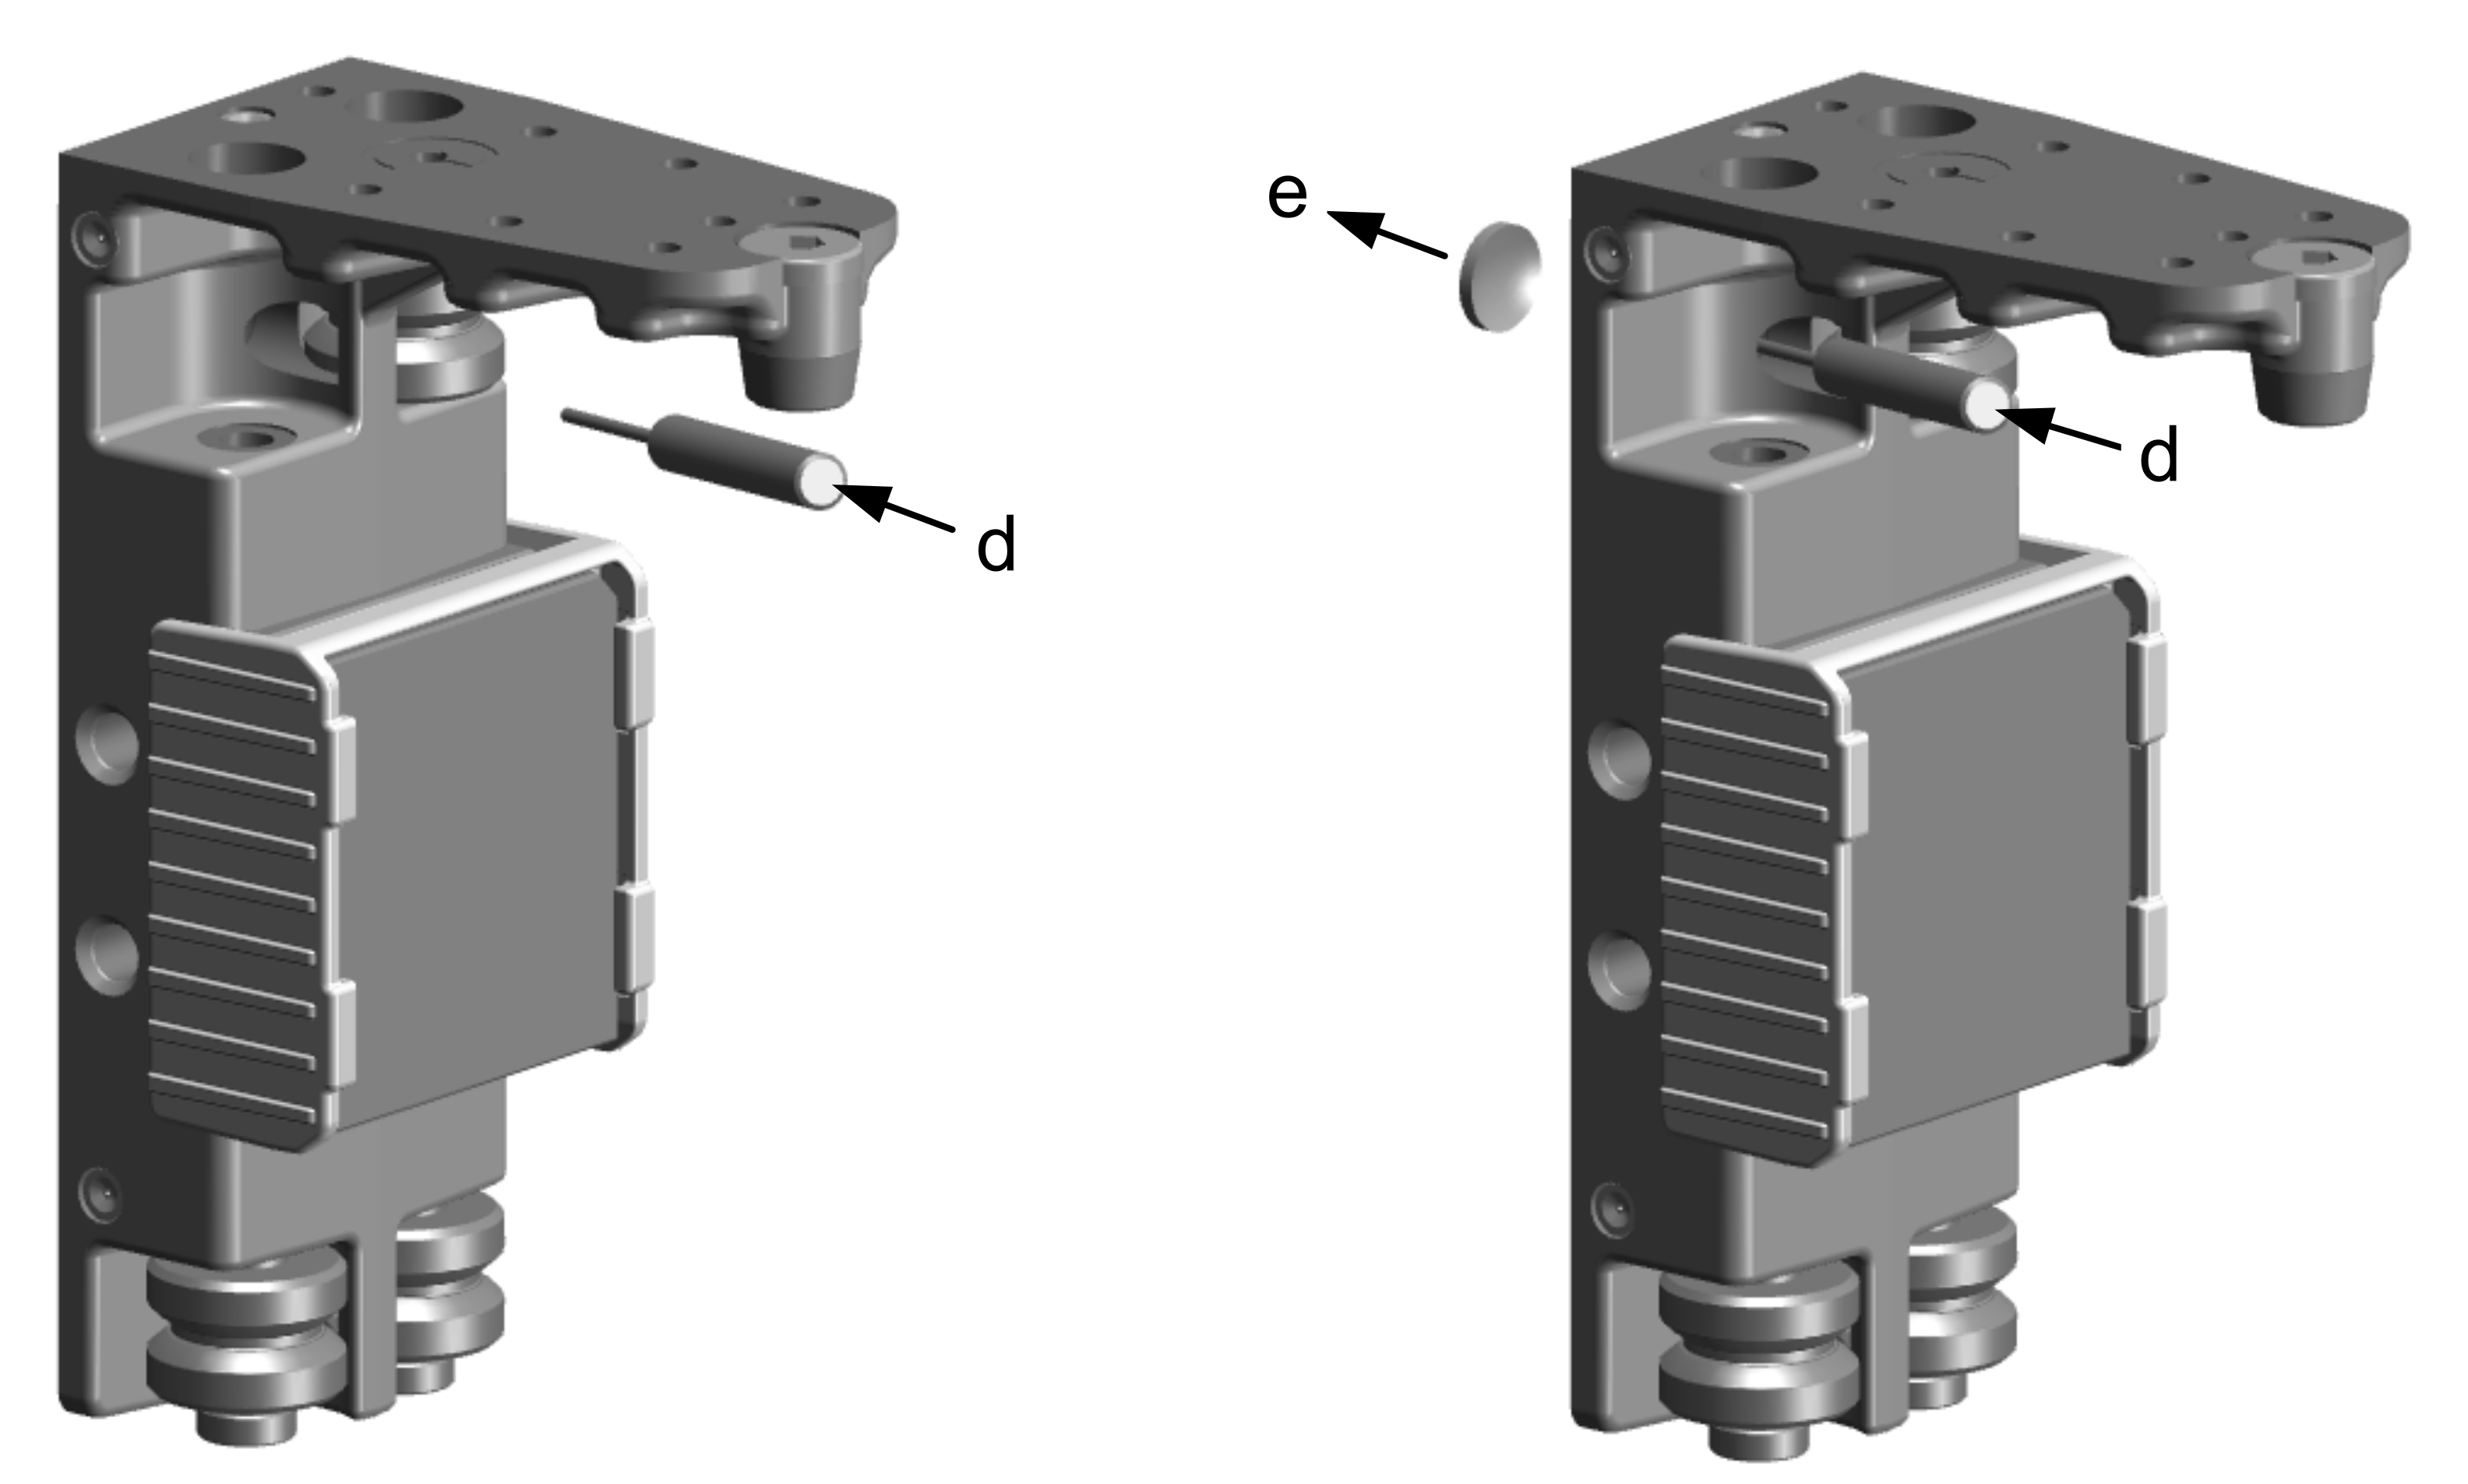
Use a suitable drift punch (d) to press the plug (e) out of the carrier body.
NOTE: Do not reuse the removed plug.
|
|
6 |
Reinsert the roller to the carrier and fix the roller with the associated screw.
NOTE: Make sure that the screw thread and hole thread are free of any residue and that thread locking adhesive has been applied to the screw.
|
|
7 |
Tighten the screw with a torque of 6 Nm (53.1 lbf-in). |
|
8 |
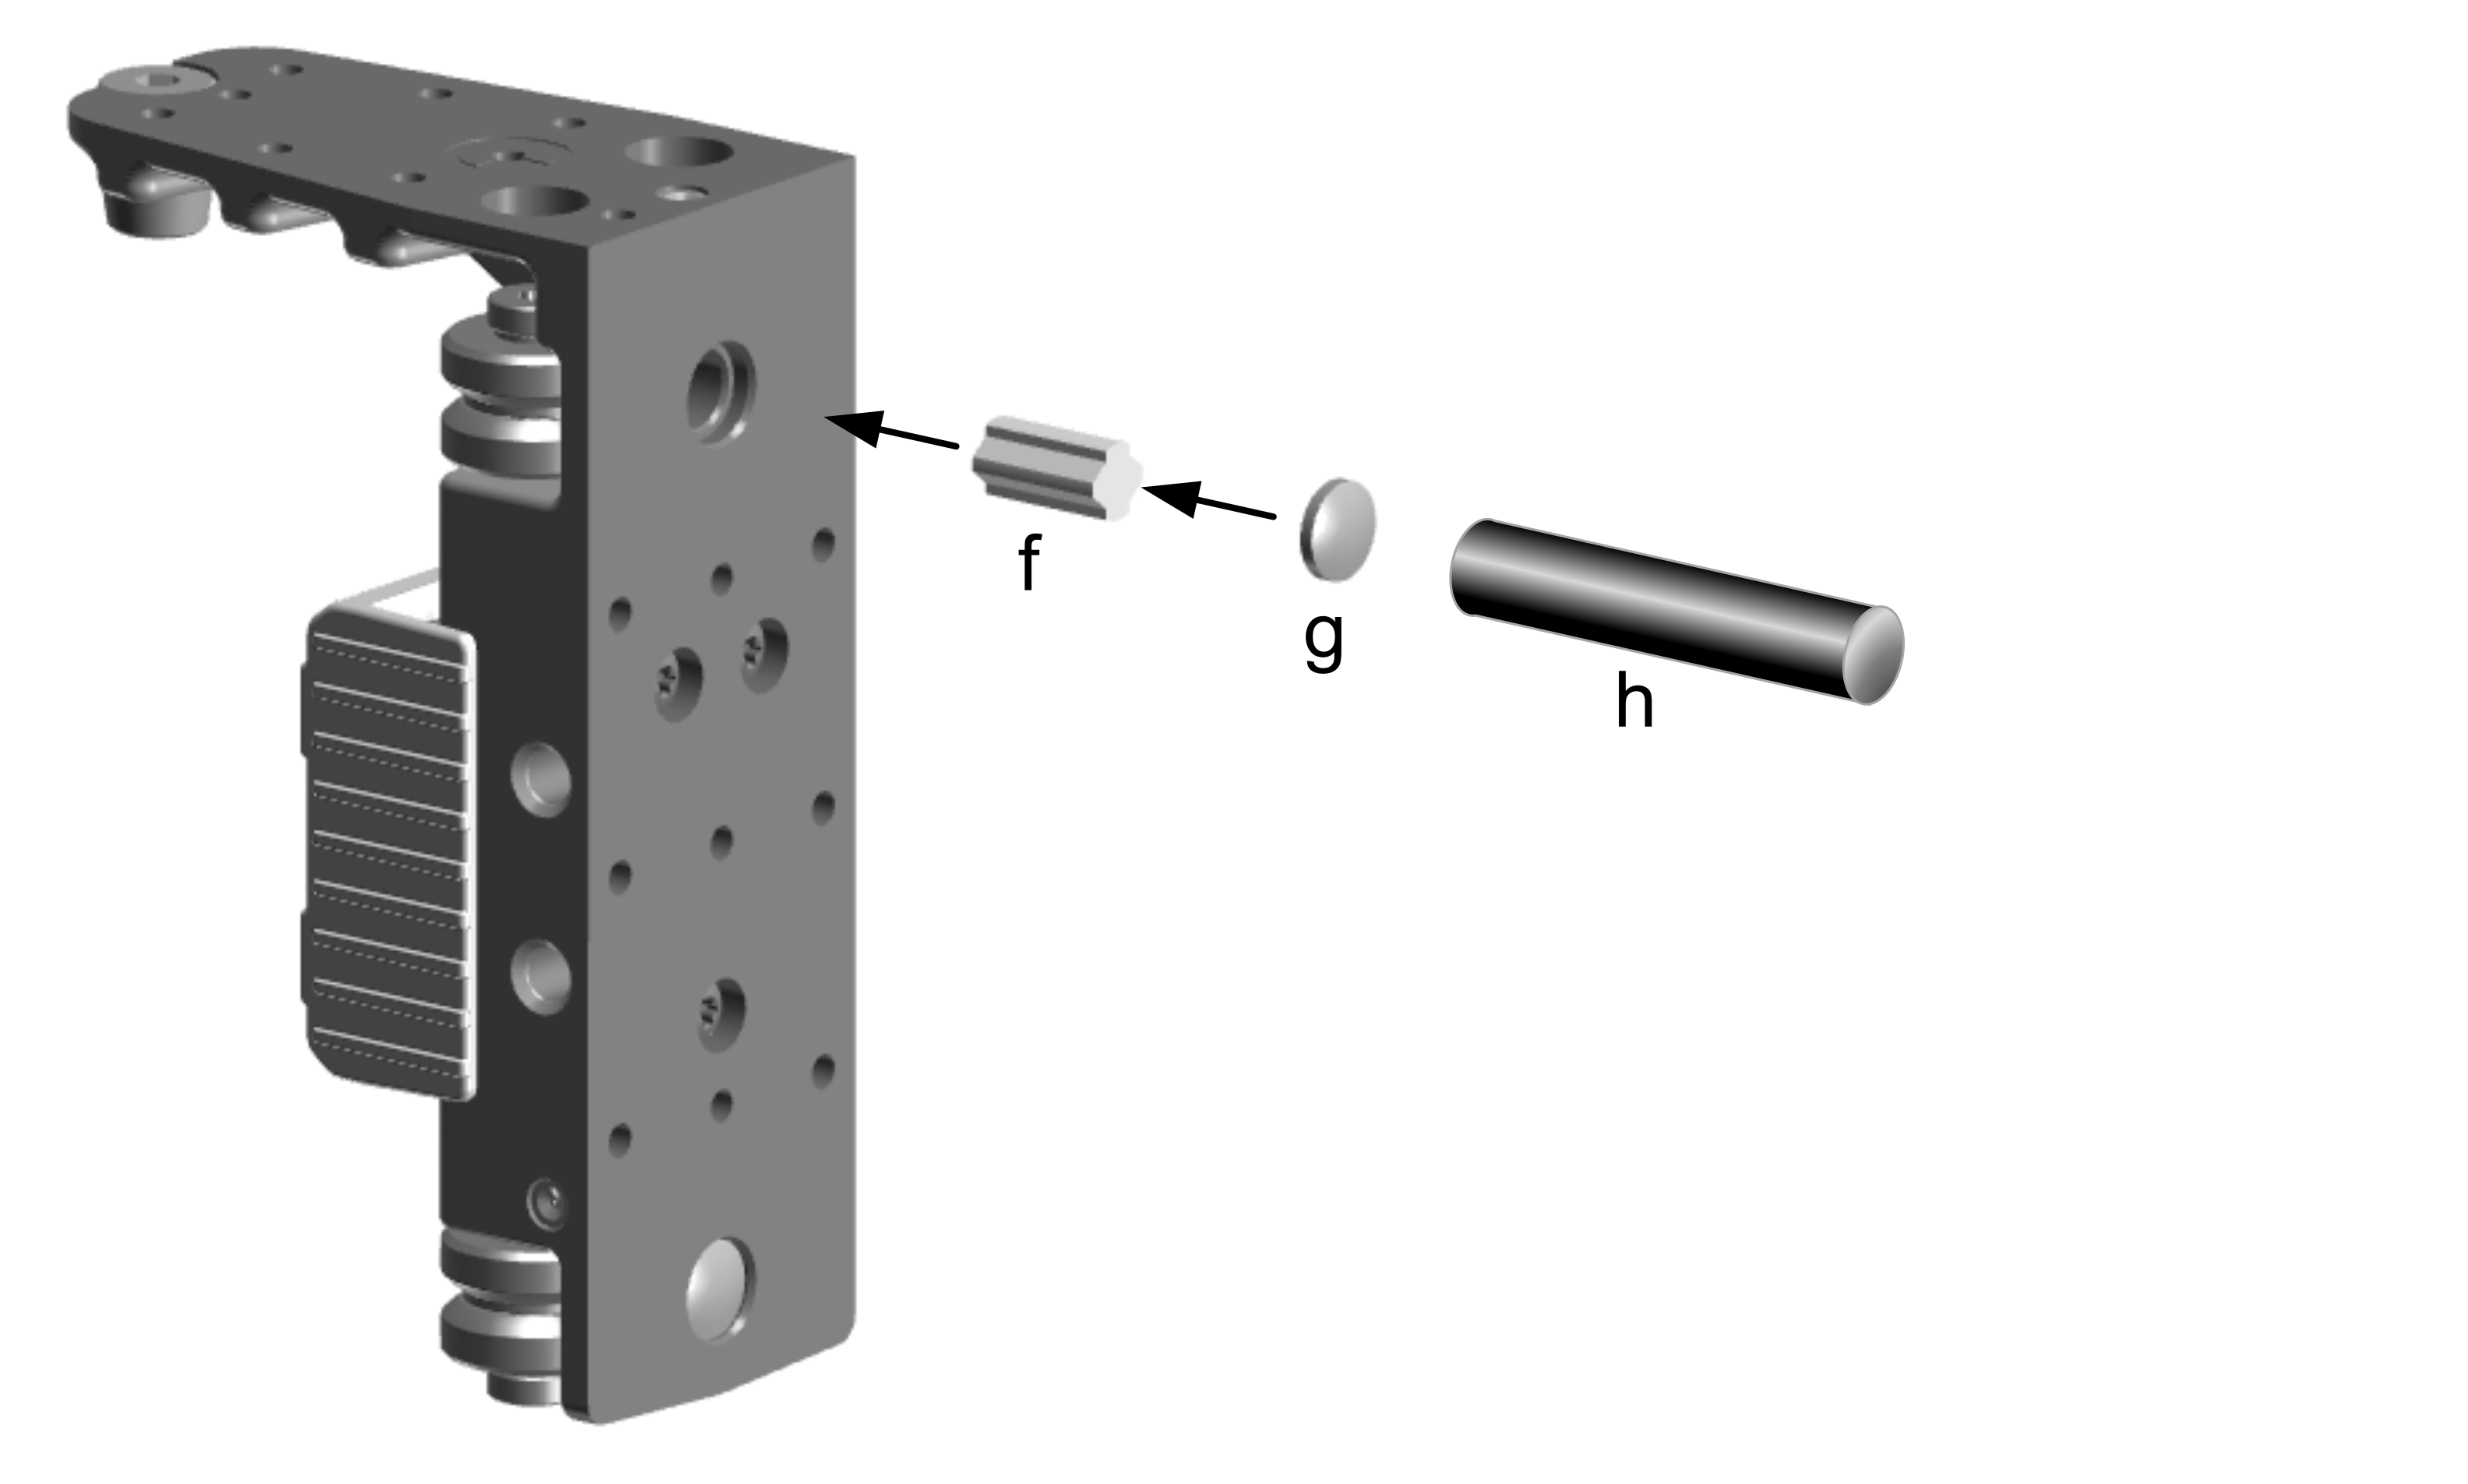
Insert a new lubrication pad (f) into the carrier and close the hole again with the plug (g). Make sure that the plug is not tilted during insertion. Use a suitable drift punch (h) to press the plug into the carrier body.
NOTE: Saturate the pad with lubricant before insertion.
Also refer to Lubrication. |
|
9 |
Proceed in this way for both lubrication pads. |