Overview
The command opens the editor. It allows you to configure parameters for encrypted communication related to the user, to the project and to the controller.
As an alternative, you can open the editor by double-clicking the  button from the EcoStruxure Machine Expert Logic Builder status and information bar.
editor with the tab open:
Tab
The tab allows you to configure security-related parameters for the logged-in user:
-
Certificates required for secured communication. Certificates with private keys are required for this purpose.
-
Digital signature of the user
Elements of the tab:
|
Element |
Description |
|---|---|
|
area |
|
|
List of available user profiles |
Select a user profile from the list. By default, the Windows login name is specified as user profile. Click the plus button to open the dialog box for adding a user profile. Click the cross button to remove a user profile from the list. |
|
|
List of certificates with public key available for the digital signature.
Click the Click the cross button to remove a certificate from the digital signature. |
|
|
Indicates the certificate that is used for decrypting project files.
Click the Click the cross button to remove the displayed certificate. |
|
area |
|
|
|
Select the following options if you want to force the use of encryption functions. |
|
|
When selected, the server certificate of the controller must be used for establishing an encrypted connection with the controller. |
|
|
When selected, the project files of the selected user are encrypted with the public keys of a certificate. When the project is saved, it is encrypted with the certificate specified in the dialog box. The selected certificates are displayed in the area of the tab. To open the project, the certificate with a private key used for encryption must be specified with the parameter . |
|
|
When selected, the project files of the selected user are signed with the public key certificate that is specified within the parameter. When a project is saved, a signature file <project name>.project.p7s containing the signature is saved to the project directory. |
|
|
This function is not available for all controllers. Consult the Programming Guide specific to your controller for further information. When selected, the data that is downloaded to the controller needs to be encrypted with a controller certificate. This certificate is defined in the , tab , area. For additional steps, refer to Encrypting Boot Applications with Certificates. Controller certificates are stored in the local Windows certificate store in the controller certificates directory. If the certificates of your controller are not available in the directory, then they must be loaded from the controller and installed to the directory. For information on handling controller certificates, refer to the How To Manage Certificates on the Controller User Guide. |
|
|
This function is not available for all controllers. Consult the Programming Guide specific to your controller for further information. When selected, the online code (downloads, online changes, and boot applications) needs to be signed with a certificate with a public key. The certificate is selected from the list in this tab. For additional steps required to sign a boot application, refer to Signing a Boot Application. As a prerequisite, the option must be selected. |
|
|
When selected, a signed library with the file extension <library name>.compiled-library is generated upon executing the command. As a prerequisite, a certificate with a private key that supports code signing must be available. |
|
|
When selected, a time stamp is added to each signed library. As a time source, enter the URL of the in the text field according to the following format: |
 button to open the
 Encrypting Boot Applications with Certificates
This function is not available for all controllers. Consult the Programming Guide specific to your controller for further information.
To encrypt a boot application with a certificate from the controller, create a certificate on the controller and install it in the Windows certificate store of your computer as follows:
|
Step |
Action |
Result |
|---|---|---|
|
1 |
In the tab of the , click the button |
- |
|
2 |
Select the device entry (device name) on the left-hand side. |
- |
|
3 |
Select Encrypted Application on the right-hand side and click the button Generate a new certificate on the device. |
The certificate is created and listed in the table with the |
|
4 |
Double-click the certificate entry that has been created. |
The default Windows certificate dialog box opens. |
|
5 |
In the tab, click the button. |
The opens. |
|
6 |
As , select . |
- |
|
7 |
In the dialog box, select the option . Then, click the button and select the folder as the . |
The controller certificate is imported to the directory and is available for encryption of download, online change, and boot application. |
|
8 |
Open the tab of the and activate the option in the section . |
- |
|
9 |
Open the tab of the and double-click the application entry in the section . |
The dialog box of the application opens. |
|
10 |
In the dialog box of the application, select the Encryption tab and select Encryption with certificates from the Encryption technology list. Then, click the
NOTE: If the option is activated in the , then Encryption with certificates is already preselected.
|
The Certificate Selection dialog box opens. |
|
11 |
In the Certificate Selection dialog box, select the certificate from the folder and click the |
- |
|
12 |
Click OK to confirm the dialog box. |
The certificate is displayed in the dialog box of the application. |
|
13 |
Click OK to close the dialog box of the application. |
The certificate is displayed in the tab of the , section : The boot application, download, and online change are encrypted. |
 .
.
 symbol.
 button.
After this procedure has been performed it is possible to transfer the boot application, perform downloads and online changes as long as the certificate and the signature are valid.
Signing a Boot Application
This function is not available for all controllers. Consult the Programming Guide specific to your controller for further information.
To sign a boot application with a certificate, proceed as follows:
|
Step |
Action |
Result |
|---|---|---|
|
1 |
In the tab of the , double-click the certificate with private key you want to assign to the boot application from the list. |
The Certificate dialog box opens. |
|
2 |
Select the tab and click the Copy to file... button. |
The Certificate Export Wizard starts. |
|
3 |
In the Export Private Key dialog box, select the option No, do not export the private key. |
- |
|
4 |
For Export File Format, select the option DER encoded binary X.509 (.CER). |
- |
|
5 |
Enter a file name and navigate to the file path to save the certificate. |
- |
|
6 |
Follow the instructions of the wizard until the message is displayed that the export has been successfully completed. |
- |
|
7 |
Return to the editor and select the tab. |
- |
|
8 |
Click the |
- |
|
9 |
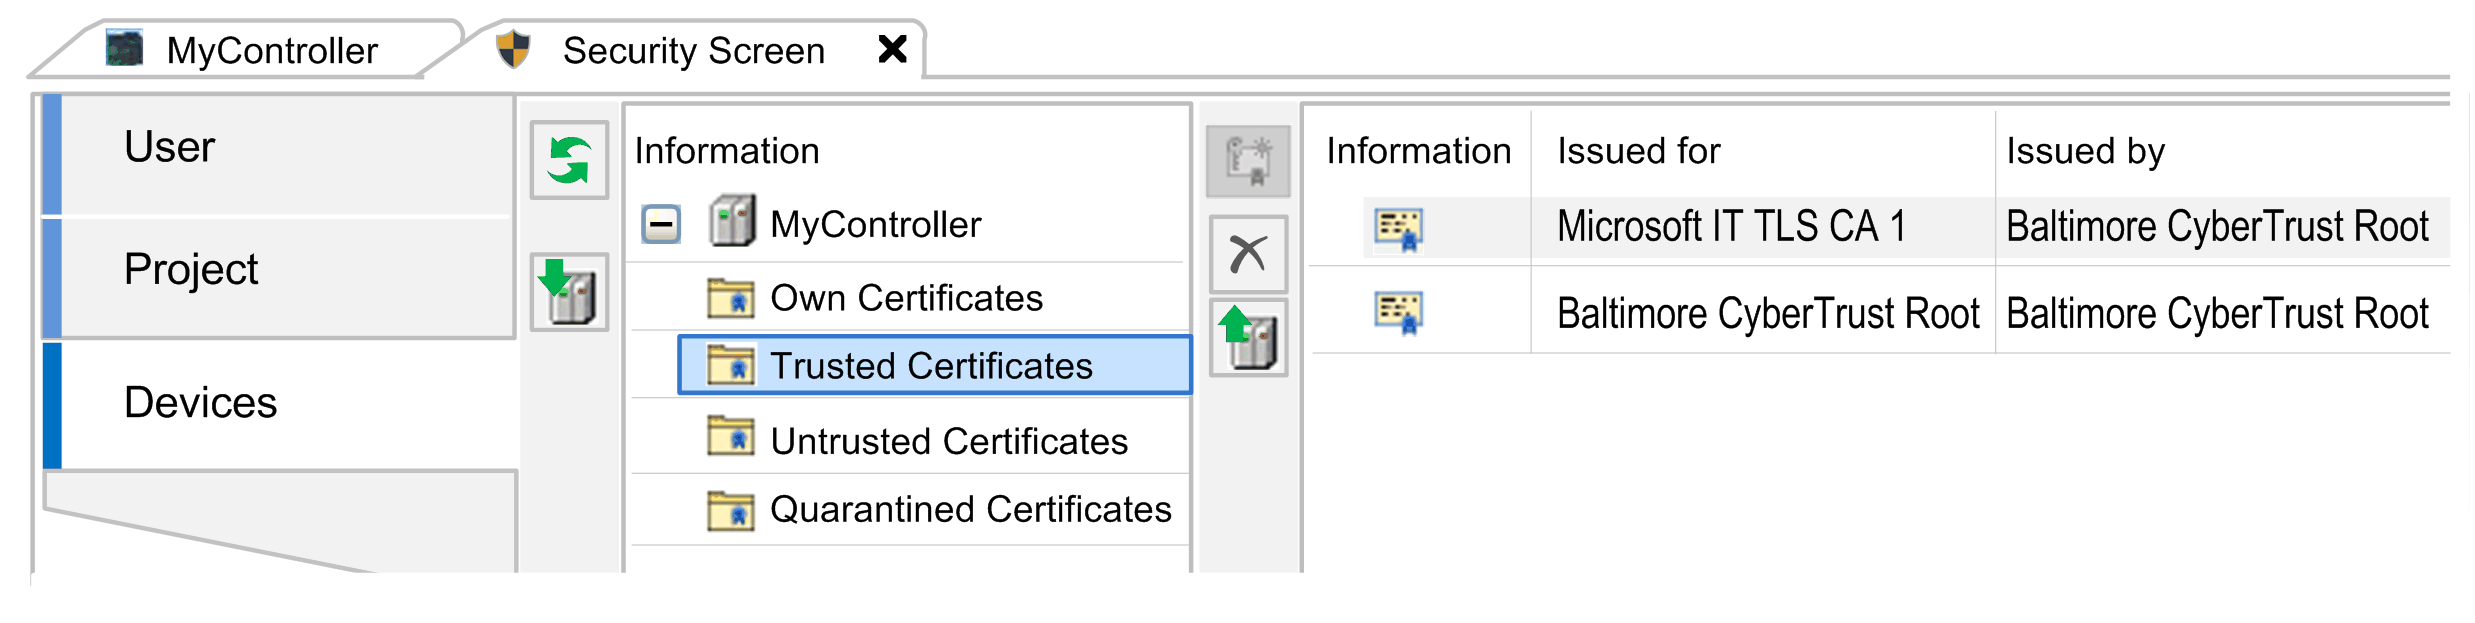
Select the subfolder Trusted Certificates of the controller to which you want to import the certificate. |
- |
|
10 |
Click the Download button. |
The Open dialog box opens. |
|
11 |
Navigate to the certificate to be imported and click the Open button. |
A message is displayed indicating that the selected certificate has been successfully imported. |
|
12 |
Open the User tab of the editor and select the option and select the option Enforce signing of downloads, online changes and boot applications to allow boot applications only if a valid certificate is available. For further information, refer to the description of Encrypting Boot Applications with Certificates. |
- |
Tab
The tab allows you to configure project-specific settings.
Elements of the tab:
|
Element |
Description |
|---|---|
|
area |
|
|
|
Click the |
|
|
Table listing the certificates that encrypt the project file. |
|
area |
|
|
List of the applications of the controller |
This function is not available for all controllers. Consult the Programming Guide specific to your controller for further information. Double-clicking an application in the list opens the dialog box. Depending on the settings of the in the tab of the , the following fields are available:
In the dialog box, click the Controller certificates are stored in the local Windows certificate store in the controller certificates directory. If the certificates of your controller are not available in the directory, then they must be loaded from the controller and installed to the directory. |
 button to open the
 Tab
The tab of the editor allows you to configure secured TCP communication to the connected controller. It provides access to the folders that are dedicated to managing certificates on the connected controller. For further information, refer to the How To Manage Certificates on the Controller User Guide.