First step - Determining the purpose, and receiving the CAD-file
Every time we start a new project we take the time to understand the needs of our customers with this project (we have a wiki page describing this process HERE). We need to figure out the function of the proposed model and the components needed to create said model. Then we look at what components we already have in catalogs and what needs to be added.
NOTE: The original model contains two conveyors and these are shown throughout the process but not in the finished product. This is because the first requested Pack-model was commisioned without conveyors for early testing, later down the line conveyors will be added again.
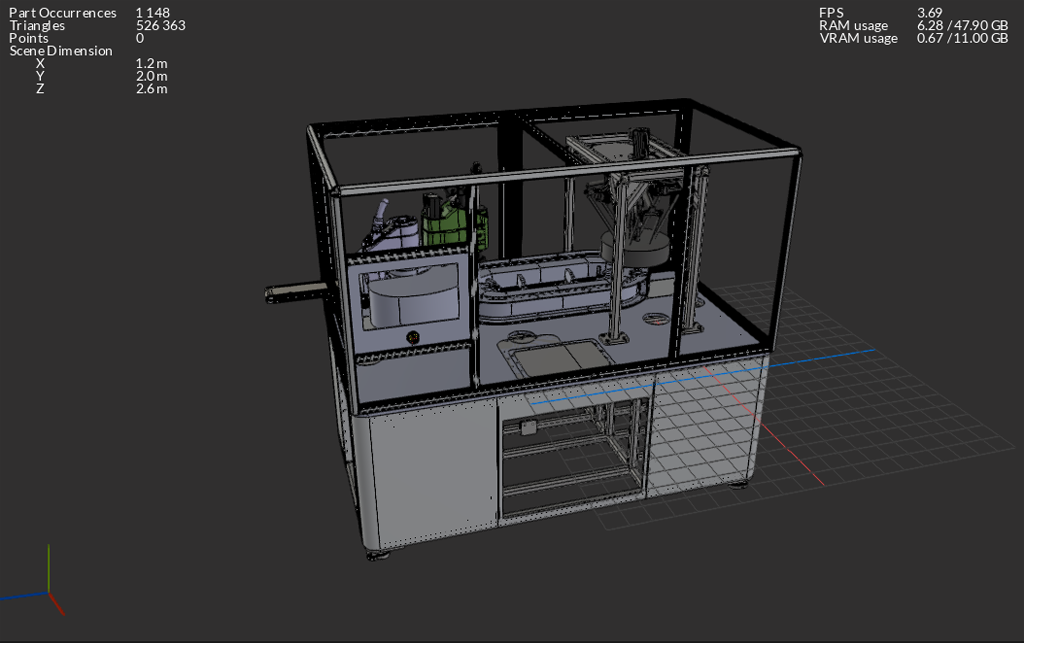
In this case we are given a project for OT-testing, that needs to add this model called US PackExpo. We receive a CAD-file from the customer that wasn’t optimized for use in EcoStruxure Machine Expert Twin. To have it run in real time as part of a larger EcoStruxure Machine Expert Twin-model, it needs to be optimized (by reducing mesh, and simplifying nonessential parts). As we received it here, the file was 297 MB. Therefore, a lot of work needed to be done getting it ready to run in MET, and by the end of our process the file is roughly 1% of that size.
Second step - Processing CAD-file with PiXYZ script
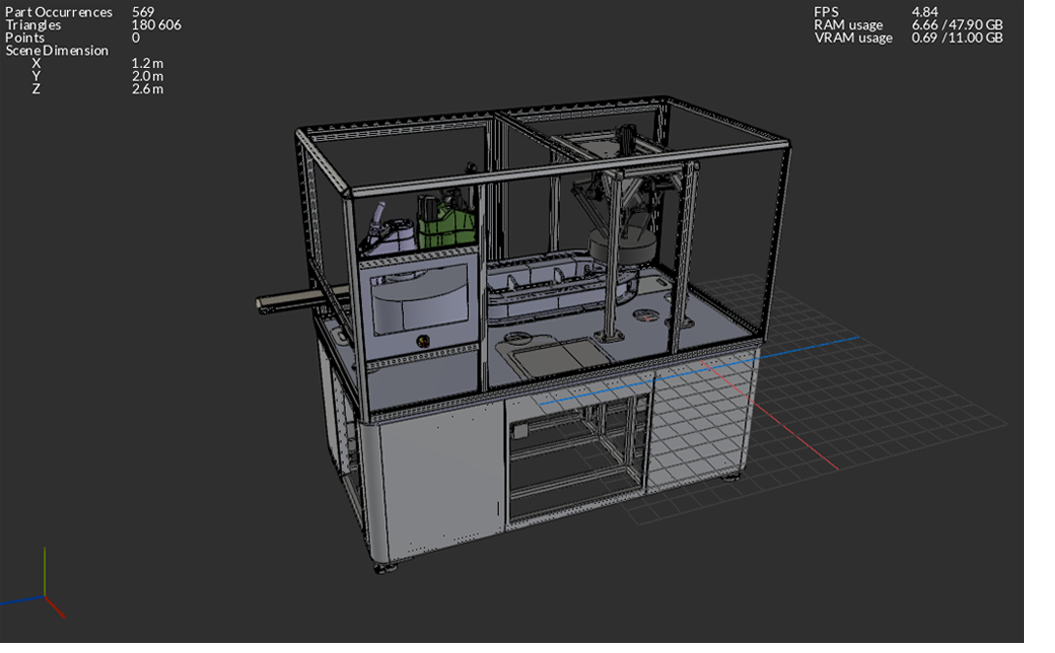
Our first aim is to remove unnecessary details and reducing the triangles of the model.
We use an automatic script for reducing triangles in the software PiXYZ. This script goes over the model and removes unnecessary triangles. The script reduced the amount from 526.363 to 180.606.
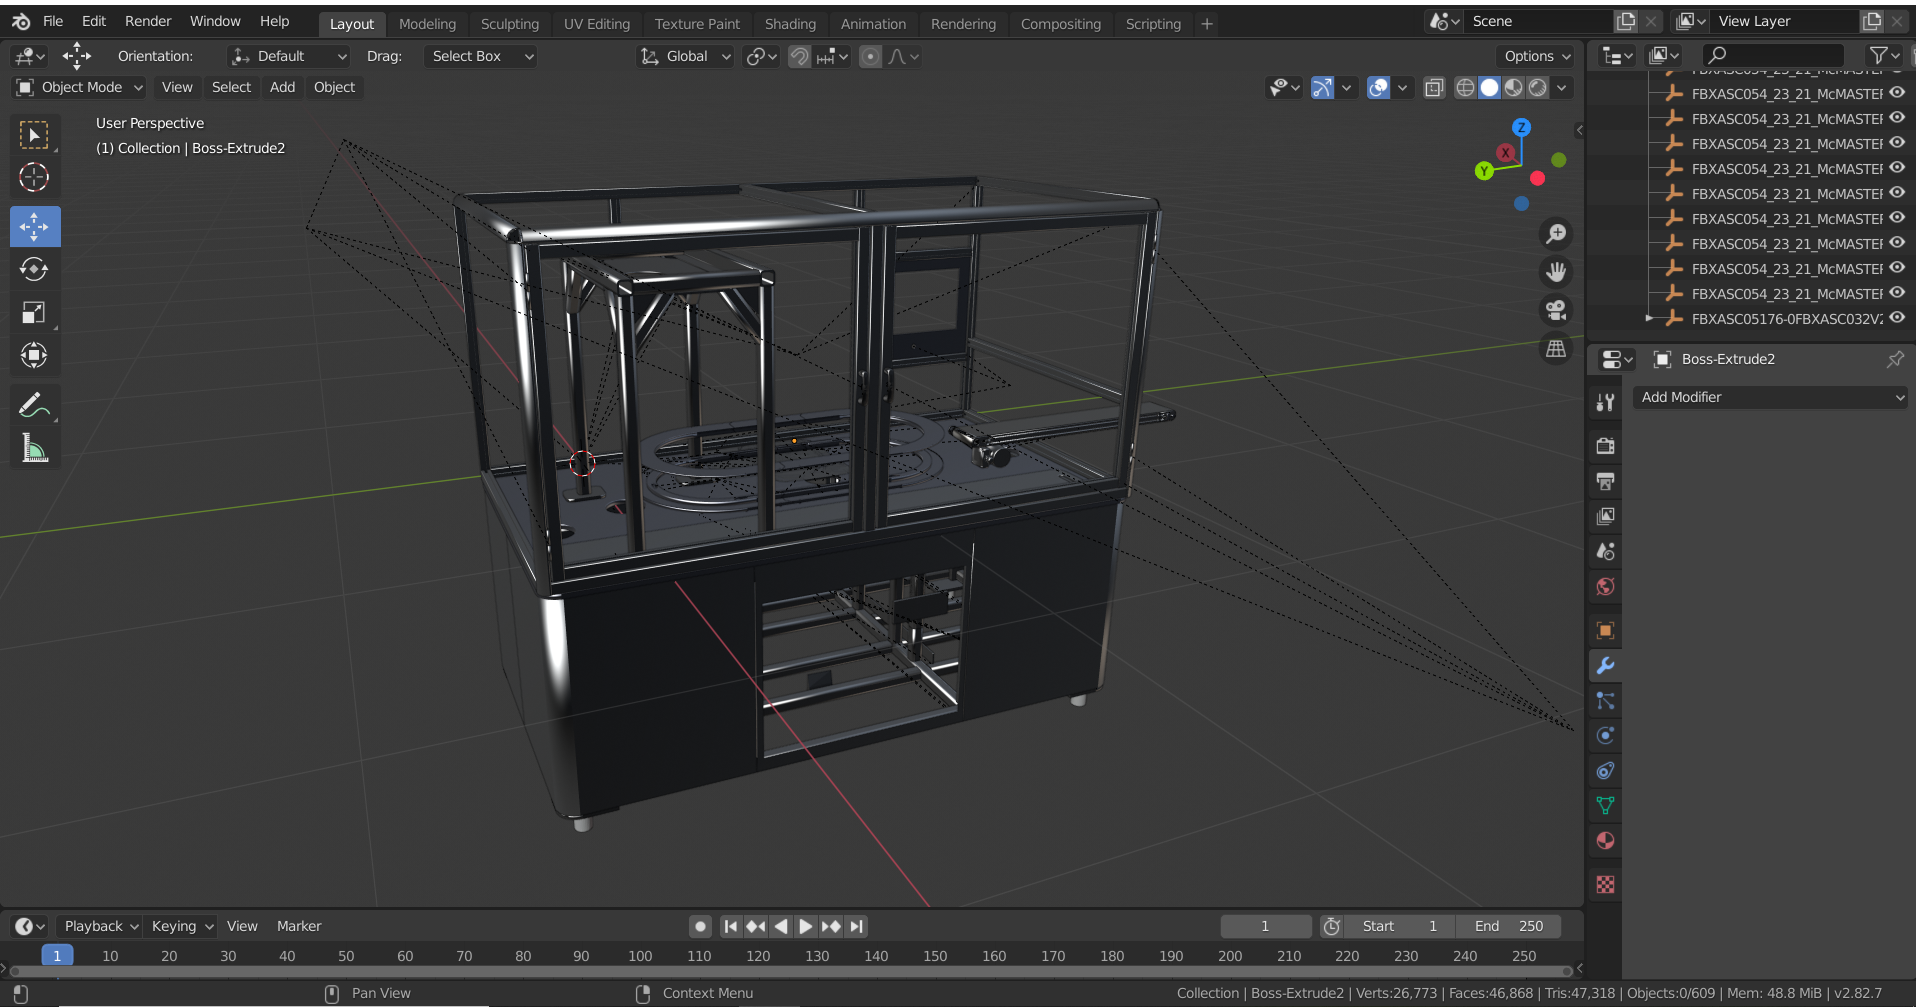
We can see that this model uses components already known to us and already in EcoStruxure Machine Expert Twin standard catalogs. Therefore, we can remove the delta and SCARA robots, the MC tracks, the conveyors as well as the emergency stop, which can be added again after we finish reducing triangles and mesh on the model.
We use a freeware called “Blender” to remove the robots, tracks and emergency stop, and we can also use Blender to simplify parts of the model to save even more triangles. For example: In this model we removed the detailed wheels at the bottom of the model and replaced them with simple cylinders, saving 10.000 triangles by that one step.
The model without robots and ready to work with in Blender
Fourth step - build the model in EcoStruxure Machine Expert Twin
We are now ready to rebuild the model. The machine framework is optimized, and we already have the delta and SCARA robots, MC tracks and emergency stop in catalogs. We import the model back into EcoStruxure Machine Expert Twin so we can add the tracks, multicarrier, emergency stops, and robot parts. The easiest way to do this would be by using the reference point from the CAD file. This CAD-file, however, had no clear reference points for the robots so we instead add them by hand. In the video you can see Elodie Moussin add a deltapicker and a multicarier to a similar model.
Fifth step
The model is now finished and you can now be saved for further use.