Replacing the Elastomer Coupling (Optional Equipment)
Replacing the elastomer coupling can cause unintended movements.
|
|
|
UNINTENDED MOVEMENTS DUE TO DISMOUNTING |
|
Secure the moving parts of the axis mounted in a vertical or tilted position against unintended movements. |
|
Failure to follow these instructions can result in death, serious injury, or equipment damage. |
You need the following tools to remove the elastomer coupling:
oSet of hex keys
oSoft-faced hammer
NOTE: Do not use ball head hex keys. Excessive torque may cause the ball head to tear off. A torn off ball head is difficult to remove from the screw.
For suitable parts, refer to Replacement Equipment and Accessories.
Perform the following procedures to replace the motor and/or gearbox:
oPreparing the replacement of the elastomer coupling
oReplacing the elastomer coupling
Preparing the Replacement of the Elastomer Coupling
|
Step |
Action |
|---|---|
|
1 |
If the axis is mounted tilted or vertically, remove the payload or support the payload and the end plates to keep it from falling. |
|
2 |
Remove the motor and/or the gearbox as described under Replacing the Motor and/or Gearbox. |
Replacing the Elastomer Coupling
|
Step |
Action |
|---|---|
|
1 |
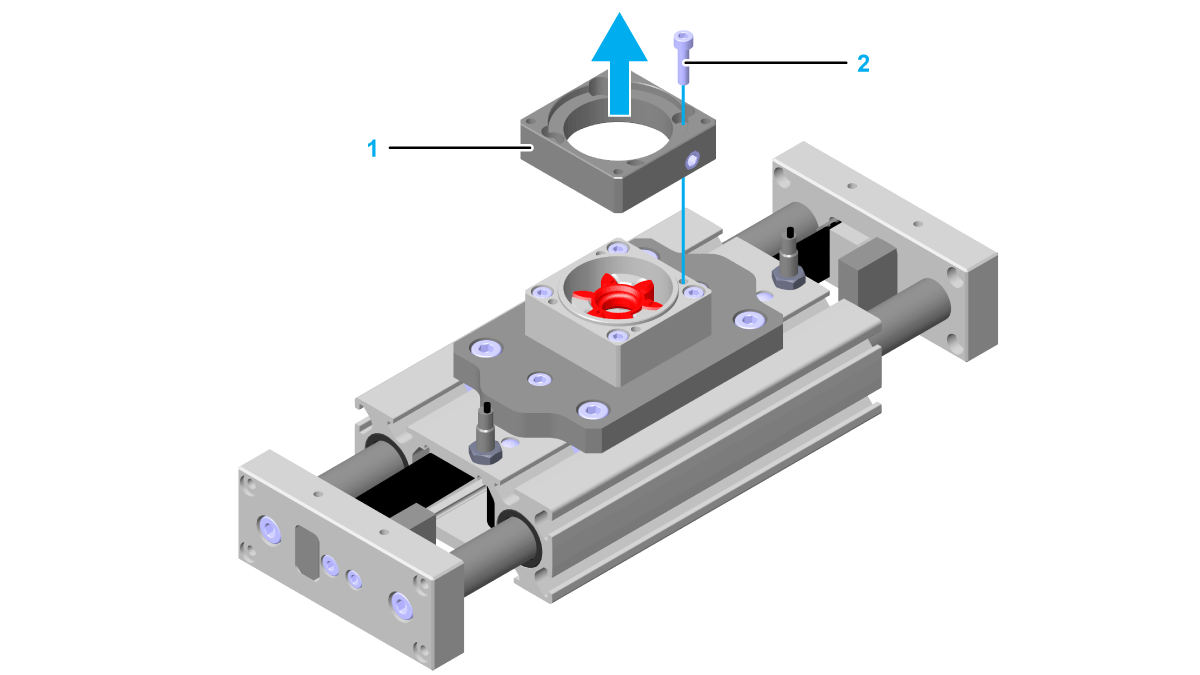
Remove the four screws (2) at the motor adapter plate (1). 
|
|
2 |
Remove the motor adapter plate. |
|
3 |
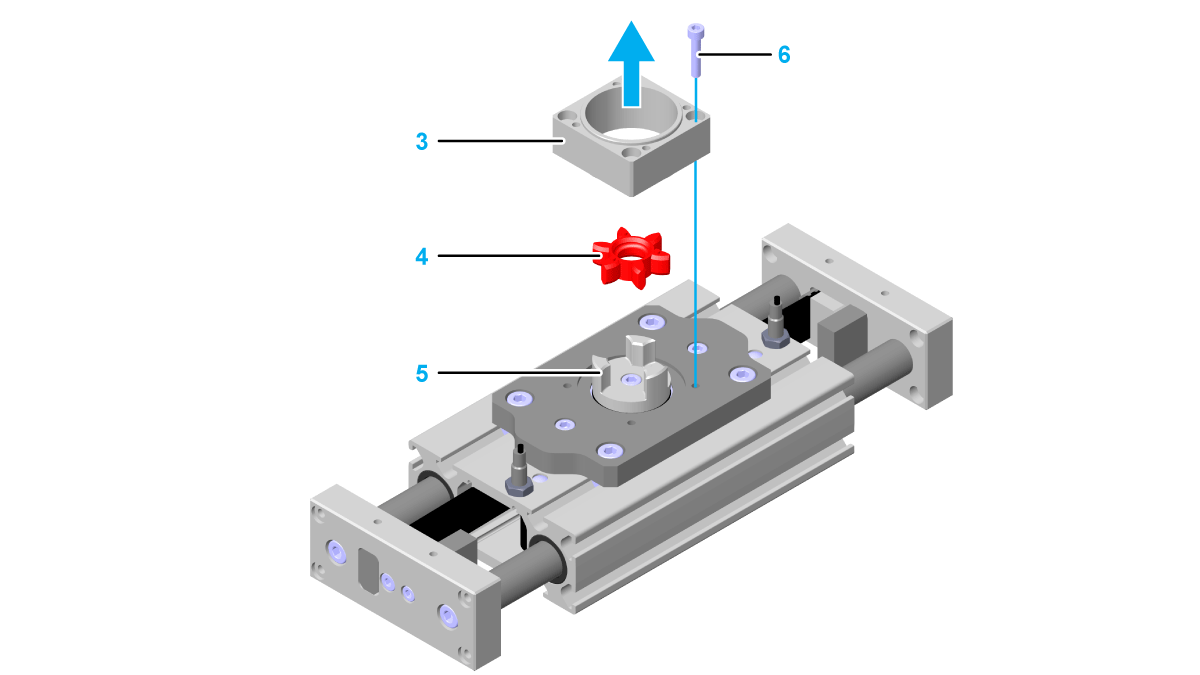
Remove the four screws (6) at the coupling housing (3). 
|
|
4 |
Remove the coupling housing. |
|
5 |
Remove the elastomer spider (4) from the expanding hub (5). |
|
6 |
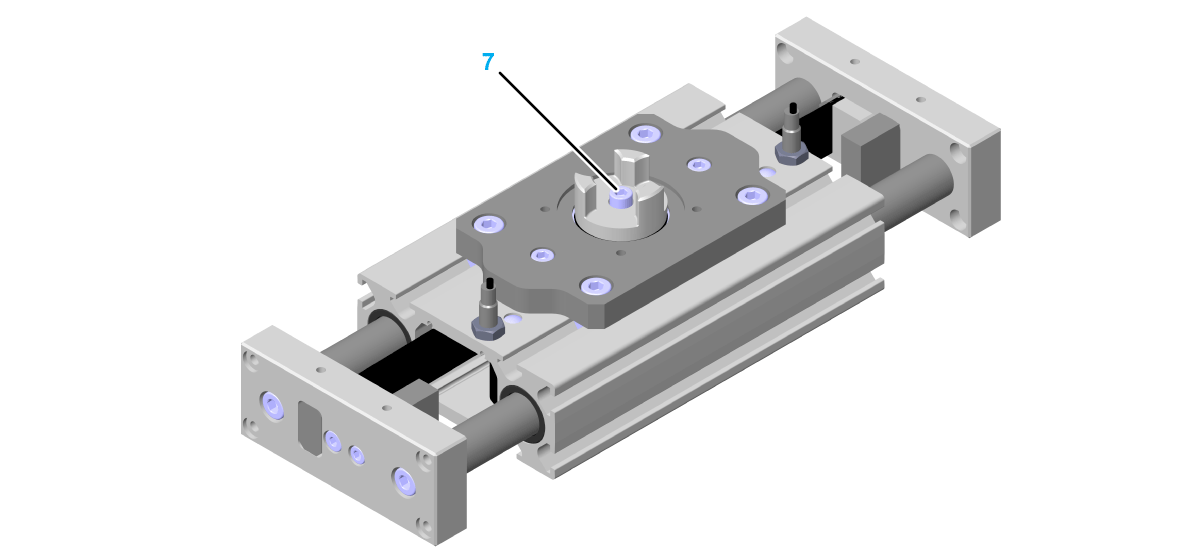
Loosen the screw (7) on the expanding hub. 
NOTE: |
|
7 |
Carefully tap on the screw head with a soft-faced hammer to loosen the cone of the expanding hub. NOTE: If you cannot reach the screw head, use a hex key as extension and tap carefully on the hex key. |
|
8 |
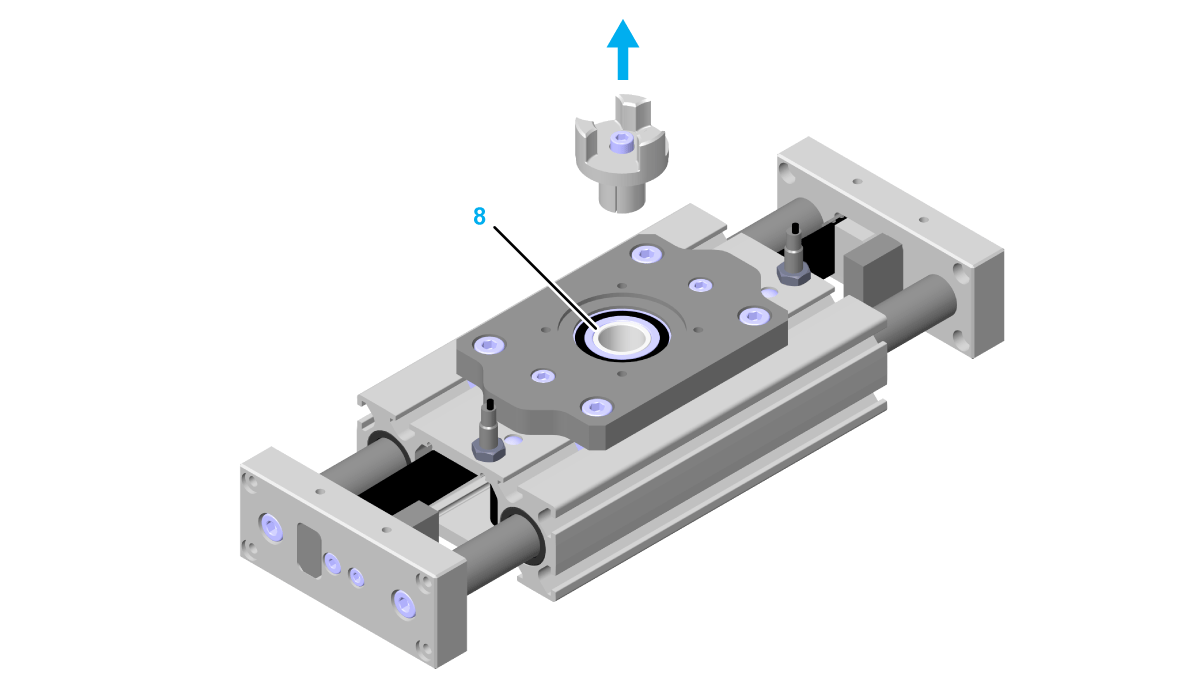
For CAR40: Pull the expanding hub carefully out of the hollow shaft of the gear rack pulley. For CAR41 / CAR42 / CAR43 / CAR44: Pull the expanding hub carefully out of the hollow shaft of the toothed belt pulley (8). 
NOTE: This may require a considerable force. |
|
9 |
Mount the new elastomer coupling as well as the motor or and/or gearbox as described in Mounting the Motor and/or Gearbox. |